")
Did audio become distorted on your Windows 11 PC/Laptop? Or have you recently faced audio-related issues? Most of the audio problems you’re facing on Windows 11 can be fixed by resetting the audio settings.
This article will explain different ways to reset the audio settings on a Windows 11 computer. You should follow these methods when the basic audio troubleshooting methods have failed, and you find no way out.
How to Reset Audio Settings in Windows 11
Resetting audio settings on Windows 11 is super easy; you just need to know the right way to do it. Here are the best ways to reset all Windows 11 computer/laptop audio settings.
1. Reset Volume for All Devices in Windows 11
If you’re experiencing problems like the volume on one device being higher/lower than the other, you can try resetting the volume for all your devices in Windows 11. Here’s what you need to do.
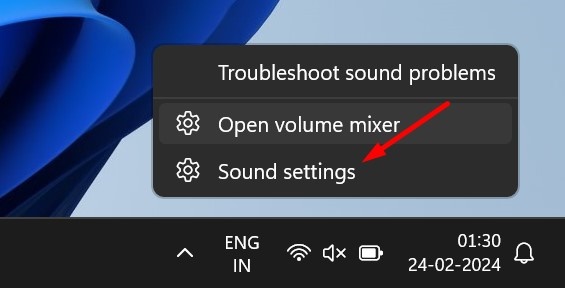
1. Right-click on the sound icon on your taskbar and select Sound Settings.
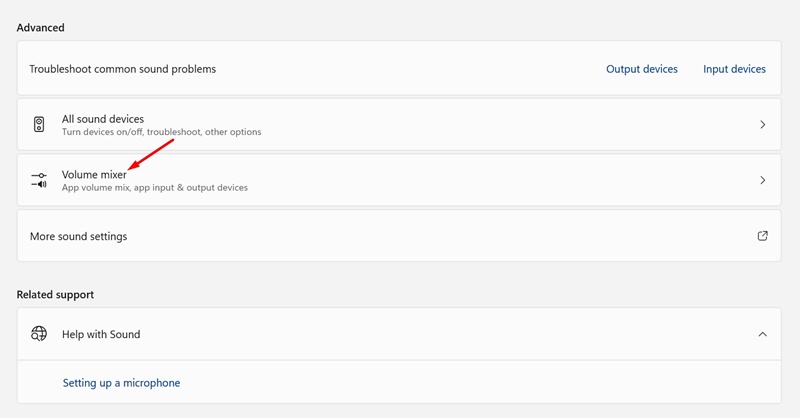
2. In the sound settings, click on Volume Mixer.
3. Scroll down to the bottom of the screen and click on Reset.
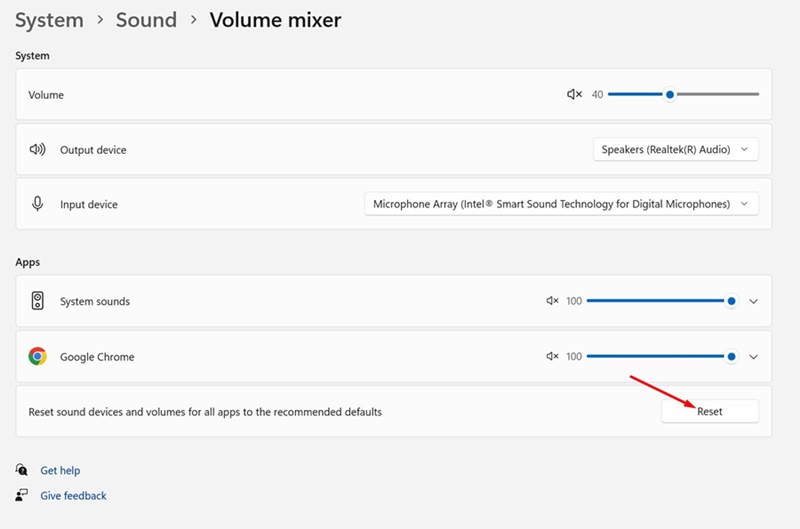
After the reset, restart your computer. This will bring the volume level to default for all devices.
2. Reset the Audio Driver in Windows 11
You can uninstall the Audio device driver from your system and install it again to reset the audio drivers. It’s recommended to try updating the audio driver first. Here’s how you can reset the Audio driver in Windows 11.
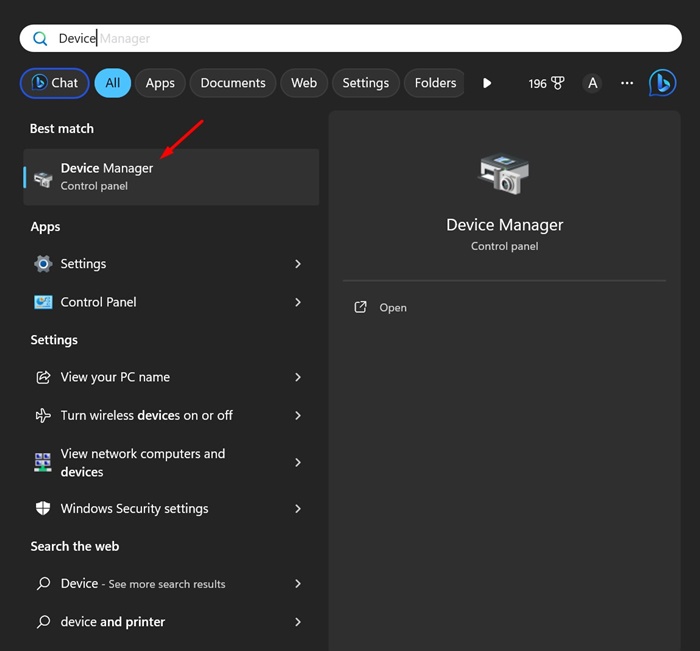
1. Type in Device Manager on the Windows 11 Search. Next, open the Device Manager app from the list of search results.
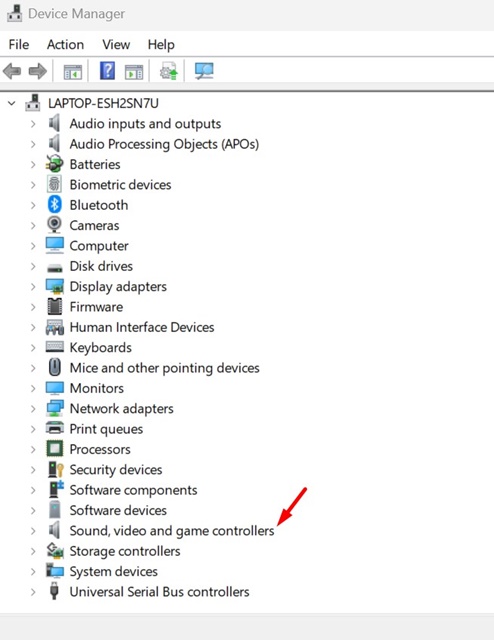
2. When the Device Manager opens, expand the Sound, video and game controllers tree.
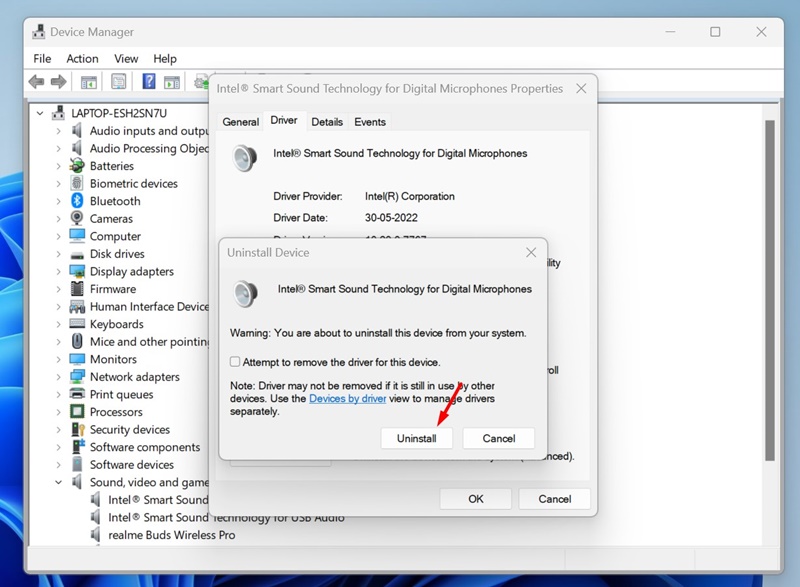
3. Next, double-click on the audio device with the issue.
4. Next, switch to the Driver tab and select Uninstall device.

5. On the confirmation prompt, select Uninstall.
Once uninstalled, restart your computer to install the device again. This should fix the audio issues you’re facing related to the device.
3. Reset the Audio Services on Windows 11
Resetting the audio services is another great way to deal with sound issues. You should restart these Audio services if you’re experiencing sound quality issues.
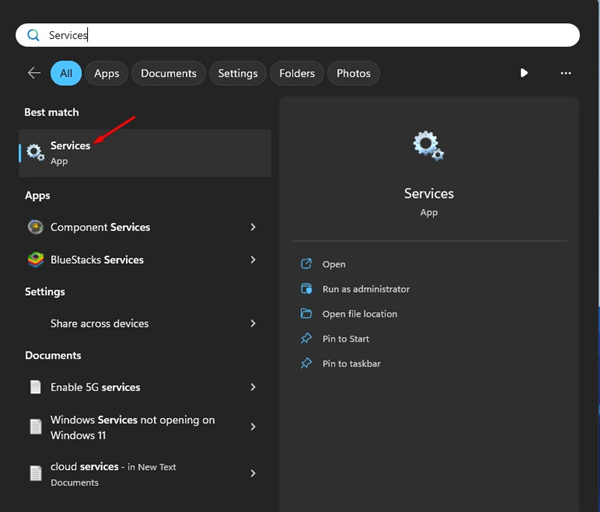
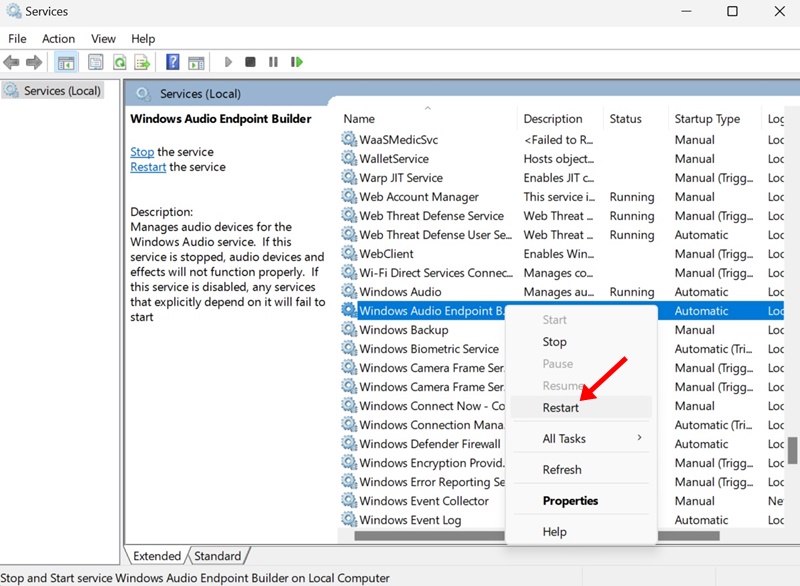
1. Type in Services on the Windows 11 Search. Next, open the Services app from the list of search results.
2. When the Services app opens, find the Windows Audio Endpoint Builder.
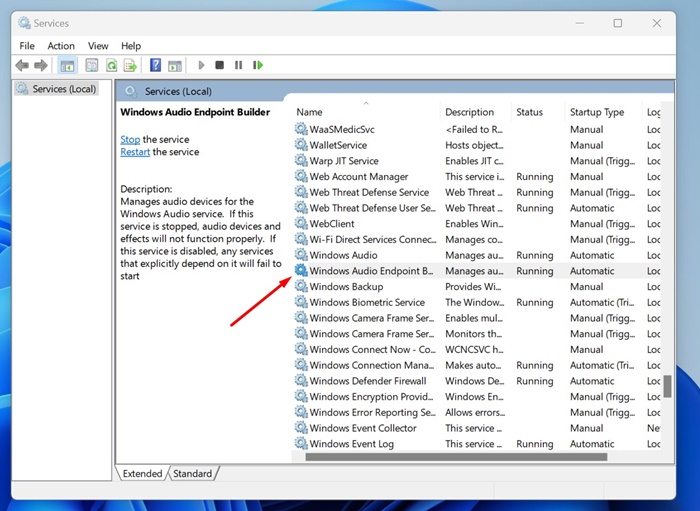
3. Right-click on the service and select Restart.
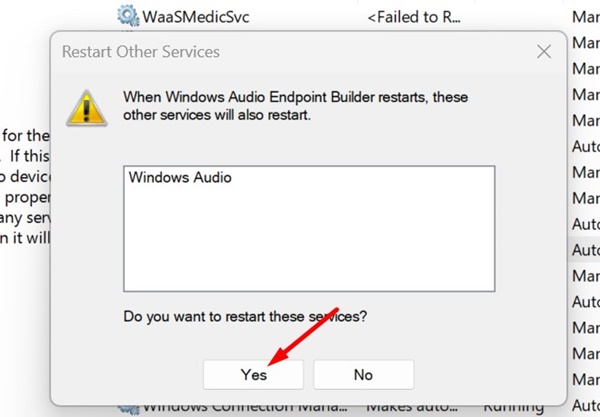
4. On the restart the Window Audio Service prompt, click Yes.
That’s it! This will reset the Audio Services on your Windows 11 computer.
Other Ways to Deal with Audio Issues?
Well, our shared methods will reset the Audio services on Windows 11. However, you should reset the audio services only after trying these basic things:
- Update the Windows 11 operating system.
- Running the Audio Troubleshooter.
- Reconnecting the Audio Devices to the PC/Laptop.
- Ruling out the Hardware issues.
- Uninstalling the recently installed programs.
So, these are the best ways to reset all audio settings on a Windows 11 computer. If you need any help troubleshooting audio issues on Windows 11, let us know in the comments below.


