

Home windows customers have all the time wished to run Android apps and video games on their PC. That is the one purpose extra Android emulators have been made for Home windows working system.
Although Home windows 11 natively helps Android apps & video games, customers want to make use of Android emulators as a result of they supply a greater gaming expertise & options. As of now, there are tons of of Android emulators obtainable for Home windows 11, however out of all, it was the BlueStack that was the most effective and advisable.
Additionally Learn: Make and Receive Android Phone Calls from Windows 11
Set up BlueStacks 5 on Home windows 11
We’re speaking about BlueStacks for Home windows 11 as a result of we just lately obtained many messages from our readers asking about BlueStacks compatibility with Home windows 11 and tips on how to set up it on the brand new working system.
If you’re studying this text, you’re most likely looking out for a similar. Therefore, beneath, we now have shared a step-by-step information on putting in and utilizing BlueStacks on Home windows 11. Let’s get began.
1. Open your favourite internet browser and go to the official BlueStacks web site. On the official web site, click on on the Obtain BlueStacks 5 button.
If you need offline set up information, verify our information Download BlueStacks For Windows 11
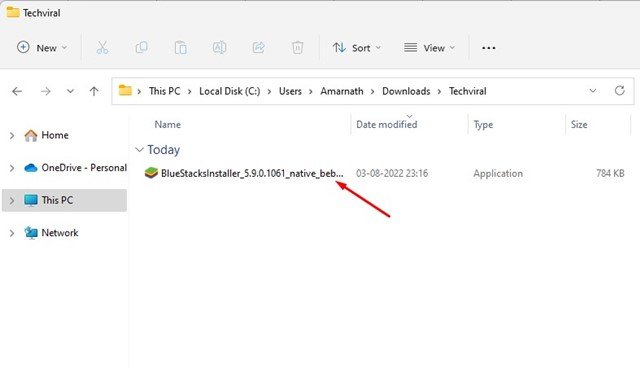
2. This may obtain the BlueStacks Installer in your machine. Open the downloads folder and double-click on the BlueStacksinstaller.exe file.
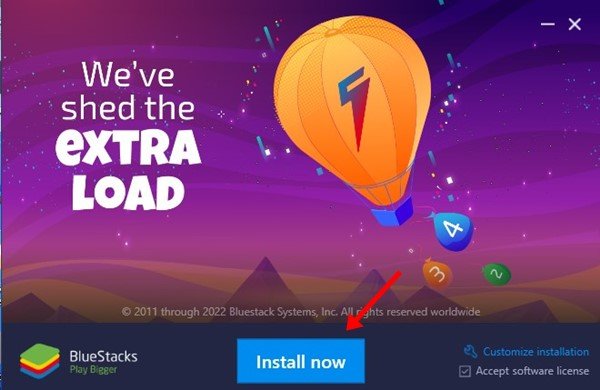
3. On the Set up display, click on on the Set up now button.
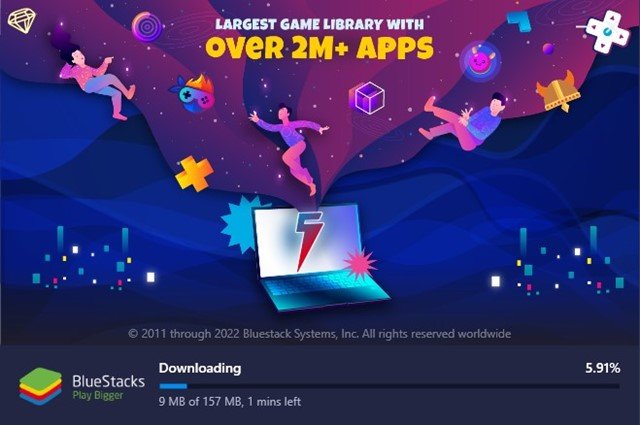
4. Now, wait till the BlueStacks emulator downloads & installs in your Home windows 11 machine.
5. As soon as put in, the BlueStacks app participant will launch routinely, and you will note a display just like the one beneath.
The right way to Use BlueStacks on Home windows 11?
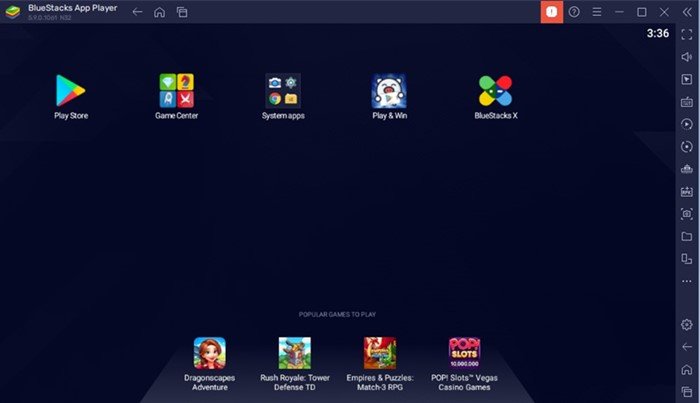
After putting in BlueStacks on Home windows 11, you’ll be able to run it simply. To begin utilizing BlueStacks, click on on the Play Retailer icon.
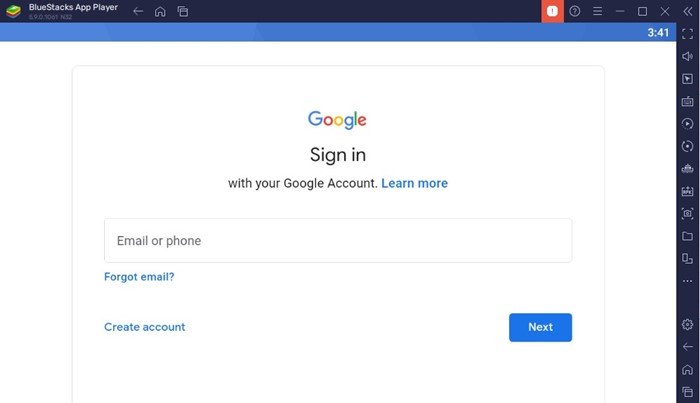
Now on the Google Play Signal-in display, click on the Check in button and enter your Google Account particulars. You possibly can discover the BlueStacks settings to optimize the efficiency of the Android emulator on Home windows 11.
The right way to Set up Apps & Video games on BlueStacks 5
Properly, putting in apps & video games on the BlueStacks emulator is comparatively simple. For that, observe among the easy steps we now have shared beneath.
1. First, launch BlueStacks in your Home windows 11 laptop that you’ve got simply put in.
2. As soon as carried out, you will note the principle interface of BlueStacks. Right here it’s worthwhile to click on on the Play Retailer icon.
3. Now login to the Play Retailer along with your Google Account.
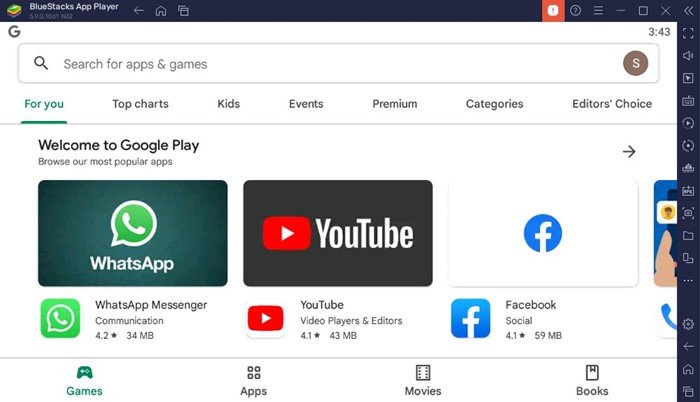
4. Now, you’ll be able to entry the Google Play Retailer. Make the most of the search bar to seek for the app or recreation you need to set up, after which choose the app/recreation from the outcomes.
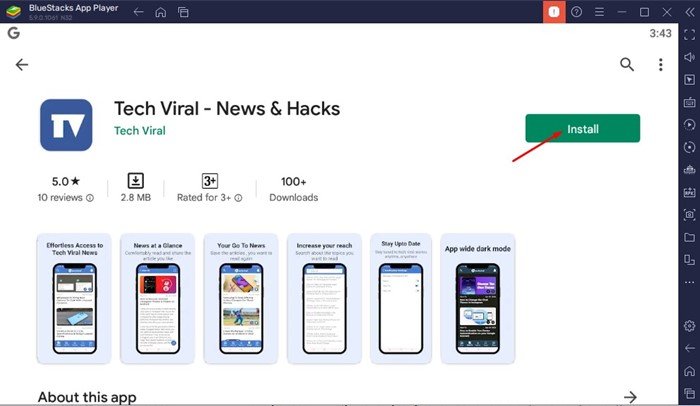
5. On the App/Sport touchdown web page, click on on the Set up button. This may set up the sport in your BlueStacks App Participant.
That’s it! That is how one can set up apps and video games on the BlueStacks app participant in your Home windows 11 laptop.
Additionally learn: How to Cast Android Screen to Windows 11 PC
So, this information is about putting in and utilizing BlueStacks on Home windows 11 computer systems. It’s an awesome Android emulator for PC, and you’d find it irresistible. In the event you want extra assist putting in BlueStacks for PC, tell us within the feedback beneath.


