")
On WiFi enabled smartphones, you have an awesome feature called WiFi Calling. The feature basically comes in handy in low or bad connectivity areas where cellular coverage is always a problem.
The WiFi calling feature aims to provide calling features with the help of WiFi networks. The WiFi calling feature that relies on the WiFi connectivity of your phone to make calls does two awesome things – it enhances the audio quality and decreases the call connection time.
In this article, we will discuss the WiFi calling feature of the iPhone and how you can enable & make use of it. With WiFi calling on iPhone, you can make & receive phone calls in an area with little or no mobile coverage.
So, if you often get stuck in an area with no mobile coverage but a WiFi connection, you should use the WiFi calling on your iPhone. Here are some simple steps to turn on WiFi calling on an iPhone.
Things to Remember Before Using the WiFi Calling on iPhone
While enabling WiFi calling is super easy on an iPhone, you must take care of a few things before using the feature. Here are some prerequisites to using WiFi calling on an iPhone.
- The WiFi calling feature depends on your network carrier. So, your network carrier should support WiFi calling.
- To use the WiFi calling, your iPhone must be connected to a stable WiFi connection.
- Make sure your device has the latest software.
These are the few things you need to keep in mind before you enable & use the WiFi calling feature on your iPhone.
How to Enable WiFi Calling on an iPhone
There’s no need to install any third-party app; if your network operator supports WiFi calling, you are good to enable & use the feature from the iPhone Settings. Here’s what you need to do.
1. Open the Settings app on your iPhone.
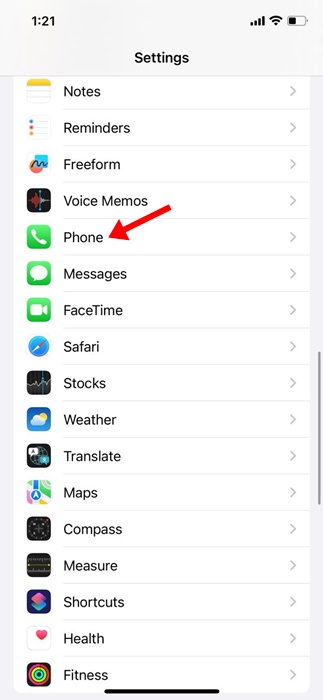
2. When the Settings app opens, scroll down and tap Phone.
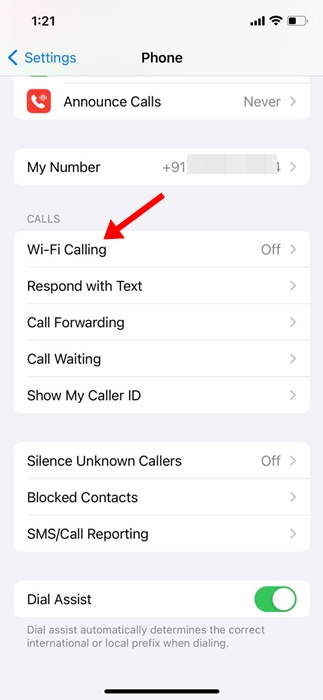
3. On the Phone screen, scroll to the Calls section and tap WiFi Calling.
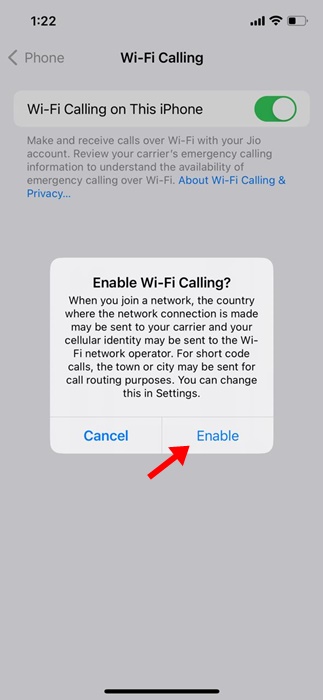
4. On the Wi-Fi Calling screen, enable the toggle for Wi-Fi Calling on This iPhone.
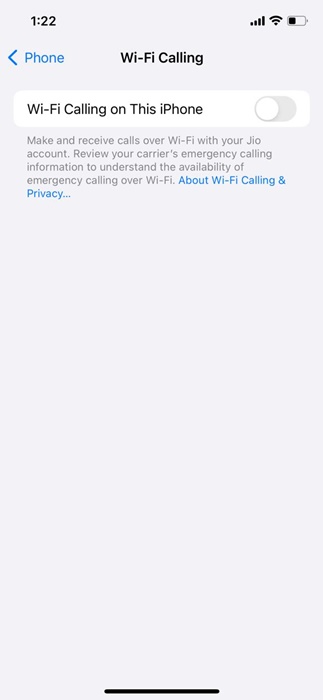
5. Now, you will see an Enable Wi-Fi Calling prompt. Tap on the Enable to continue.
6. Now, if you are asked to enter your address to avail of the emergency services, enter the information.
That’s it! This will immediately enable the WiFi calling feature on your iPhone. You should see a Wi-Fi next to your network operator’s name in the Status bar.
How to Use WiFi Calling on iPhone?
Now that you have enabled WiFi Calling on your iPhone, you may be interested in knowing how to use the WiFi calling feature.
Basically, the steps we have shared will enable WiFi Calling if your network operator supports it. You don’t need to do anything; whenever the mobile network service isn’t available, the calls will be made through WiFi.
The same goes for making the emergency calls as well. If mobile network services aren’t available, emergency calls will use WiFi calling. However, in some circumstances, your iPhone may use location information to aid response efforts.
Important: If the WiFi connection is lost during the calls, the calls will switch to your cellular network using VoLTE, if available and enabled.
WiFi Calling Not Working on iPhone?
If you cannot turn on WiFi calling on your iPhone, you need to take care of a few things. Here are a few important things to do if WiFi calling isn’t working.
- Make sure that you are correctly turning on the WiFi calling.
- Restart your iPhone after enabling WiFi calling.
- Try connecting to a different WiFi network.
- Ensure your device software is up to date & your network provider supports WiFi calling.
- Reset the Network Settings of your iPhone.
- Reset your iPhone.
So, this guide is all about how to turn on WiFi calling on an iPhone. Let us know if you need more help enabling WiFi calling on an iPhone. Also, if you find this guide helpful, don’t forget to share it with your friends.


