
In 2023, Microsoft introduced a new AI-powered feature to Windows 11 called Copilot. If you don’t know, Microsoft Copilot is an AI assistant designed to run on Windows 11. Recently, the Copilot is also made available for Android & iPhone.
The latest builds of Windows 11 already have the Microsoft Copilot icon on the taskbar, providing quick access to the AI companion. Microsoft also made a separate website that provides access to Copilot from a web browser.
While the Copilot taskbar icon provides quick access to the AI companion, wouldn’t it be better if we had a desktop shortcut for the same? Having a Copilot desktop shortcut will help you hide the Copilot icon from the taskbar and have space for other important items.
So, if you don’t want to ditch Copilot but don’t want to keep the taskbar shortcut, it’s best to create a Copilot desktop shortcut in Windows 11. Below, we have shared some easy steps to create a Copilot Desktop Shortcut in Windows 11. Let’s get started.
Also read: Download Microsoft Copilot App (Latest Version)
How to Create Copilot Desktop Shortcut in Windows 11
You don’t need to use any third-party app to create a Copilot desktop shortcut. You must use Windows 11’s shortcut wizard to create a desktop shortcut for accessing Copilot. Here’s what you need to do.
1. To get started, move to the desktop screen.
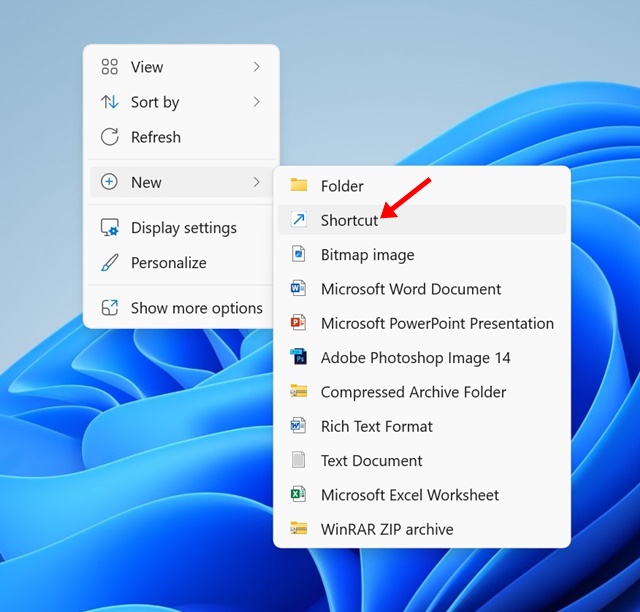
2. Next, right-click on a blank space on your desktop and select New > Shortcut.
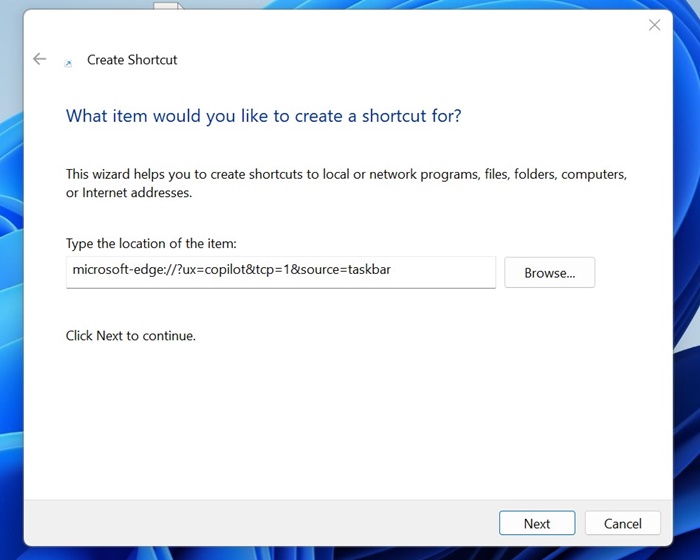
3. This will open the Create Shortcut wizard.
4. On the Type the location of the item field, copy and paste the given URL and click Next.
microsoft-edge://?ux=copilot&tcp=1&source=taskbar
5. Next, on the Type a name for this shortcut field, type Copilot and click Finish.

6. This will immediately add the Copilot Shortcut to your desktop screen. You can double-click the newly created shortcut to launch the AI assistant.
That’s it! This is how you can create a Copilot desktop shortcut on your Windows 11 computer.
How do you customize the Desktop Shortcut for Copilot?
The shortcut you’ve created just now will provide access to the AI assistant, but you will see a blank shortcut. If you want to make the shortcut look more like a Copilot desktop app, you need to customize it. Here’s how to customize the desktop shortcut for Copilot.
1. To get started, you need a Copilot icon in .ico format stored on your local drive. You can get it from this link or download the Copilot PNG image and convert it to .ico format.
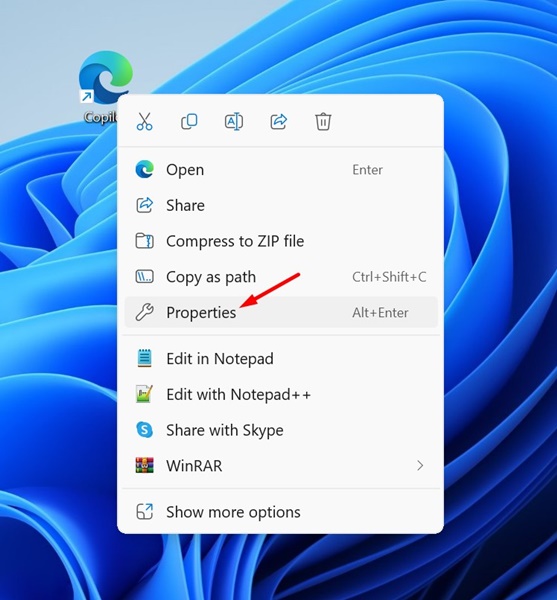
2. Now, right-click on the Copilot desktop shortcut and select Properties.
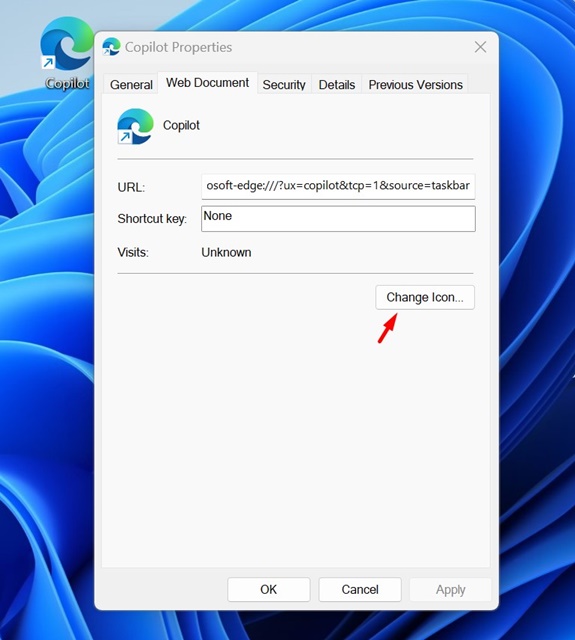
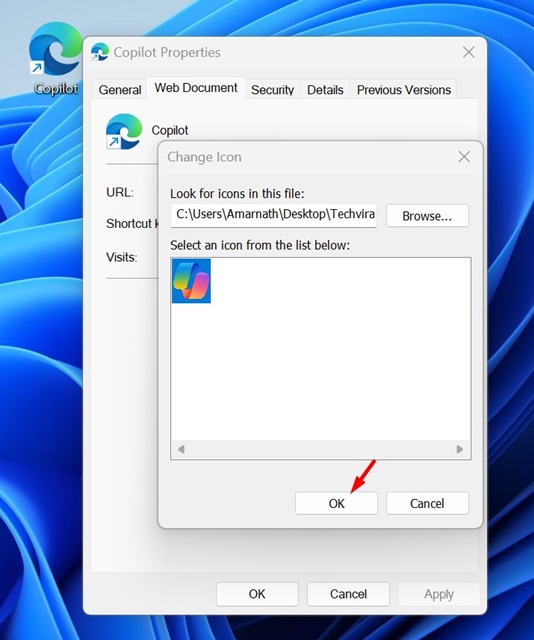
3. On the Properties, switch to the Web Document tab.
4. Next, click on the Change icon button as shown below.
5. Now browse the Copilot icon that you already have.
6. Once selected, click on OK to save the changes.
7. Next, click Apply and then OK to close the Window.
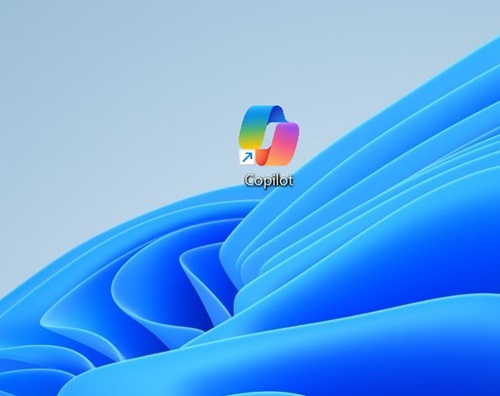
That’s it! This is how you can customize the desktop shortcut to make it look like an official Copilot app.
So, this guide is about adding a Copilot shortcut to your Windows 11 desktop. Let us know if you need more help adding a Copilot icon on your desktop screen. Also, if you find this guide helpful, don’t forget to share it with your friends.
Also read: Microsoft Copilot (Free) vs Copilot Pro: Differences & Features


