")
Windows 11, the latest operating system from Microsoft, arrives with a new design and many new features. Although the operating system is very much bug-free, users can still sometimes experience problems while using it.
Users who have just installed Windows 11 may face problems due to stretched screens. Users may notice that the desktop icons have become larger or stretched vertically or horizontally. If you are nontechnical, you may feel your monitor has a problem, but it’s not.
Stretched screen in Windows 11 isn’t a problem; it is usually a result of incorrect display resolution settings. You get to experience the problem when Windows 11 uses a resolution not supported by your monitor. So, what’s the solution for it? We will know about it in this article.
How to Fix Stretched Screen in Windows 11
So, if you face problems like the stretched screen in Windows 11 or the entire screen content appears distorted to fit the screen, continue reading the article. Below, we have shared some simple ways to fix the stretched screen in Windows 11. Let’s get started.
1. Restart your computer
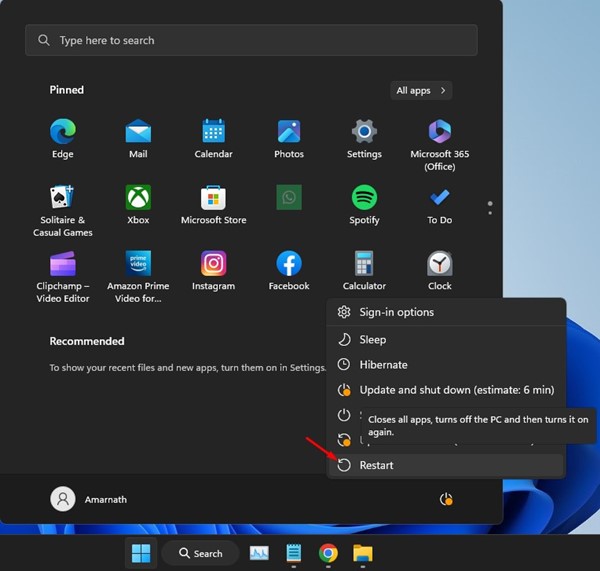
If you’ve just installed Windows 11, and if it’s pending restart, simply restart it to fix the stretched screen issues.
There is a possibility that Windows 11 has just downloaded the required graphics driver, which is pending installation. Restarting will install all downloaded graphics drivers that are required for the proper functioning of your GPU.
So, click the Windows 11 Start button and select the Power Menu. On the Power Menu, select Restart. This will restart your Windows 11 computer.
2. Set the Correct Display Resolution
One prominent reason for the stretched screen in Windows 11 is the incorrect display resolution settings. You can try playing with different display resolutions and settle on the one that solves the problem. Here’s how you can change the display resolution on Windows 11.
1. Click on the Windows 11 Start menu and select Settings.
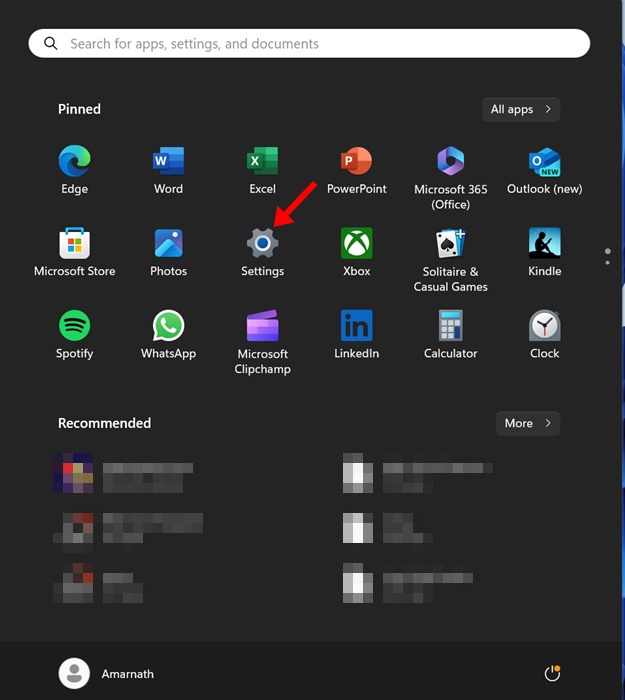
2. When the Settings app opens, switch to the System.
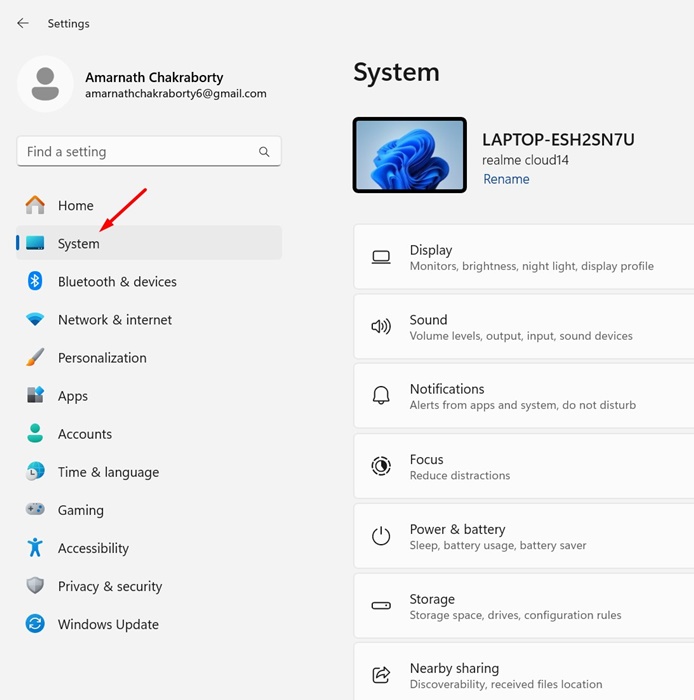
3. On the right side, click on Display.
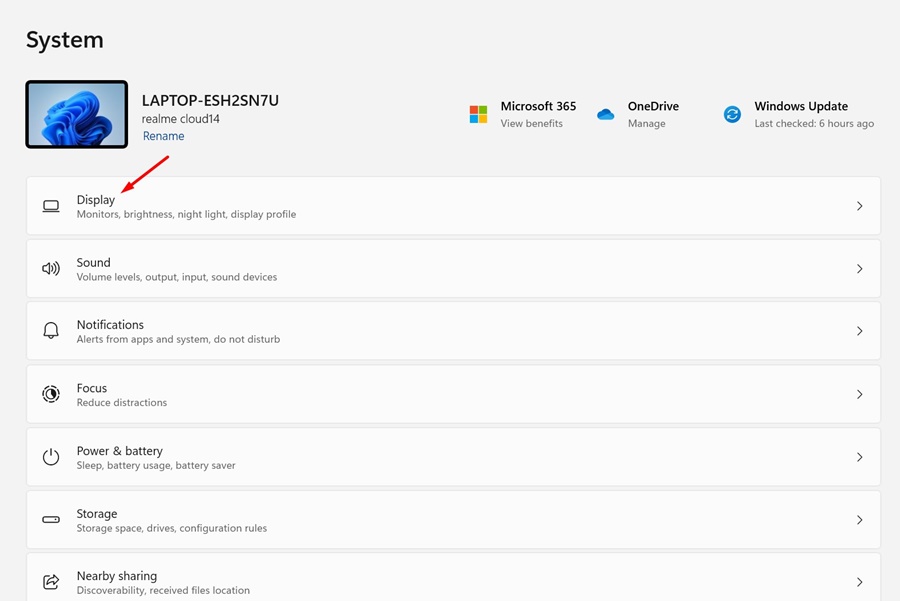
4. On the Display, scroll down to the Scale & layout. Next, click on the dropdown next to Display resolution.
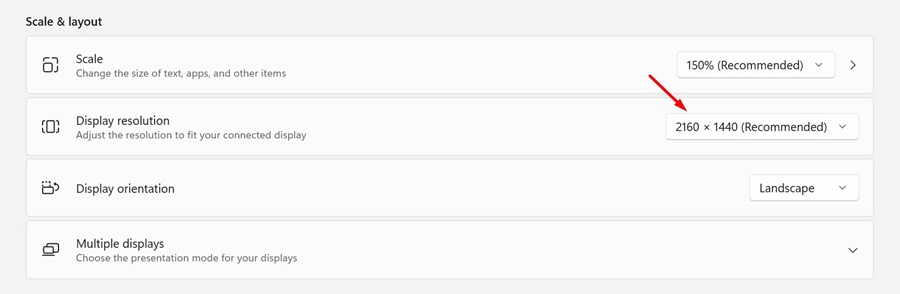
5. The default resolution is usually marked; you can select the one marked as ‘Recommended‘. Or else, if you know the maximum resolution supported by your monitor, you can also try selecting that.

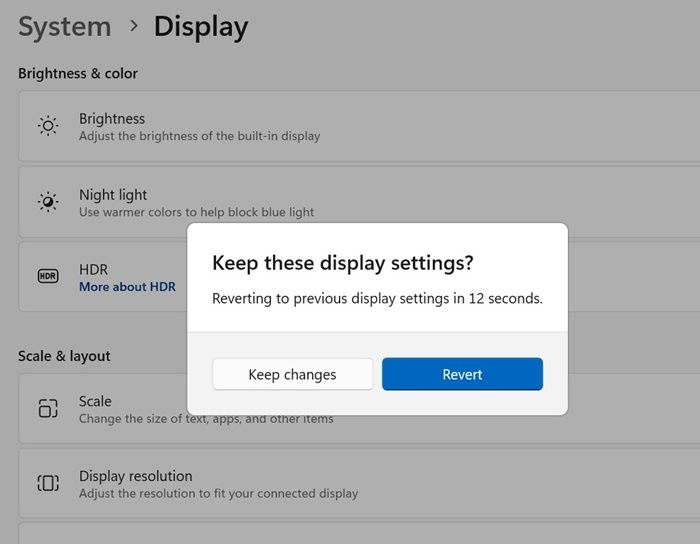
6. Upon selection, you will get a prompt. Click on the Keep Changes button.
That’s it! This is how you can change the display resolution on Windows 11 via the Settings app.
3. Find Resolution Supported by your monitor
If you don’t know the maximum resolution your monitor supports, you can easily find it. Here’s how you can find resolutions supported by your monitor.
1. Open the Settings app and switch to the System tab.
2. On the right side, click on Display.
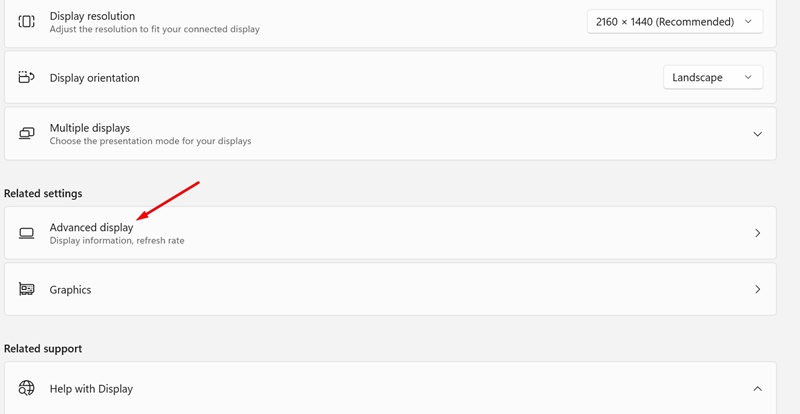
3. Now, under the Related settings, click on Advanced Display.
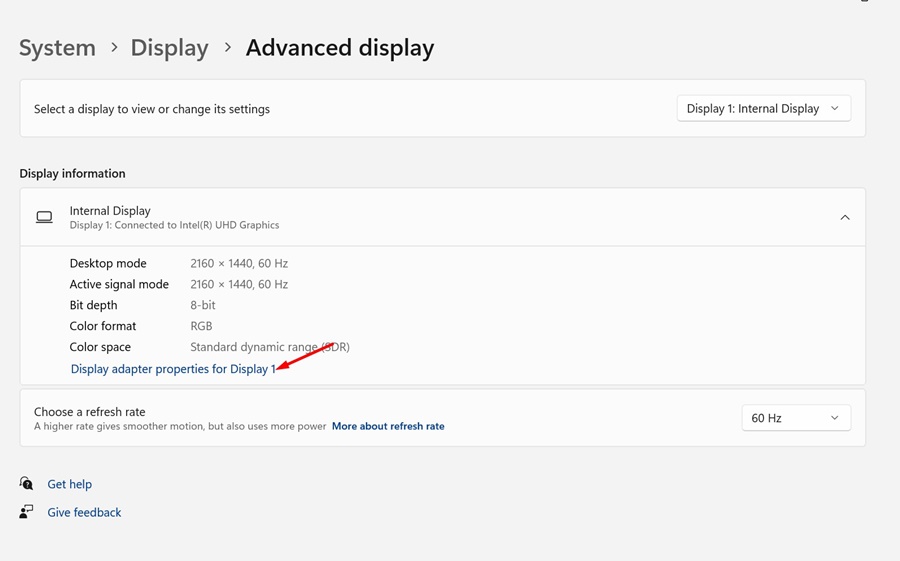
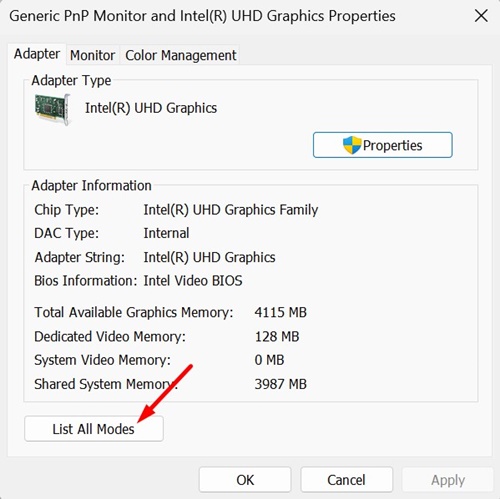
4. On the Display information section, click Display adapter properties for your current display.
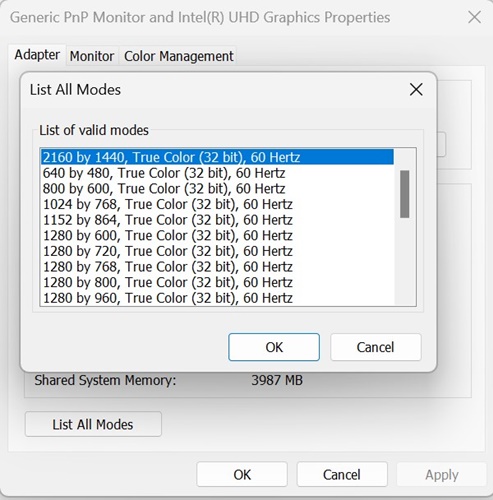
5. On the Display adapter properties, click on List all Modes.
6. Now, you can see a list of all supported resolutions. Select the resolution that matches your monitor’s native resolution and click OK.
That’s it! This is how you can find resolutions supported by your monitor.
4. Update the Graphics Driver
Corrupted graphic drivers are another leading reason for the stretched screen problem on Windows 11. Updating the graphics driver will automatically replace the corrupted driver files with fresh ones. Here’s how to update the graphics driver on Windows 11.
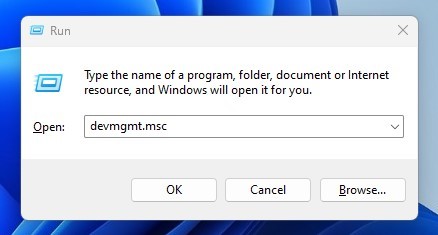
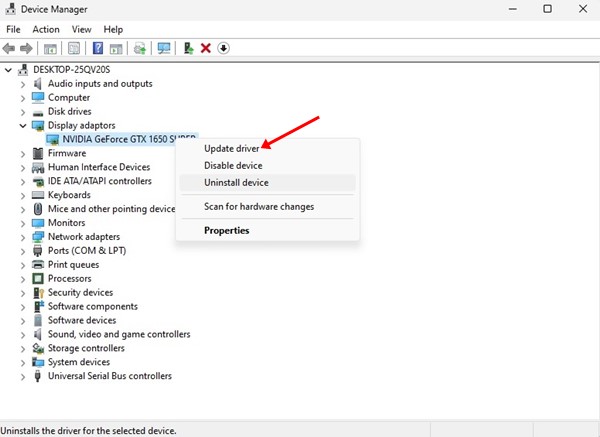
1. Press the Windows Key + R button on your keyboard. On the RUN dialog box, type devmgmt.msc and press Enter.
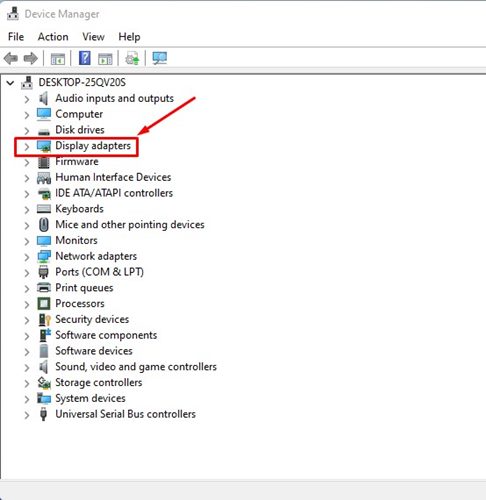
2. On the Device Manager, expand the Display adapters.
3. Right-click on the graphics card and select Update driver.
4. On the how do you want to search for drivers prompt, select Search automatically for drivers.
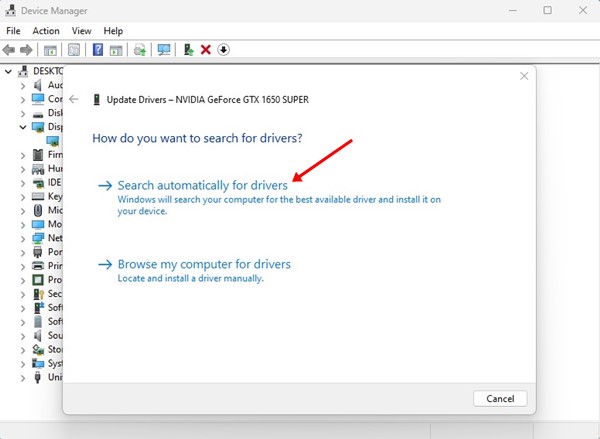
5. That’s it! Now, the driver update tool will run and check for available updates. If any update is available, it will be downloaded & installed automatically.
That’s it! This is how you can update the graphics card driver on a Windows 11 computer.
5. Reinstall the Graphics Card Driver
If updating the GPU drivers didn’t work, you can try reinstalling the GPU drivers to fix the stretched screen on Windows 11. Here’s how to reinstall the graphics driver on Windows 11.
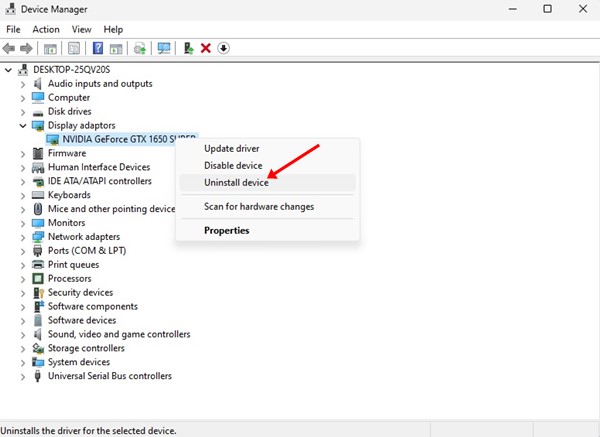
1. Press the Windows Key + R button on your keyboard. On the RUN dialog box, type devmgmt.msc and press Enter.
2. On the Device Manager, expand the Display adapters.
3. Right-click on the graphics card and select Uninstall device.
4. On the Uninstall Device prompt, select Uninstall.
That’s it! After the uninstallation, restart your computer. This will install the required GPU drivers again on your PC.
6. Connect a Different Monitor
If the stretched screen problem appeared due to software-based problems, it could have been fixed by now. However, if the issue persists, it’s time to use a different monitor.
You can connect a different monitor to remove the possibility of hardware issues. If a secondary monitor is not available, you can get your monitor checked by connecting it to any other PC or TV using an HDMI cable.
Also, you can try replacing the cable that connects your PC to the monitor. You need to check & rule out the possible hardware issues.
So, these are the few best methods to fix the Stretched Screen issue in Windows 11. Let us know if you need more help resolving the stretched display issue. Also, if you find the guide helpful, share it with your friends.
Also read: How to Screen Record Using Snipping Tool on Windows 11


