
On Windows 11, you can maximize your productivity by adding one, two, or more monitors. Basically, you can add monitors to expand the desktop canvas and improve your multitasking experience.
You can even use this feature to share your computer screen with a different display, like a SmartTV. Setting up multiple displays on Windows 11 is pretty easy, and you don’t need to use any dedicated app.
However, the problem that users often face is that Windows 11 is unable to detect the second monitor. Many Windows 11 users have recently reported problems connecting their second monitor.
According to the users, Windows 11 cannot detect the second monitor; it even fails while connecting to a wireless display. So, if you’re a Windows 11 user facing the same issue, continue reading the guide. Below, we have shared some easy methods to fix the Windows 11 Second Monitor not detected issue. Let’s get started.
Why Windows 11 Not Detecting Second Monitor?
There could be various reasons why Windows 11 may fail to detect your second monitor. Mostly, it concerns incorrect display settings, faulty cables, outdated graphics drivers, etc.
Below, we have mentioned some common reasons that lead to Windows 11 being unable to detect your second monitor.
Display Settings: Incorrect display settings are one of the prominent reasons for Windows 11 not detecting the second monitor.
Outdated Graphics Drivers: Graphics drivers are very important for the proper functioning of the monitor. If the graphics drivers are outdated, the second monitor may not appear, or Windows 11 may fail to detect it.
Faulty Hardware: Hardware issues should be ruled out first when it comes to connecting a second monitor. You need to check for faulty cables or ports; if you are using screen share, check the casting device or software.
How to Fix Second Monitor Not Detected on Windows 11?
Now that you know the possible reasons for Windows 11 failing to detect a second monitor, troubleshooting the issue will become a little easier. Here are the best things to do if Windows 11 fails to detect a second monitor.
1. Make sure the Display Settings are correct
Incorrect display settings are usually the prominent reason for Windows not recognizing the second monitor. Here’s how you can check the Display Settings to confirm everything is fine.
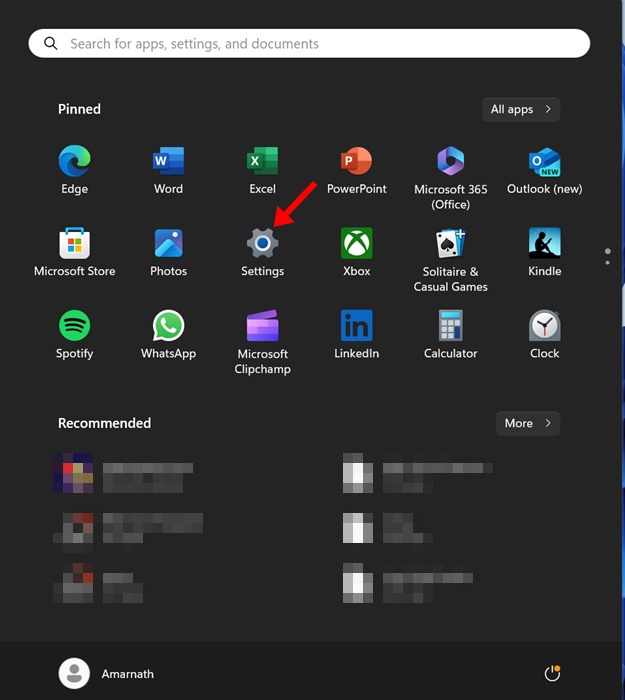
1. Click on the Windows 11 Start button and select Settings.
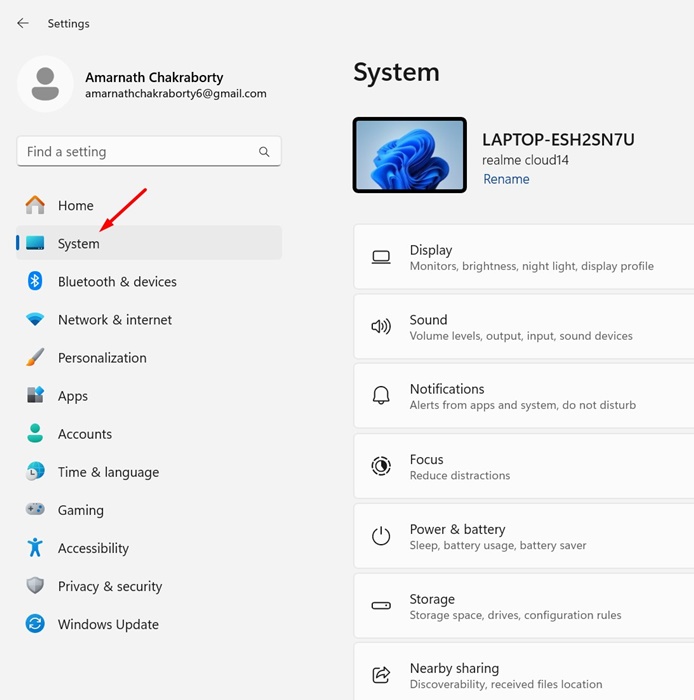
2. When the Settings app opens, switch to the System tab.
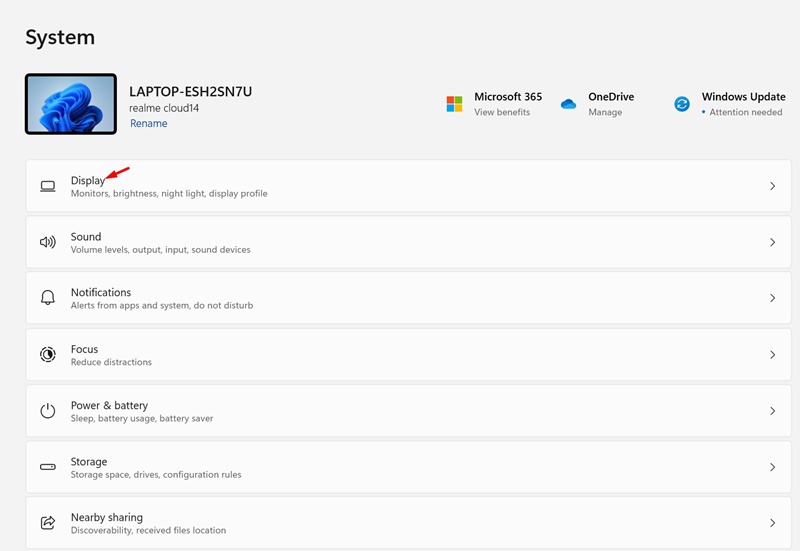
3. On the right side, click on Display.
4. Now scroll down to the Multiple Displays section and expand it.
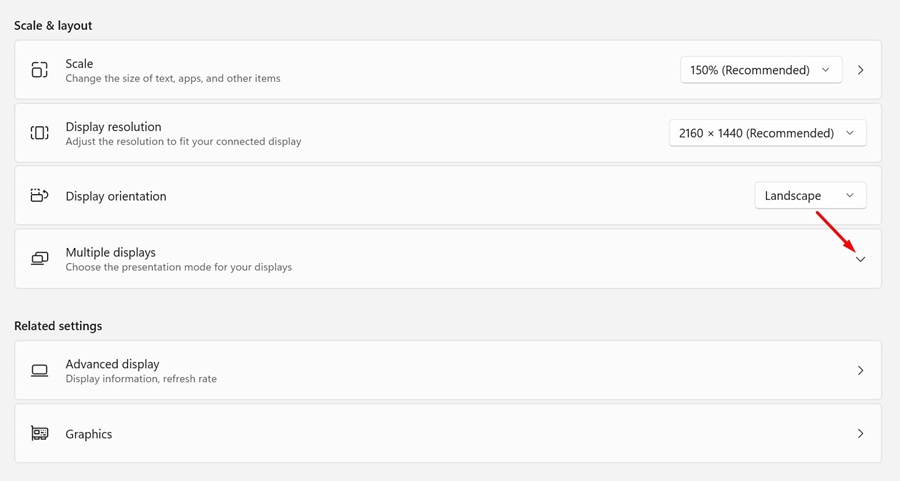
5. On the Detect other display, click on Detect.
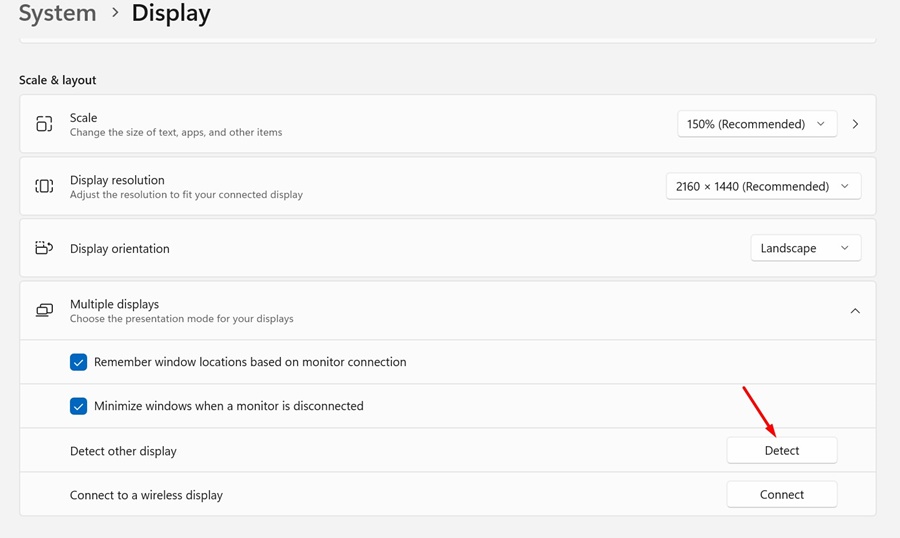
If your second monitor is properly connected and without any hardware issues, Windows 11 should detect it. If Windows 11 fails to detect the display, follow the next methods.
2. Restart your Windows 11 PC
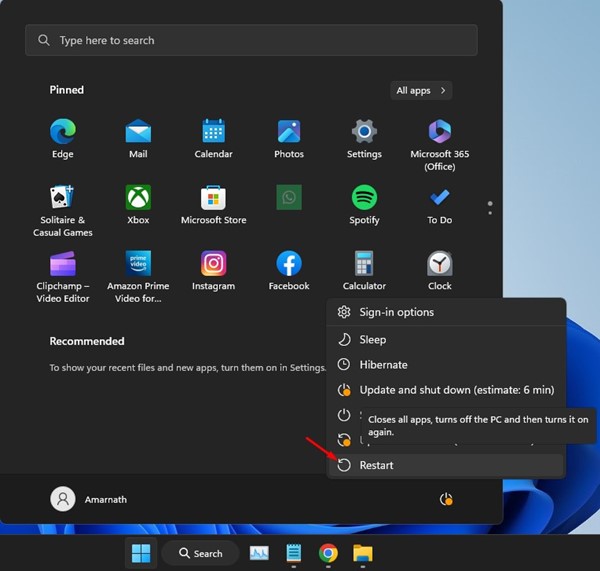
The next best thing you can do to resolve Windows 11 failure to detect a second monitor is to restart your PC.
Maybe a bug or glitch prevented Windows 11 from detecting your second monitor. You can easily remove the system-level bugs or glitches with a simple restart.
To restart Windows 11, press the Windows Start button and select Power Menu. On the Power menu, click on Restart. This should restart your Windows 11 computer.
3. Update the Graphics Driver
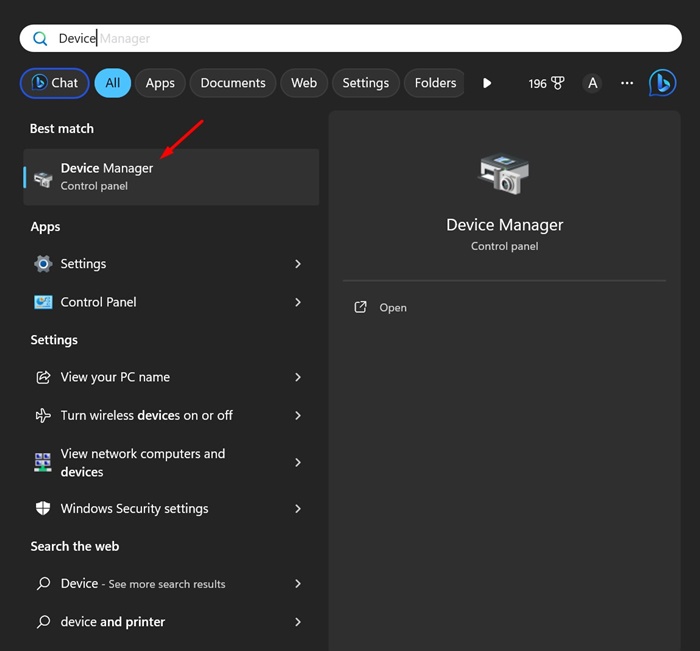
As we all know, the second monitor won’t work if the graphics driver on your computer is outdated or corrupted. To rule out the driver-related issues, updating the Graphics driver from the Device Manager utility is recommended. Here’s how to update the graphics driver on Windows 11.
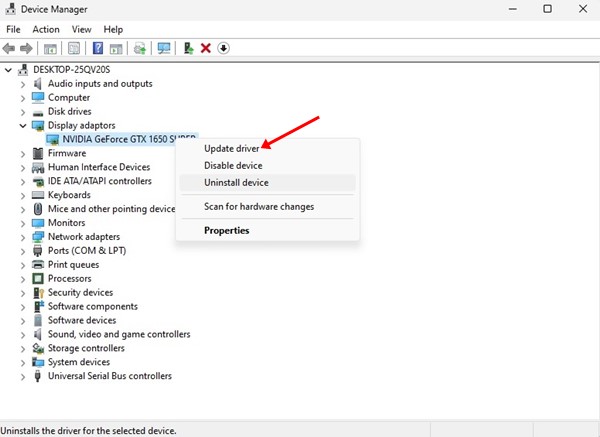
1. Type in Device Manager on the Windows 11 Search. Next, open the Device Manager app from the list of best-match results.
2. When the Device Manager opens, expand the Display adaptors.
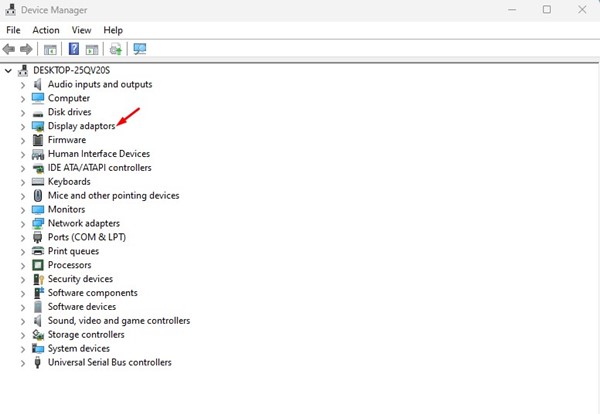
3. Right-click on the corrected graphics card and select Update driver.
4. On the How do you want to search for drivers? prompt, select Search automatically for drivers.
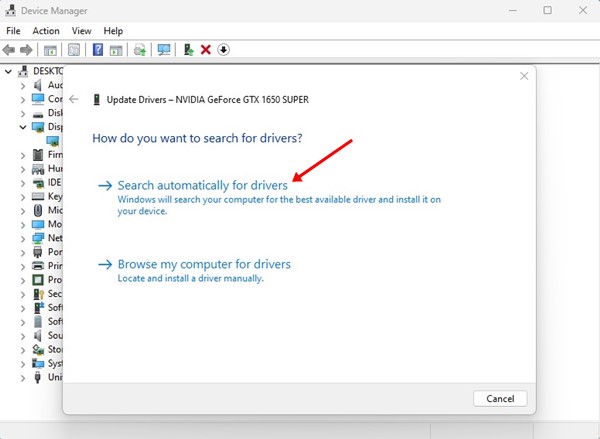
5. If Windows 11 finds any pending graphic driver update, it will be downloaded & installed automatically.
That’s it! After updating the graphics driver, restart your PC to apply the changes. After the driver update, try connecting to the second monitor again.
4. Reinstall the Graphics driver
If updating the graphics driver didn’t help, you can try reinstalling the graphics driver of your PC. Here’s how you can reinstall the graphics driver on Windows 11 PC.
1. Type in Device Manager on the Windows 11 Search. Next, open the Device Manager app from the list of best match results.
2. When the Device Manager opens, expand the Display adaptors.
3. Right-click on the corrected graphics card and select Uninstall device.
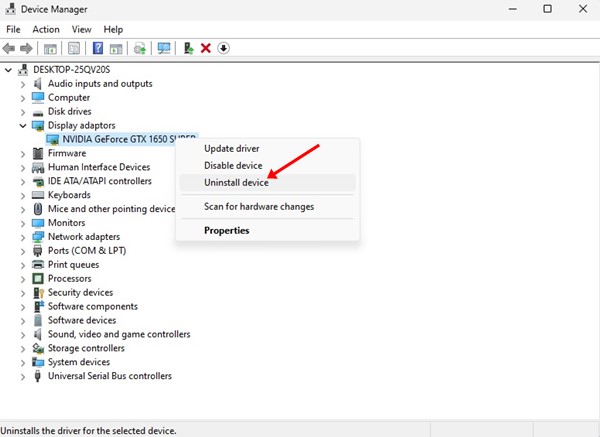
4. On the confirmation prompt that appears, select Uninstall.
5. After the uninstallation, restart your Windows 11 PC.
After the restart, Windows 11 will attempt to install the graphics driver again, which should fix your issue.
5. Manually Connect External Wireless Display
If Windows 11 is not detecting the external wireless monitor automatically, you should force the detection manually. Here’s what you need to do.
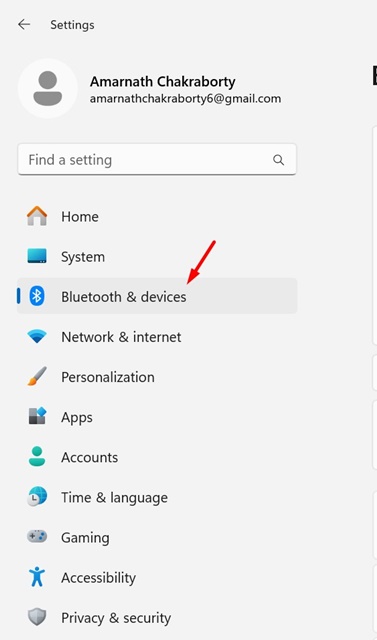
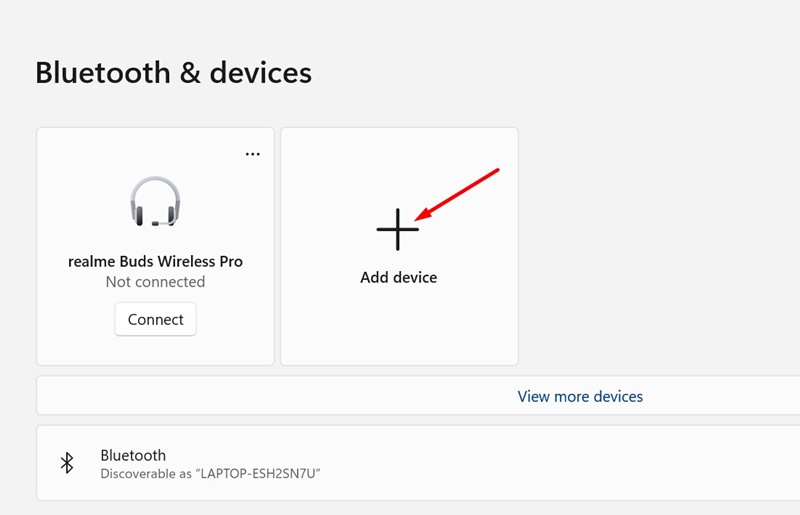
1. Navigate to the Settings > Bluetooth & devices.
2. On the Bluetooth & devices, click the Add Device button.
3. On the Add a Device prompt, select Wireless Display or Dock.
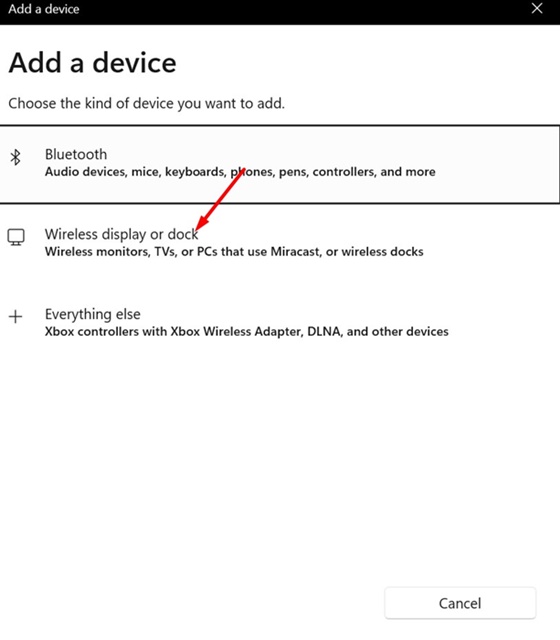
4. Make sure that the Wireless display is turned on. It would appear; select the display and follow the on-screen instructions to connect with it.
That’s it! Once you complete the steps, the wireless display will be detected as a new external display on Windows 11.
6. Set the Same Refresh Rate on Both Screens
The next important thing you should do is check if the refresh rate set for both screens is the same. Here’s how you can set the same refresh rate on both screens on Windows 11.
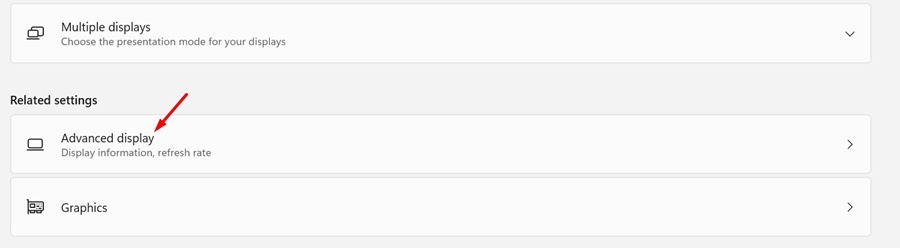
1. Open the Settings app and navigate to the System > Display.

2. On the Display screen, select Advanced Display.
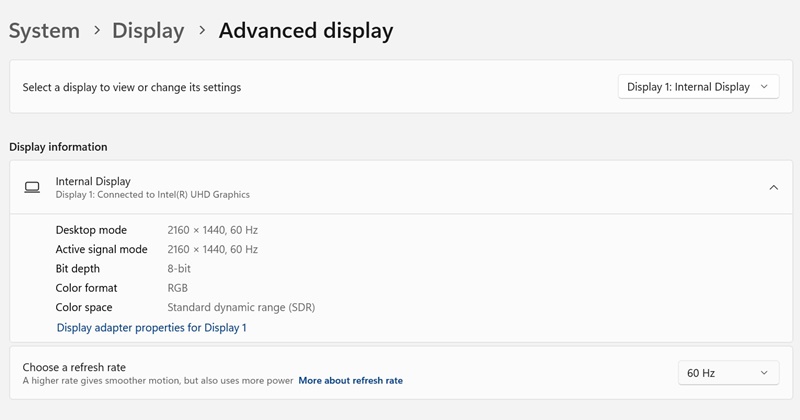
3. Select the second monitor from the drop-down menu. On the Choose a refresh rate drop-down, make sure to set the refresh rate the same as your primary monitor.
That’s it! This is how you can set the same refresh rate for the second monitor on a Windows 11 computer.
7. Update Windows 11
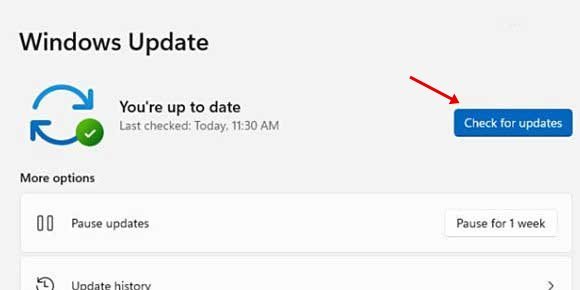
If nothing worked in your favor, it’s time to update the Windows 11. Chances are that the version of Windows you’re using has a bug or glitch preventing you from using the second monitor.
You can eliminate system-level bugs & glitches by updating your Windows 11 to the latest version. So, head to Settings > Windows updates, and on the right side, click on the Check for updates button.
If any update is pending, simply download & install it on your Windows 11 PC. After the update, check if your PC detects the second monitor.
So, these are some of the best ways to fix Windows 11 not detecting the second monitor problem. Let us know if you need more help on this topic. Also, if you find this guide helpful, don’t forget to share it with your friends.
Also Read: How to Display Internet Speed on Taskbar in Windows 11/10


