
Windows users may be very familiar with the Optional Features. Optional features are basically functionality that you can enable if you want. While most of the optional features for Windows 11 target power users and IT admins, certain features may prove helpful to regular users.
For example, there’s an auto HDR feature that can be helpful in gaming, a Wireless Display feature that lets you cast your phone’s display to a computer, etc. There are whole lots of things you can do by enabling optional features on Windows 11.
We have already shared a detailed guide on adding or removing optional Windows features. However, many users have recently reported that Windows 11 won’t let them install optional features.
Users have reported that Windows 11 returns an error while adding optional features. Even if the error doesn’t appears, Windows 11 takes forever to add an optional feature. Hence, if you are also dealing with the same problem, keep reading the article.
Fix Optional Features Not Installing in Windows 11
This article will share some of the best and tested ways to fix optional features not installing in Windows 11. The methods are very easy; just follow them as mentioned. Let’s get started.
1. Restart your computer
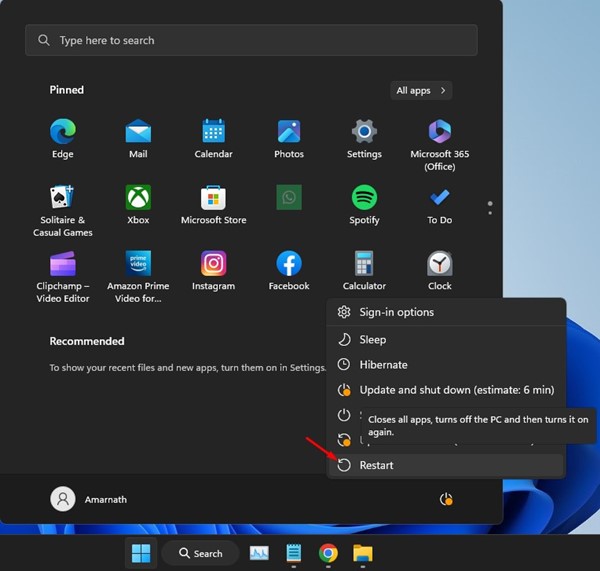
Well, if Windows 11 is taking long to install optional feature or if it’s showing you an error message, it’s recommended to restart your computer.
Maybe a glitch is preventing Windows 11 from installing the optional features. Also, there could be apps and processes running in the background conflicting with the installation process of the Optional feature.
Therefore, before trying the next methods, restart your computer. After the restart, add the optional feature again.
2. Check if your internet is working
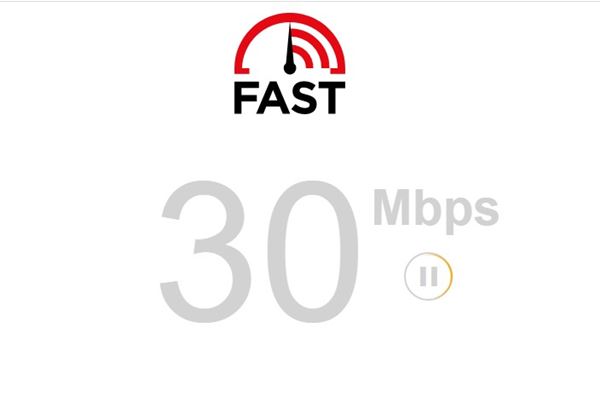
If Windows 11 cannot install the optional features, it’s time to check the internet connection. It’s important to note that Windows 11 relies on an internet connection to download and install the optional features on your device.
Hence, it’s very important to have an active and stable internet connection during installation. You can check the Network tab on the Task Manager to confirm whether the internet is working.
Alternatively, you can open your web browser and visit fast.com. The site will show you the current internet speed along with the Ping. You can also use other speed test websites, but fast.com is a better option and very accurate.
3. Modify the Group Policy Settings
If the ‘Hide Windows Features’ policy is active, you won’t find the optional features. Even if you manage to find it, you will face problems while installing them. Hence, you need to check and disable the ‘Hide Windows Features’ policy to fix optional features not installing Windows 11.
1. First, click on Windows 11 search and type in Local Group Policy Editor. Next, open the Local Group Policy editor from the list of matching results.

2. When the Local Group Policy Editor opens, navigate to this path:
User Configuration\Administrative Templates\Control Panel\Programs
3. Next, on the right side, find and double-click on the ‘Hide “Windows Features”‘ policy.

4. On the next screen, select ‘Disabled‘ and click the Apply button.

That’s it! Now close the Local group policy editor and try to install the optional features again. This time the optional features will install without any error.
4. Make Changes to the Windows Modules Installer
Windows Modules Installer or TrustedInstaller is a service that enables the installation, modification, and removal of Windows updates and optional components. It also deals with the optional features that you want to add. Hence, you need to ensure the service is running on your device.
1. Open Windows search and type in Services. Next, open the Services app from the list of matching results.

2. On the Services screen, find the ‘Windows Modules Installer‘ option.

3. Next, double click on the ‘Windows Modules Installer’.
4. On the next screen, select ‘Automatic‘ under the Startup type. After making the changes, click on the Ok button.

That’s it! Now close the Services app and restart your computer. After the restart, try to add the optional features.
5. Run the SFC Command
SFC or System File Checker is a utility that resolves corrupted system files. If Windows 11 isn’t installing the optional features due to corrupted system files, running the SFC command would help. Here’s how to run the tool.
1. First, click on Windows search and type CMD. Right-click on the CMD and select ‘Run as administrator’.
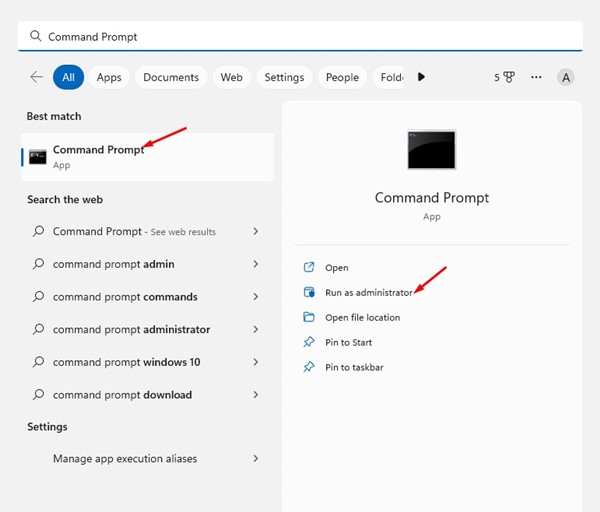
2. When the Command Prompt opens, type sfc /scannow and hit the Enter button.

That’s it! This will run the SFC utility on your Windows 11. The tool will automatically find and fix the corrupted system files.
6. Run the DISM tool
DISM or Deployment Image Servicing and Management is a tool intended to fix problems that SFC won’t. If the above command returns an error, you need to run this tool. Here’s what you need to do.
1. Open Windows search and type CMD. Right-click on the CMD and select ‘Run as administrator’.
2. When the Command Prompt opens, execute this command:
DISM /Online /Cleanup-Image /RestoreHealth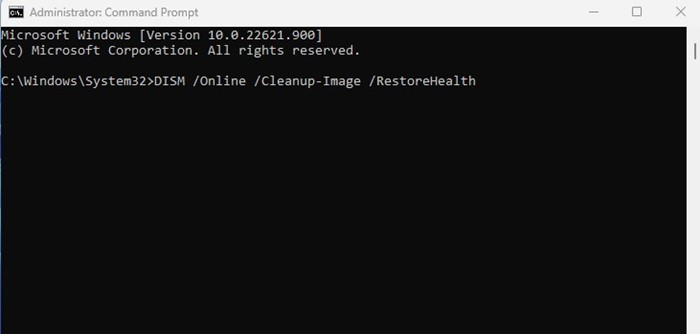
That’s it! The command may take a few minutes to complete depending on your computer’s specifications and files. You need to wait patiently for the process to complete.
7. Update Windows 11
If you are using the Dev or Beta builds of Windows 11, you are bound to face some problems. It’s common for Windows 11 users to face problems like BSOD, system lags, etc., occasionally.
There are chances that the version of Windows you are using has a bug preventing optional features from installing on your device. You can eliminate such bugs by updating your Windows operating system.
You can try switching to the Beta or Release Preview channel using a Dev build. It’s recommended to use a Release Preview build because those builds have comparatively fewer bugs & glitches than Dev or Beta builds.
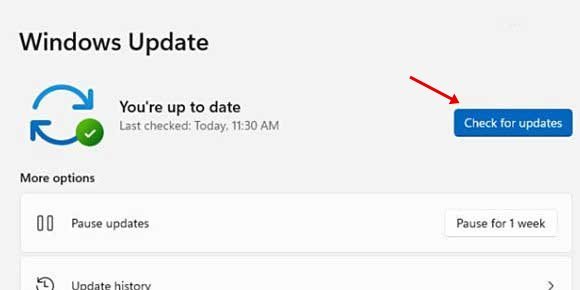
To update Windows 11, open Settings > Windows Update > Check for Update. It’s recommended to install all pending updates on your device. Once updated, try to install the optional features again.
Also Read: How to Fix File Explorer Not Responding on Windows 11
So, these are the few best and simple methods to fix optional features not installing on Windows 11. If you need more help installing optional Windows features, let us know in the comments below. Also, if the article helped you, make sure to share it with your friends as well.


