

In older variations of Home windows, equivalent to Home windows XP, and Home windows 7, customers want to put in a third-party ISO mounter to mount the ISO recordsdata. Nonetheless, issues have modified with Home windows 8 because it provided a built-in software for mounting ISO recordsdata on a digital drive.
The built-in ISO Mounting characteristic is obtainable on Home windows 10 and 11. In actual fact, on Home windows 11, you’ve got a number of methods to entry the built-in ISO mounter. Therefore, in case you are utilizing Home windows 11, you’ll be able to simply mount or unmount ISO recordsdata on a digital drive in simple steps.
Therefore, in case you are in search of methods to mount an ISO file in Home windows 11, you could discover this information very useful. Under, we now have shared just a few greatest methods to make use of the built-in ISO mounter of Home windows 11. Right here’s methods to mount an ISO file in Home windows 11.
1) Mount ISO file in Home windows 11 with a Double-Click on
On Home windows 11, you don’t have to arrange the ISO mounter to work. You may double-click on the ISO file, which is able to instantly mount and open the .iso file.
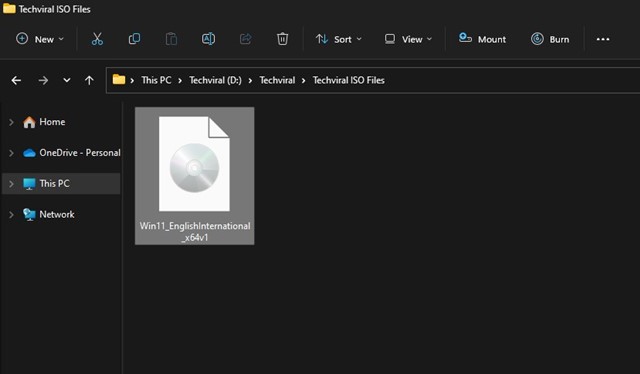
You need to open File Explorer and find the folder with the ISO picture. Subsequent, double-click on the .iso file to mount it on a digital drive.
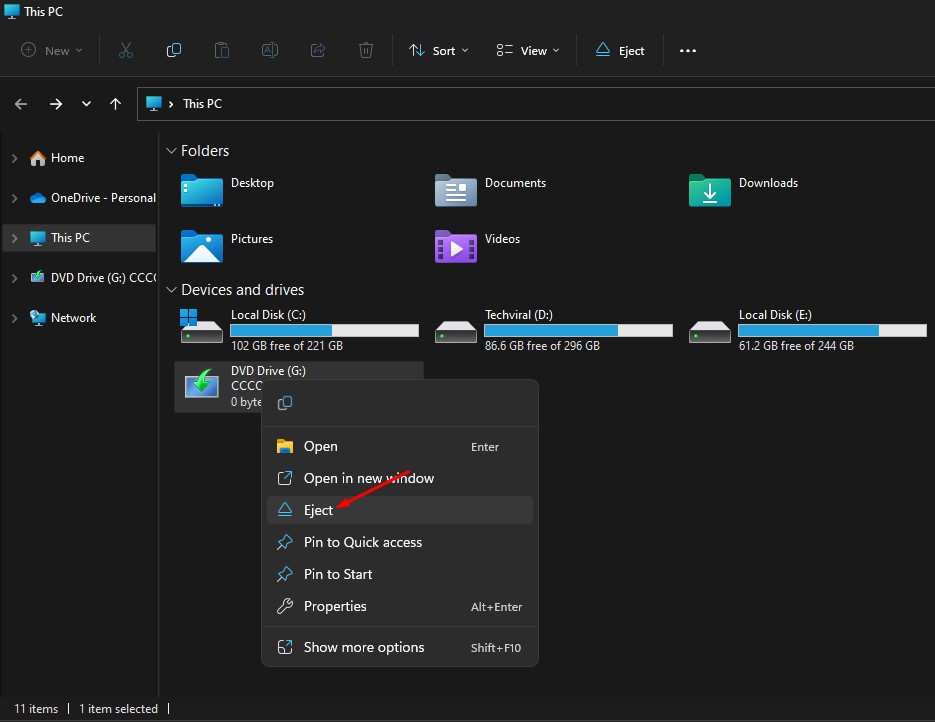
If you wish to unmount the ISO picture, right-click on the newly mounted digital drive and choose Eject.
If the double-click technique didn’t be just right for you, you might select to mount the ISO file through the Context menu on Home windows 11. For that, comply with a number of the easy steps we now have shared under.
1. Press the Home windows key + E button in your keyboard. This can open the File Explorer in your PC.
2. Subsequent, on the Home windows 11 File explorer, navigate to the disc picture file you need to mount.
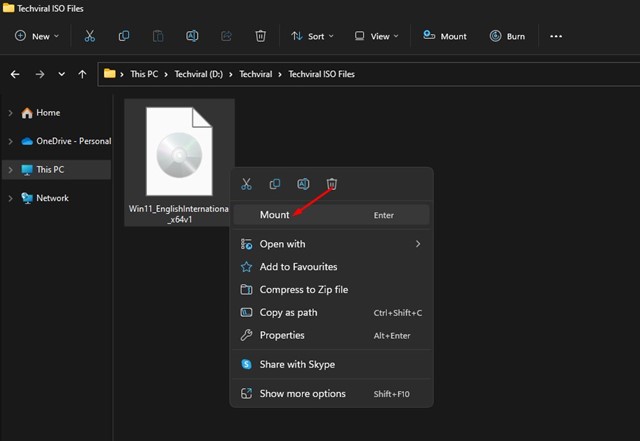
3. Proper-click on the .iso picture file and choose Mount. This can mount the ISO file in a digital drive. You can see it in your File explorer.
4. If you wish to unmount the ISO picture, right-click on the newly mounted digital drive and choose Eject.
3) Mount ISO recordsdata utilizing Home windows PowerShell
You may make the most of Home windows PowerShell to mount ISO recordsdata if you’d like. You should comply with a number of the easy steps we now have shared under.
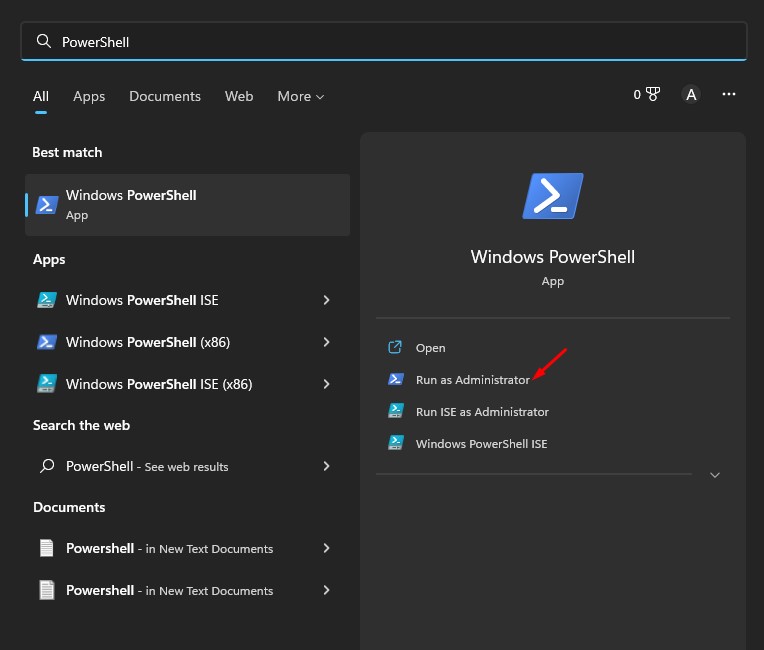
1. First, click on on the Home windows 11 search and sort PowerShell. Subsequent, right-click on Powershell and choose Run as administrator.
2. Now reduce the PowerShell, and navigate to the folder the place you’ve got saved the ISO File. Proper-click on the ISO file and choose Copy as Path.

3. Now, maximize the PowerShell and execute the command given under, and press Enter:
Mount-DiskImage -ImagePath "CompletePathToISO.iso"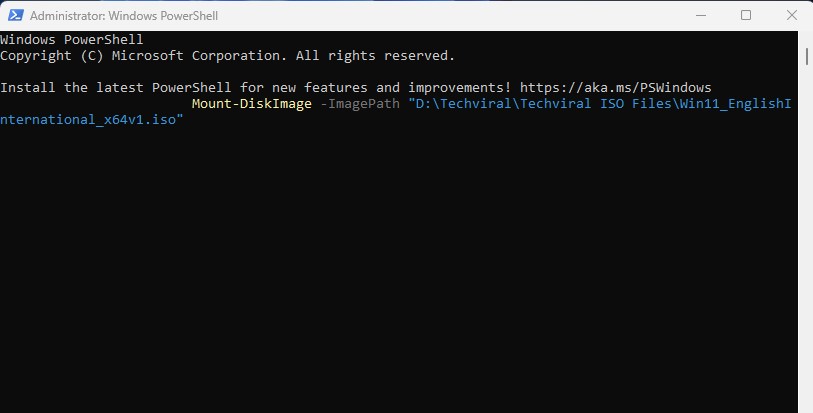
Necessary: Change CompletePathToISO with the precise path of the ISO file.
4. This can instantly mount the ISO file in your Home windows 11’s File Explorer.
5. If you wish to eject or Unmount the ISO picture, execute the command:
Dismount-DiskImage -ImagePath "CompletePathToISO.iso"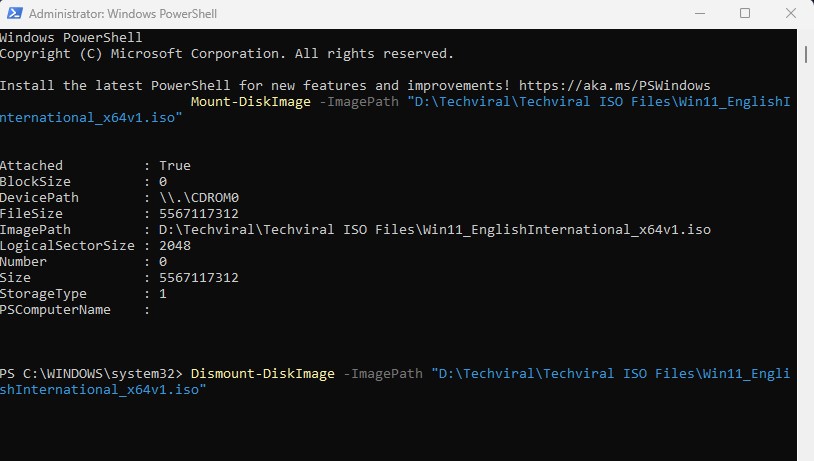
Necessary: Change the CompletePathToISO with the precise path of the ISO file.
That’s it! That is how one can mount and unmount ISO recordsdata in Home windows 11 utilizing PowerShell.
Additionally learn: Windows 11 ISO Free Download Full Version
Aside from the default choices, you need to use a third-party ISO mounter to mount your ISO picture on Home windows 11. So, these are a number of the greatest methods to mount ISO picture recordsdata in a Home windows 11 pc. Should you want extra assist mounting/unmounting ISO recordsdata on Home windows 11, tell us within the feedback under.


