
Do you want to erase all data on your USB drive? Would you like to format the USB drive connected to your Windows 10/11 PC? This guide talks about the top three ways to format USB drives in Windows 10/11.
NOTE 1: Formatting your USB drive will erase all data on it. So, make sure you have moved or backed up important data from the USB drive before formatting it.

NOTE 2: Make sure that you select the correct USB drive. Once a USB drive is formatted, you might be unable to recover the lost data.
NOTE 3: We recommend formatting USB drives with the NTFS file system for the simple reason that it can store files greater than 4 GB in size. FAT32 file system can store files smaller than 4 GB only.
NOTE 4: Do not disconnect the USB drive or turn off your computer when the drive is being formatted. Doing so might damage the drive.
Method 1 of 3
Format USB drive via File Explorer in Windows 10/11
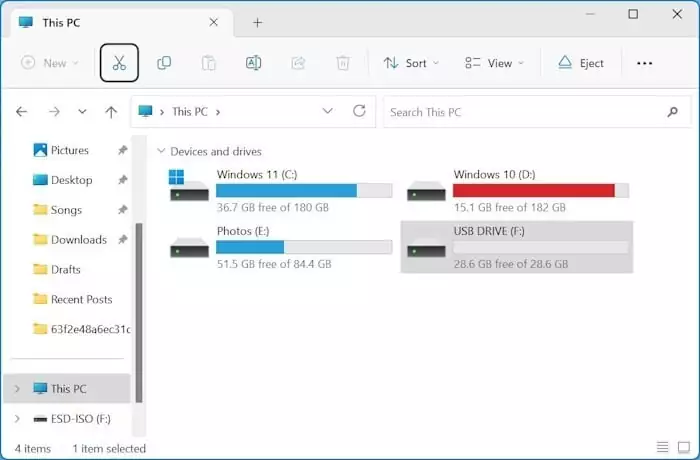
Step 1: Open This PC in File Explorer.
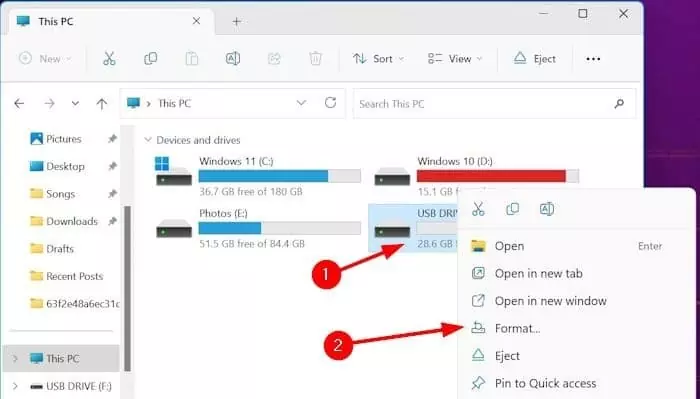
Step 2: Right-click on the USB drive that you want to format and then click the Format option.
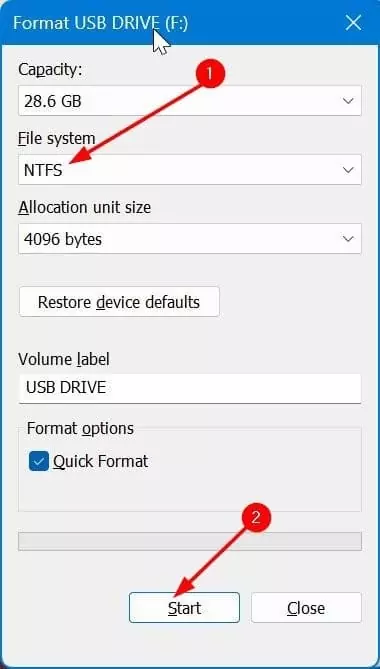
Step 3: In the File system drop-down menu, select NTFS or FAT32.
Step 4: Finally, ensure that Quick format is selected and then click the Format button. No need to alter the default allocation unit size.
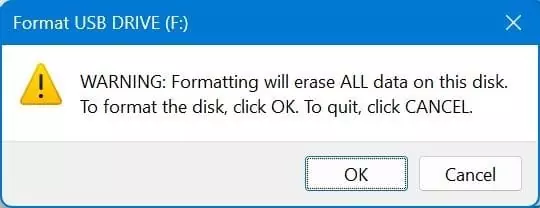
Step 5: When you see the confirmation prompt, click the OK button.
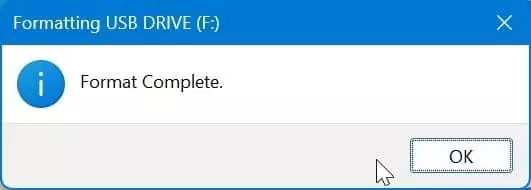
In a few seconds, you should see the “Format is complete” message. That’s it! You may now use the USB drive or disconnect it.
Method 2 of 3
Format USB drive via Disk Management in Windows 10/11
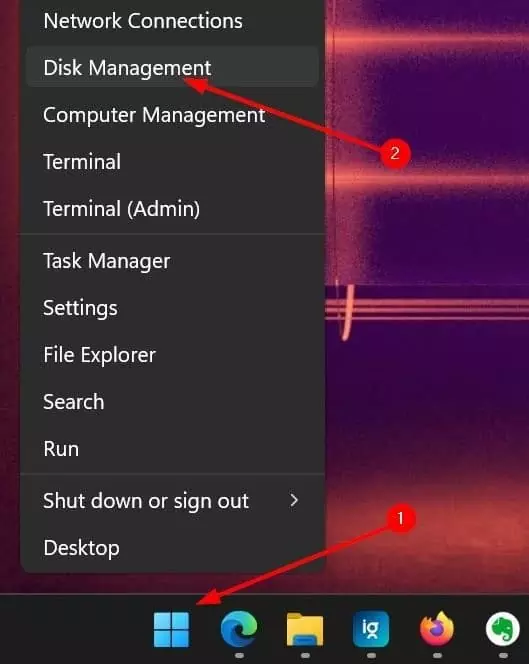
Step 1: Open the Disk Management window. The easiest way is to right-click the Start button and then click the Disk Management option.
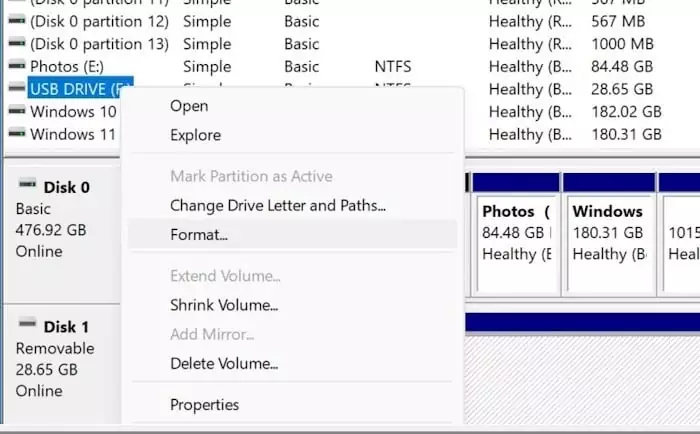
Step 2: In the Disk Management window, right-click on the USB drive’s entry and then click the Format option. Be sure to select and right-click on the correct USB drive.
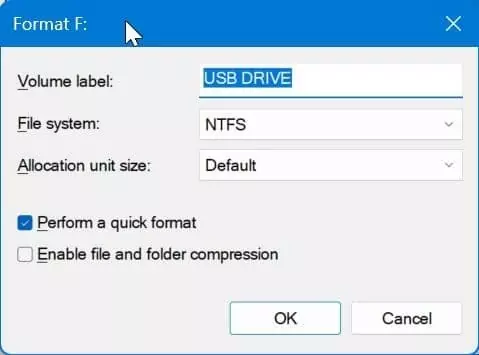
Step 3: Select the File System (NTFS or FAT32) from the drop-down menu and then click the OK button.
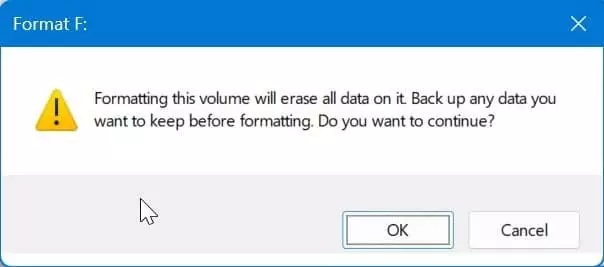
Step 4: When you get the following warning message, click the OK button to format the drive and erase all data. That’s it!
Method 3 of 3
Format USB drive via Command Prompt or PowerShell in Windows 10/11
The Command Prompt and PowerShell can also be used to format USB drives. But we recommend using Command Prompt or PowerShell only if you are unable to format the USB drive via File Explorer and Disk Management, as the procedure is not very straightforward. Note that you need to open Command Prompt administrator rights to format drives.
If you are interested, refer to our how-to format USB drives via Command Prompt in Windows 10/11 guide for step-by-step directions.

