

If you’re utilizing Home windows working system, you could be very acquainted with the DirectX. Should you don’t know, DirectX is a collection of utility programming interfaces (API) that enables video games to speak to video playing cards.
It’s an important program because it optimizes your gaming and multimedia expertise. In case your Windows 11 PC doesn’t have the appropriate model of DirectX put in, you would possibly expertise issues whereas operating video games. Not solely video games but additionally packages that depend on GPU gained’t work correctly.
Steps to Obtain & Set up the Newest Model of DirectX on Home windows 11
So, you probably have simply put in Home windows 11 and going through issues whereas operating graphics-heavy purposes or video games, you may need to replace or reinstall the DirectX. Beneath, we’ve shared a step-by-step information on downloading, putting in, and uninstalling DirectX on Home windows 11. Let’s take a look at.
1. Discover the model of DirectX put in on Home windows 11
Earlier than downloading DirectX, you first must examine the model of DirectX put in in your Home windows 11. Right here’s learn how to examine it.
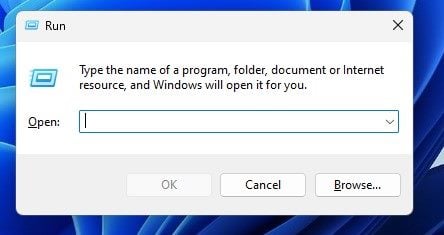
1. Initially, press the Home windows Key + R button in your keyboard. It will open the RUN dialog field.
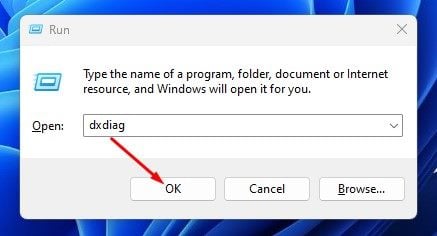
2. On the RUN dialog field, enter dxdiag and hit the Enter button.
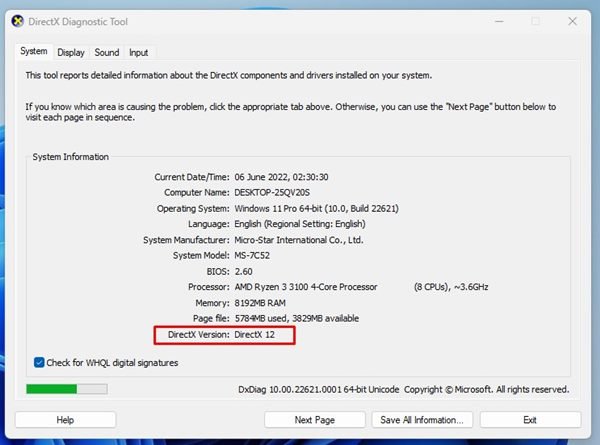
3. It will open the DirectX diagnostic software. You’ll want to examine the DirectX model on the backside.
That’s it! That is how one can examine the model of DirectX put in in your Home windows 11.
2. Obtain & Set up the newest model of DirectX
DirectX 12 is the newest model of DirectX accessible for the Home windows working system. In case your PC is appropriate with DirectX 12, you’ll be able to obtain & set up it manually. Right here’s learn how to obtain & set up the newest model of DirectX.
1. First, open your favourite net browser and open this DirectX download page.
2. Subsequent, scroll down and choose your language. As soon as completed, click on on the Obtain button.
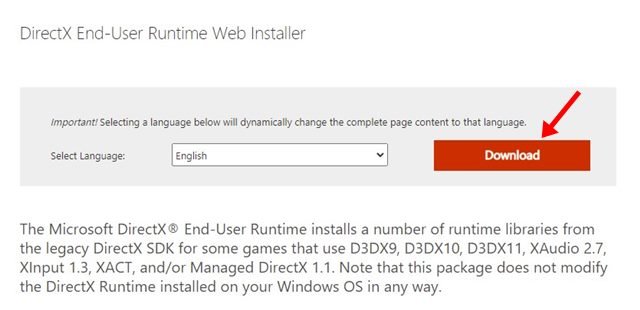
3. It will obtain the DirectX 12 in your PC.
4. As soon as downloaded, open the DirectX 12 executable file and comply with the on-screen directions to finish the set up half.
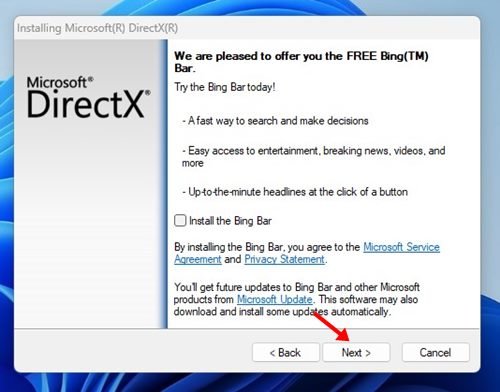
That’s it! After the set up, restart your Home windows 11 laptop. Open the Direct X diagnostic software once more by way of the RUN command and examine the DirectX model to verify the set up.
3. The right way to Uninstall DirectX on Home windows 11
If you’re experiencing extra issues after putting in the newest model of DirectX, it’s good to roll again to the older model.
Since Microsoft doesn’t enable customers to uninstall DirectX utterly, it’s good to roll again from a more moderen model to an older model. To roll again the DirectX model, it’s good to restart your PC to a earlier level.
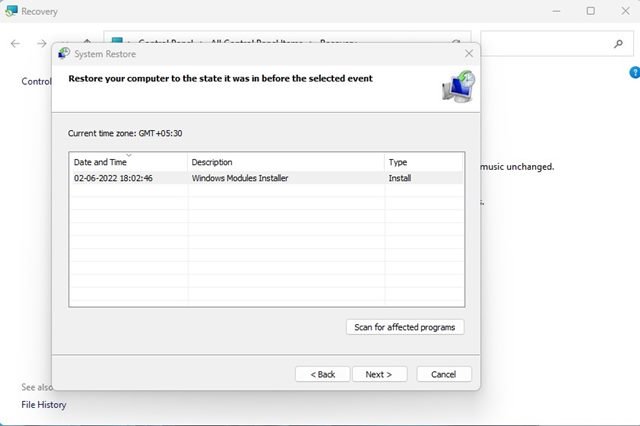
That is solely doable you probably have arrange Automatic Restore Point in your Home windows 11 laptop. In case your PC doesn’t have any restore level, it’s good to reinstall the working system.
DirectX on Home windows 11 is designed to replace mechanically via the Home windows Replace. So, this information is all about learn how to obtain & set up the newest model of DirectX on Home windows 11. In case you have any doubts associated to DirectX on Home windows 11, tell us within the feedback.


