

Screenshot, typically known as a screengrab, is a picture that captures every part displayed in your pc or smartphone display. At occasions, you might need to take a screenshot in your Home windows 11 pc, and there may very well be numerous causes behind it.
Taking screenshots on Home windows 11 isn’t simply useful; it may very well be a time-saver, particularly when it is advisable to display one thing that may in any other case be troublesome to elucidate in phrases.
Just a few months in the past, we shared a information on Cyberfreaks the place we mentioned a number of finest methods to take a screenshot on Home windows 11. You possibly can depend on the built-in Print Display performance or use third-party apps for capturing a screenshot.
Should you depend on the Home windows + Print Display shortcut to take a screenshot, you would possibly know that Home windows 11 saves the display captures within the ‘Screenshots’ folder contained in the ‘Photos’ folder. On Home windows 11, it’s fairly simple to assign a brand new folder location for saving screenshots in case you need to change the default one.
Steps to Change the Screenshot Folder Location in Home windows 11
Therefore, on this article, we are going to share a step-by-step information on methods to change the Screenshot folder location in Home windows 11. The steps shall be very simple; simply comply with them as we now have talked about. So, let’s get began.
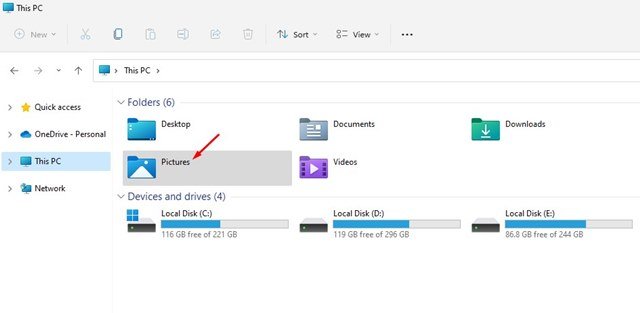
1. To start with, open the File explorer of your PC and navigate to the ‘C:Customers<username>Photos folder’.
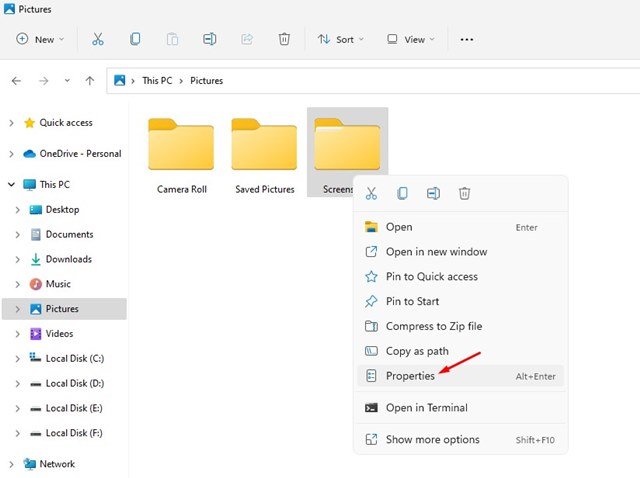
2. You can find a number of folders contained in the Photos folder. It’s essential to right-click on the Screenshots folder and choose the Properties.
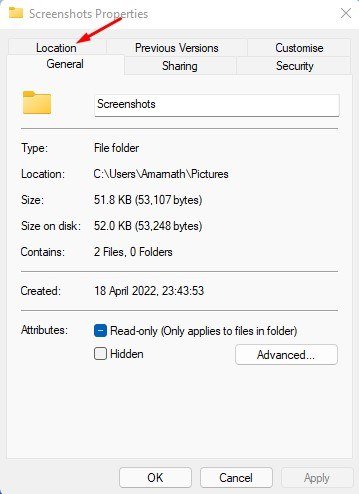
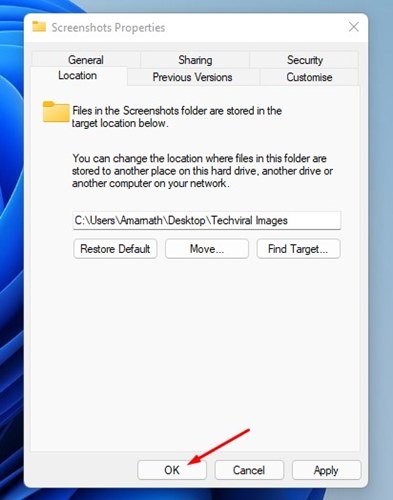
3. On the Screenshots Properties, change to the Location tab as proven within the screenshot under.
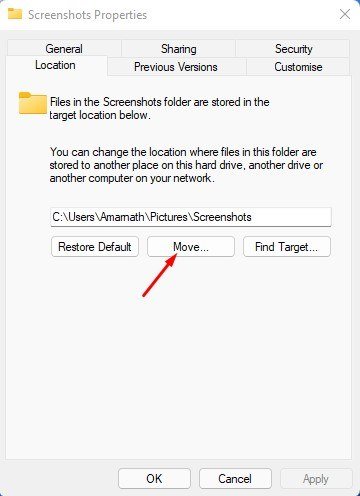
4. Subsequent, click on on the Transfer button as proven under within the screenshot.
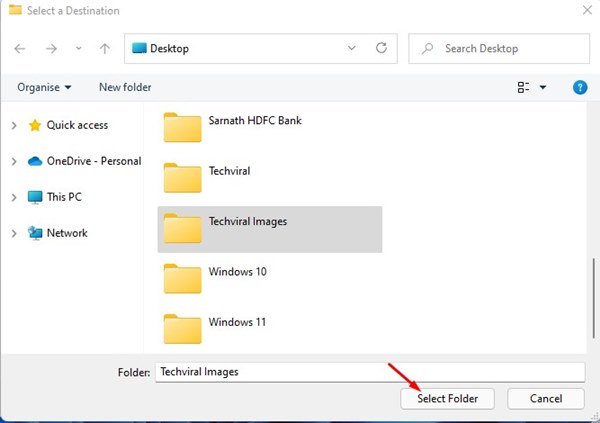
5. Now, on the file picker interface, choose the brand new folder the place you need to retailer your screenshots. As soon as executed, click on on the Choose Folder button.
6. It will change the default screenshot folder location in your Home windows 11. You simply have to click on on the Okay button to use the adjustments.
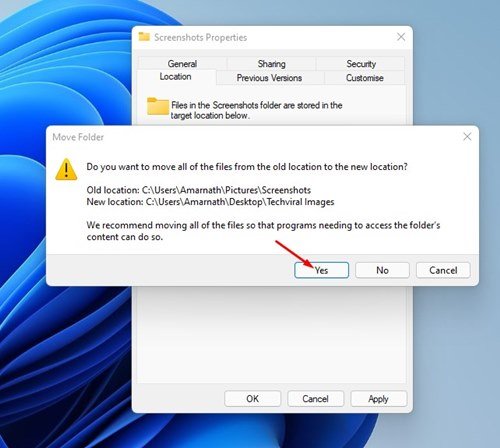
7. Now, you will notice a immediate asking you to maneuver all of the screenshots to the brand new folder. To maneuver all screenshots to a brand new folder, click on on the Sure button.
That’s it! You might be executed. That is how one can change the default screenshot folder location on Home windows 11.
It’s fairly simple to vary the screenshot folder location in Home windows 11. I hope this text helped you! Please share it with your folks additionally. If in case you have any doubts associated to this, tell us within the remark field under.


