

If you happen to’re utilizing Windows 11, you most likely know that Microsoft has made some important modifications to the working system. Along with a brand new design, Home windows 11 additionally launched many new and priceless options. Many of those options have been stored hidden from the customers to scale back storage consumption.
The function stored hidden from the customers is termed Non-obligatory Options. On Home windows 11, you get a devoted part for Non-obligatory options that means that you can set up & allow many new functionalities of the working system.
Some choices focused energy customers and IT directors, whereas others have been meant for normal customers. Therefore, if you’re on the lookout for methods to entry the Non-obligatory options on Home windows 11, you might be studying the correct information.
Steps to Add or Take away Non-obligatory Options in Home windows 11
This text will share a step-by-step information on including or eradicating Non-obligatory options on Home windows 11 working system. The steps can be easy; comply with them as talked about beneath.
1) Add Non-obligatory Options on Home windows 11
On this part, we’ll know the best way to allow optionally available options on the most recent Home windows 11 working system. Observe a few of the easy steps now we have shared beneath.
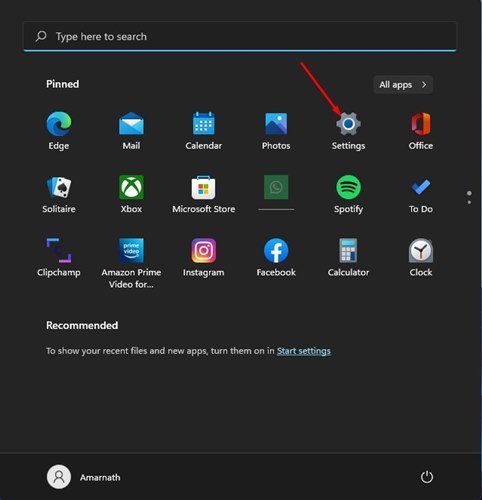
1. To start with, click on on the Home windows 11 Begin button and choose Settings.
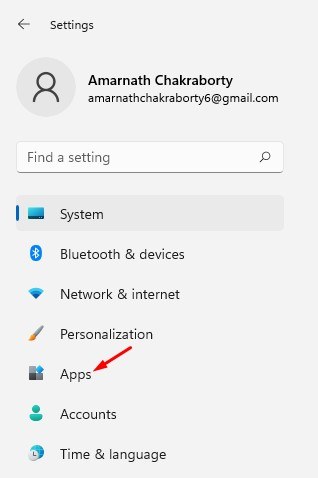
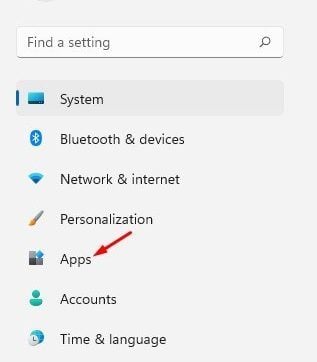
2. On the Settings app, click on on the Apps part, as proven beneath.
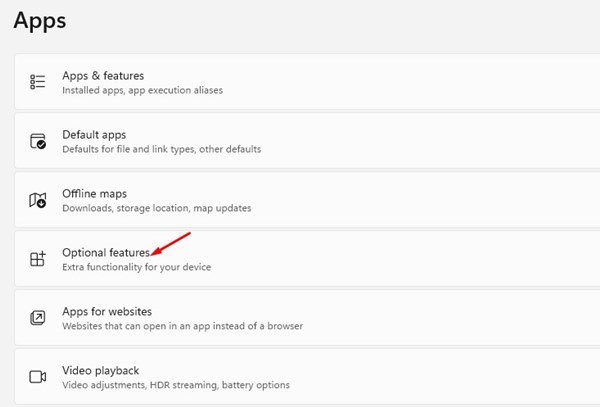
3. scroll down and click on on the Non-obligatory options possibility on the correct pane.
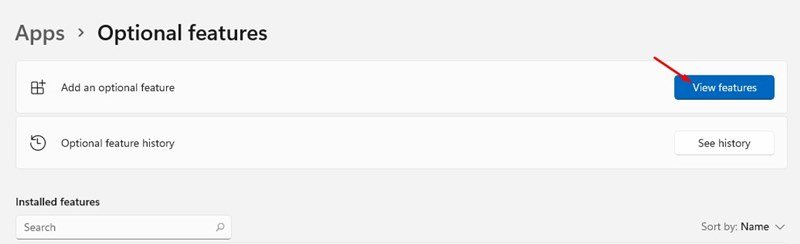
4. On the subsequent display, click on on the View options button behind the Add an optionally available function or View options possibility.
5. On the Add an optionally available function pop-up, choose the function you need to set up in your pc. For instance, right here, now we have chosen the Wi-fi Show function. As soon as finished, click on on the Subsequent button.
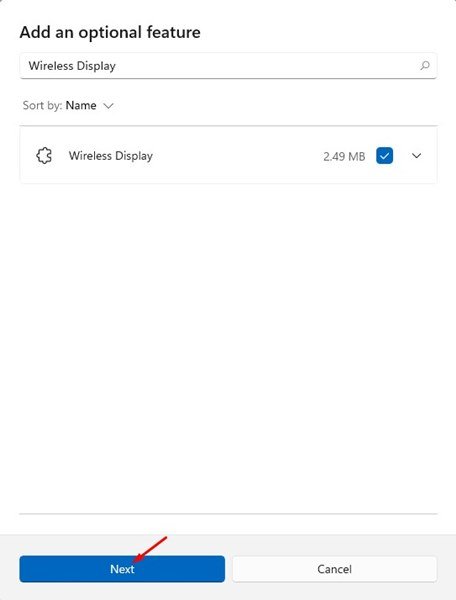
6. On the subsequent display, click on on the Set up button beneath.
That’s it! You’re finished. That is how one can add an optionally available function to your new Home windows 11 working system.
2) How you can Take away Non-obligatory Options
If you happen to don’t need to use the optionally available options, you may simply disable or uninstall them from the Settings app. Right here’s what it is advisable do.
1. To start with, click on on the Home windows 11 Begin button and choose Settings.
2. On the Settings app, click on on the Apps part, as proven beneath.
3. scroll down and click on on the Non-obligatory options possibility on the correct pane.
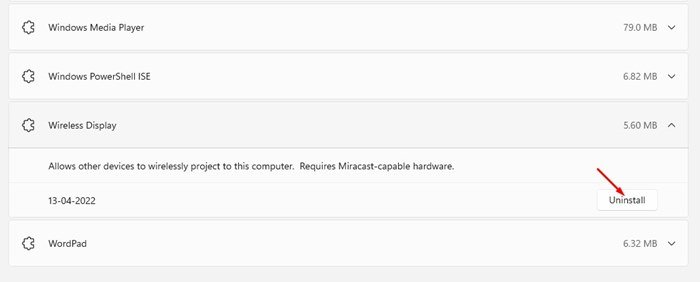
4. Your put in options will seem beneath the Put in options part. You want to choose the function and click on on the Uninstall button.
That’s it! You’re finished. That is how one can take away an optionally available function out of your Home windows 11 pc.
So, this information is all about the best way to add or take away optionally available options on Home windows 11 working system. I hope this text helped you! Please share it with your folks additionally. When you’ve got any doubts about this, tell us within the remark field beneath.


