The Windows operating system has a terrible reputation for ruining the user experience. Although Microsoft is swift to push new updates that contain bug fixes and new features, at the same time, it triggers some unexpected errors as well. Out of all those, BSOD errors seem to be the worst.
BSOD error on the Windows operating system suddenly appears, and it just turns off the computer without any prior notice. What’s worst is that users won’t even get a second chance to save their ongoing tasks. Just briefly examine the Microsoft Forum; you will see many Windows users complaining about BSOD errors.
Until now, we have shared lots of tutorials to deal with different types of BSOD errors, and today we are going to discuss Kernel Security Check Failure or Kernel Security Check Error. Let me tell you the ‘Kernel Security Check Failure’ is one of the critical Windows 10 errors that results in a BSOD.
Best Ways to Fix ‘Kernel Security Check Failure’ BSOD Error
Various things can trigger the ‘Kernel Security Check Error’ like Memory problems, outdated drivers, viruses & malware, corrupted Windows files, hard disk errors, etc. So, here in this article, we will share some of the best methods to fix the Kernel Security Check Error message in Windows 10.
1. Windows Memory Diagnostic
As we all know, the Kernel Security Check Failure BSOD error occurs due to memory problems. So, we need to use the Windows Memory Diagnostic tool to fix memory problems. So, here’s how you can use the built-in Windows Memory Diagnostic Tool to fix Kernel Security Check Failure BSOD.
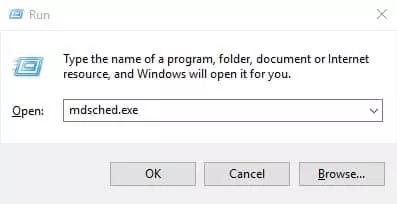
1. Press Windows key + R to open the Run Dialog Box. In the run dialog box, type in mdsched.exe and press Enter.
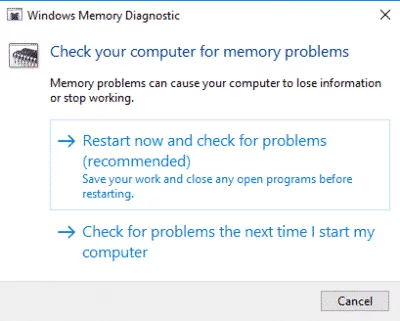
2. In the next step, click Restart Now and check for problems.
Now Windows 10 will automatically restart and will check for the memory problem. If it finds any memory problem, then it will fix it automatically.
2. Fix Corrupted Windows Files
Sometimes, corrupted Windows files trigger the ‘Kernel Security Check Failure’ error message. So, in this method, users need to scan and fix corrupted Windows files. Fixing corrupted files on the Windows operating system is easy; users need to follow some of the simple steps listed below.
1. First, open the Search menu and type in Powershell. Right-click on Powershell from the list and select Run as administrator.
2. Now, on the Powershell Window, enter the command 'sfc /scannow'
That’s it; you are done! Now the command will scan and fix corrupted Windows files. Once done, restart your computer to fix the BSOD error.
3. Fix Hard Disk Error
To deal with Hard Disk errors, Microsoft provides users with a check disk utility. Check Disk Utility, also known as chkdsk scans, and fix hard disk errors. So, here we need to use the CHKDSK command to fix the ‘Kernel security check failure; error message. Let’s check out how to use CHKDSK command on Windows 10.
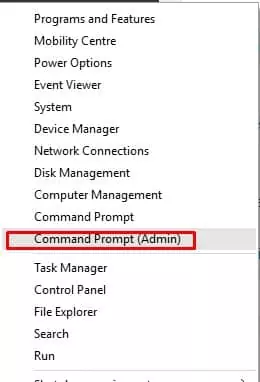
1. Right-click the Windows icon and select Command Prompt (Admin).
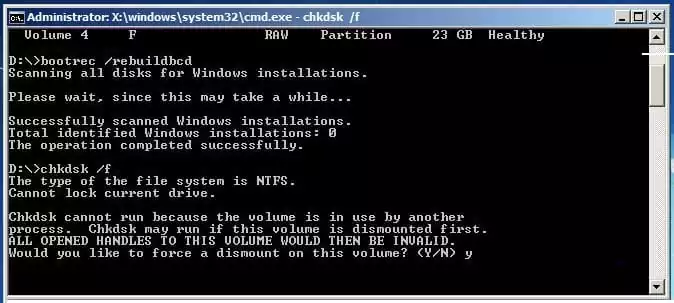
2. On the Command Prompt, enter the command chkdsk /x and press enter. Make sure to change the ‘X’ with your Windows installation drive letter.
3. Now, CMD will ask you to confirm the action. Simply enter Y.
That’s it; you are done! Once done, type in ‘exit’ and restart your computer. This will probably fix the Kernel Security Check BSOD error from Windows 10.
4. Uninstall, Reinstall, or Update Drivers
The Kernel Security check failure problem also occurs due to outdated hardware drivers. It can even appear due to incompatible drivers. So, in this method, we need to uninstall, reinstall, or update the hardware drivers to fix the Kernel Security check failure BSOD error.
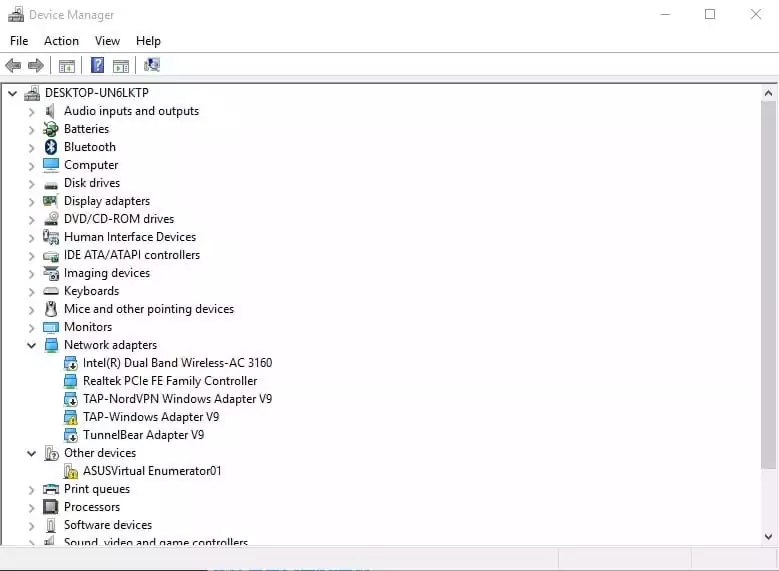
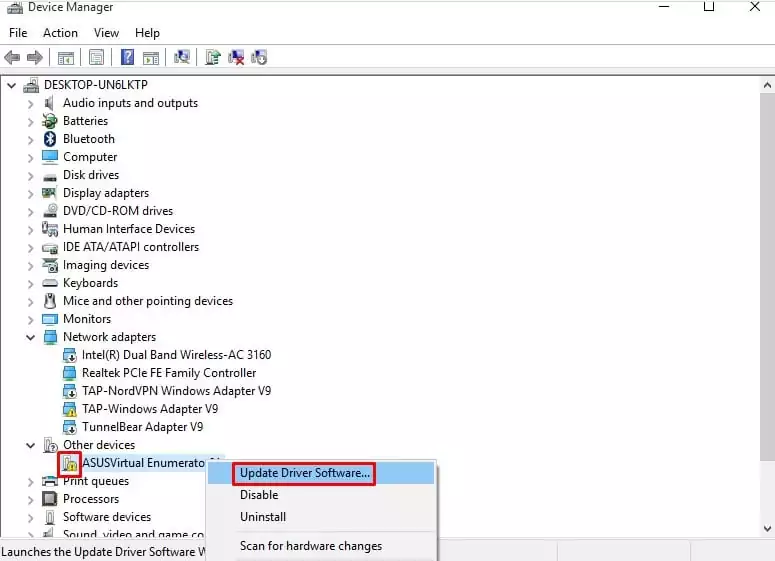
1. First of all, open Device Manager on your Windows 10. You can right-click on the Windows 10 start menu and choose Device Manager.
2. Next, check for the components with an error symbol. Select the component likely to cause the problem and choose Update Driver.
3. If it doesn’t help, uninstall the device and restart the PC. After the restart, Windows will automatically install the required driver.
That’s it! You are done. To update all drivers, you can check our article – How To Easily Update Drivers In your Windows PC
5. Scan Your Computer With Antivirus
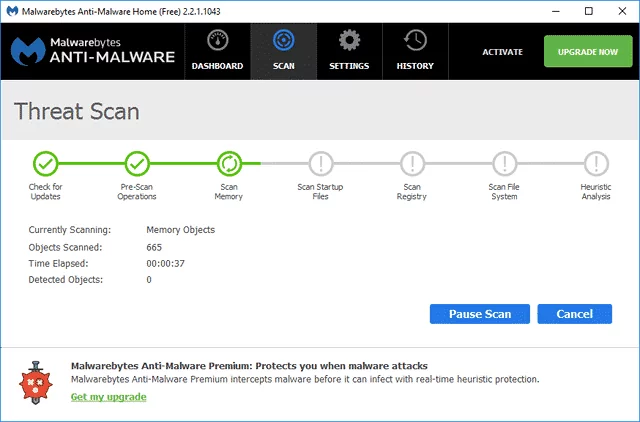
Virus or malware could be another reason behind the ‘Kernel Security Check Failure’ BSOD. So, before you choose to format and reinstall Windows 10, scan your computer with powerful antivirus software.
You can rely upon Malwarebytes or Kaspersky to scan your computer. If you cannot complete the scan, toot into the safe mode and perform a full system scan.
6. Reset Windows Operating System
If nothing has worked until now, the final remaining option is to reset your Windows PC. Resetting will possibly remove all user made settings and corrupted system files.
Along with the settings, you will also lose your files saved in the system installation drive. So, make sure to backup the files before your reset your PC. Here’s how to reset Windows to fix kernel security check failure BSOD error.
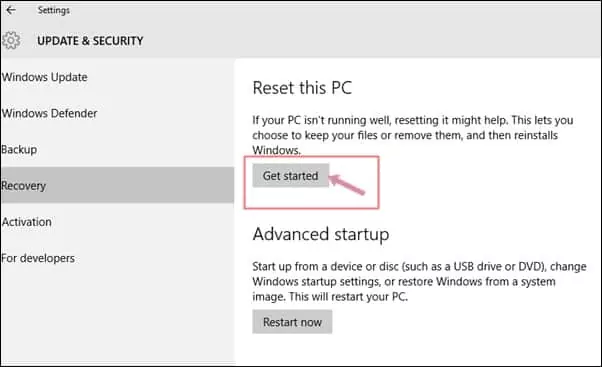
1. Navigate to Settings > Update and Security.
2. On the right side, select Recovery; on the left, click on the Get Started button underneath Reset this PC.
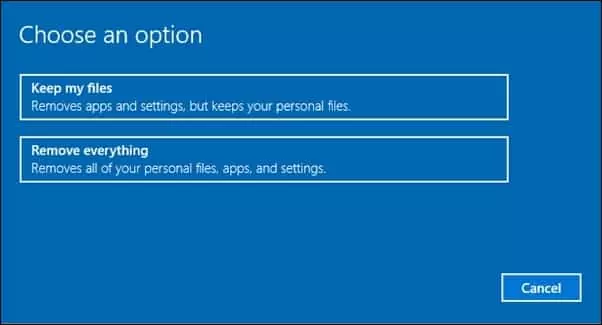
3. Now, on the Choose an option prompt, select Keep my files.
4. Confirm your selection and click Next.
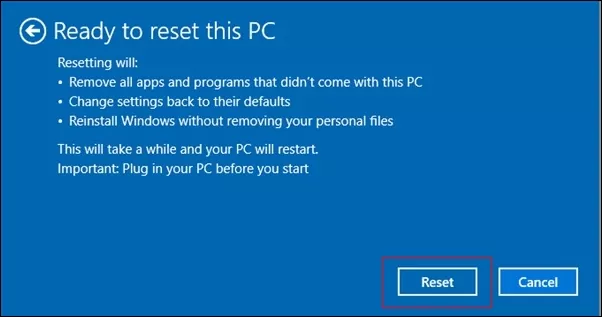
5. On the Ready to Reset this PC screen, click Reset.
That’s it! Now your PC will restart several times. Just be patient and wait for the process to complete.
That’s it; you are done! These are the four best methods to fix the ‘Kernel Security Check Failure’ error message. Let us know in the comment box below if you know of any other method to fix the error message,

