
If you are reading tech news regularly, you may know about the Copilot feature. The feature is available in the latest version of the Windows 11 update that was rolled out a few days ago.
Technically, the Windows 11 2023 update KB5030310 that Microsoft released a few days ago has all the features of the 23H2 build, which is supposed to roll out in November this year. So, if you want to try Windows Copilot, you must update the Windows 11 2023 update.
You should note that even when you have downloaded & installed the Windows 11 2023 update, Copilot is not enabled by default on many computers. So, if your PC is already updated but can’t find the Copilot icon in your Taskbar, continue reading the guide.
How to Enable Copilot on Windows 11 2023 Update
In this article, we will share a few of the best ways to enable Copilot on Windows 11. The steps will be very easy; follow the steps we have mentioned. Let’s get started.
1) Download and install the Windows 11 2023 Update
Before jumping to the next methods, ensure your PC already has the Windows 11 2023 update installed. Installing Windows 11 2023 Update is easy; you must install all available updates.
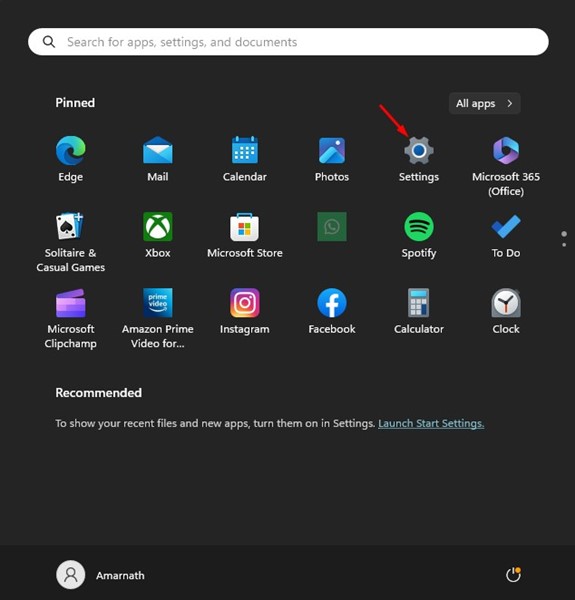
1. To get started, open the Settings app on your Windows 11 computer.
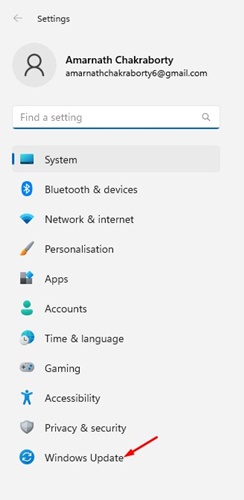
2. When the Settings app opens, switch to the Windows Update tab.
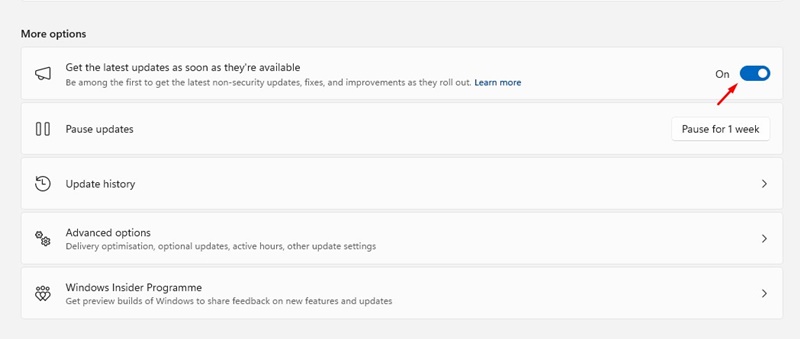
3. On the right hand side, enable the toggle for Get the latest updates as soon as they’re available.
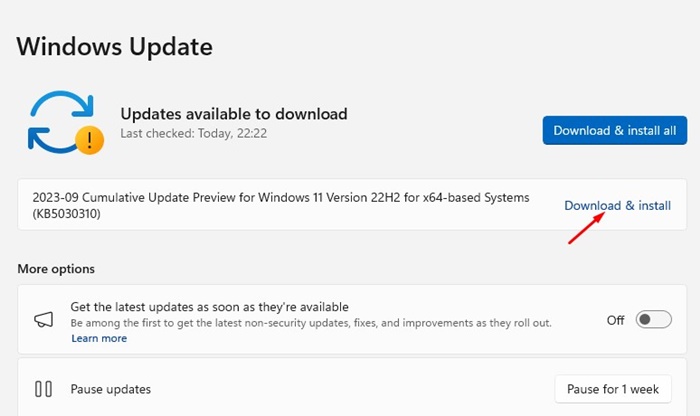
4. Next, click on the Check for Updates button. The Windows 11 Version 22H2 (KB5030310) will show up. Click on the Download & Install button.
That’s it! That’s how easy it is to download and install Windows 11 2013 Update on right now.
However, to download the Windows 11 2023 Update with the 23H2 Build Number, you must join the Release Preview Channel of the Windows Insider Programme.
For complete details on downloading the Windows 11 2023 update, check out this guide – Download & Install Windows 11 23H2.
2) Enable Copilot using the ViVeTool (Old Method but Still works)
If the Windows Copilot icon doesn’t appear on your Windows 11 Taskbar, the next best option to enable it is using the ViveTool. This is an old method, but it still works on the latest version of Windows 11.
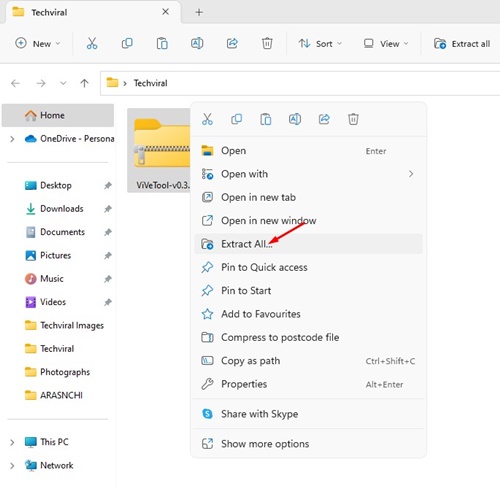
1. Download the latest version of the ViveTool ZIP file on your computer. Once downloaded, extract the ZIP File.
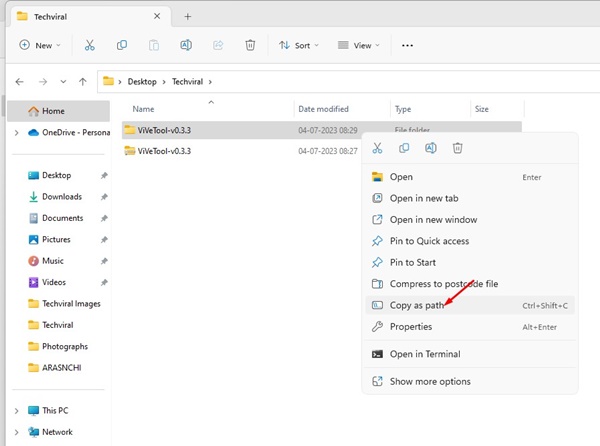
2. Now right-click on the extracted folder and select Copy as Path.
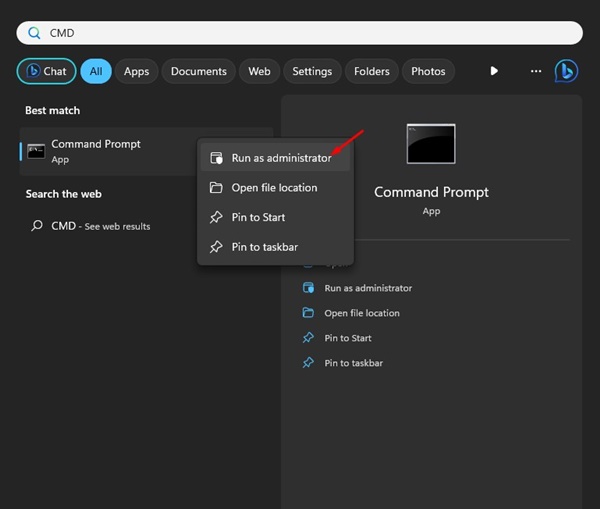
3. Type in Command Prompt on Windows Search. Right-click on the Command Prompt and select Run as administrator.
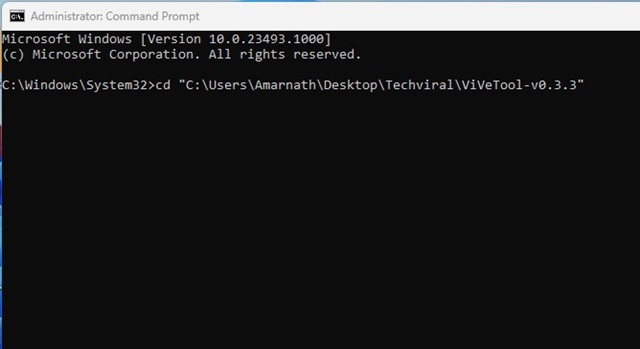
4. On the command prompt, type cd and paste the path you’ve copied. The command would look something like this:
cd "C:\Users\Amarnath\Downloads\ViVeTool-v0.3.3"
5. Now, you need to execute these commands one by one.
vivetool /enable /id:44774629
vivetool /enable /id:44850061
vivetool /enable /id:44776738
vivetool /enable /id:42105254
vivetool /enable /id:41655236
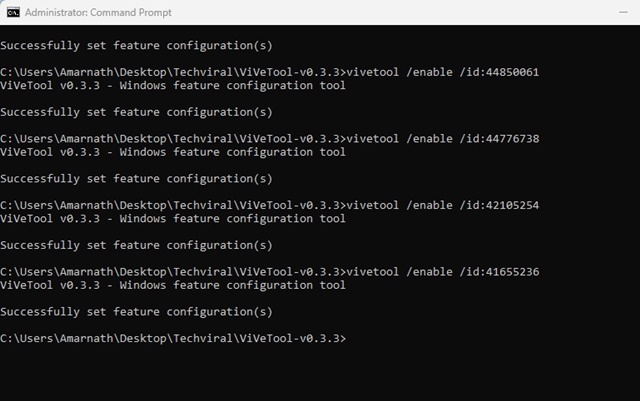
6. After executing all commands, restart your Windows 11 computer.
That’s it! After the restart, you can see the new Windows 11 Copilot icon in your Taskbar.
How to Fix Copilot Not Enabled in Windows 11?
Many Windows 11 Home users have reported Copilot not enabled on their computers. If facing the same issue, you must change the Group Policy Editor to enable Copilot. Here’s what you need to do.
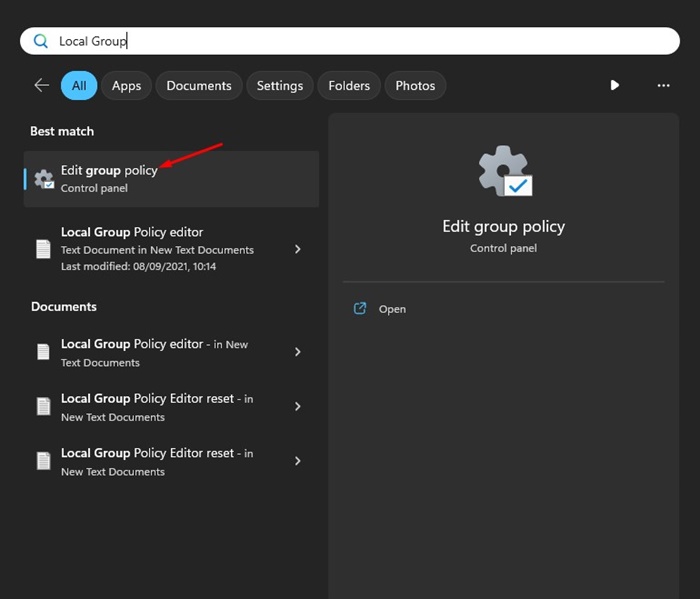
1. Press the Windows Key + R button on your keyboard. This will open the RUN dialog box, type gpedit, and press Enter. Or else, open Windows Search, and type Group Policy.
2. Open the Edit Group Policy from the list.
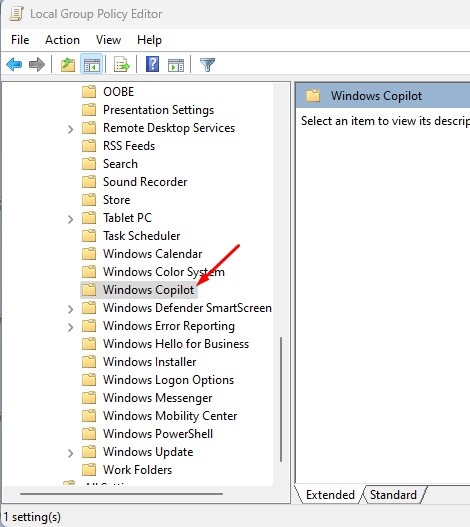
3. When the Local Group Policy Editor User Configuration -> Administrative Templates -> Windows Components -> Windows Copilot.
4. On the right side, find & double click on the Turn off Windows Copilot Settings.
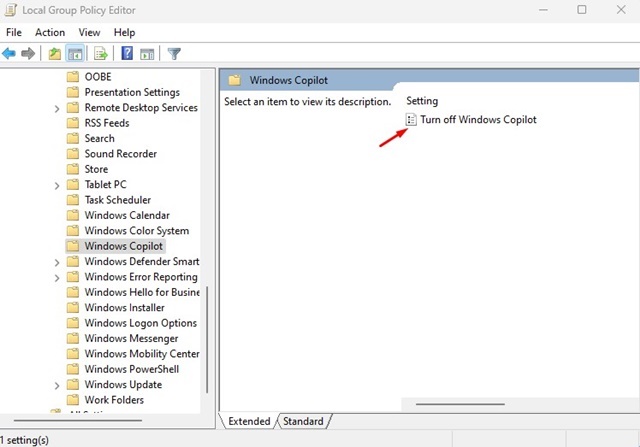
5. On the Turn off Windows Copilot prompt, select Disabled.
6. Finally, click on the OK button to apply the changes.
That’s it! This will immediately enable the Windows 11 Copilot on your device. You should be able to find the Copilot icon on the Taskbar.
So, this guide is all about how to enable Windows 11 Copilot in easy steps. Ensure you follow the steps mentioned to bring back the hidden AI feature on Windows 11. Let us know your opinion on the new Windows 11 Copilot, did you find it useful?
Also read: How to Turn Off Copilot on Windows 11

