")
Every electronic device, whether a laptop, computer, or smartphone, will become slower over time. The problem relies on the storage device, degrading performance as the data fills up.
The same goes for Windows 11 as well; filling up the hard drive can significantly downgrade the HDD/SSD performance. One good way to address such problems is to optimize the drive.
Windows 11 lets you optimize your HDD/SSD for improved performance; you can either run the Storage Sense to free up storage or use the Disk Defragment tool. In this specific article, we will discuss how to defrag Windows 11.
What is Defragging?
Installing Windows software generates data fragmentation on the storage drive. This fragmented data is actually spread across the entire drive.
So, when you run the program, Windows searches for fragmented files across different parts of the drive, which takes time and puts more load on the drive.
So, an HDD slows down because it has to read & write the fragmented data spread across the storage. Defragging is simply a process of reorganizing the fragmented data on a drive by filling the storage gaps.
As a result, the hard disk drive gets better read & write speed. The process to defrag a hard drive on Windows 11 is easy and doesn’t require installing any third-party app.
How to Defrag a Hard Drive on Windows 11?
Now that you know what defragmenting is, you may be interested in defragging a hard drive to improve its performance. Here’s what you need to do.
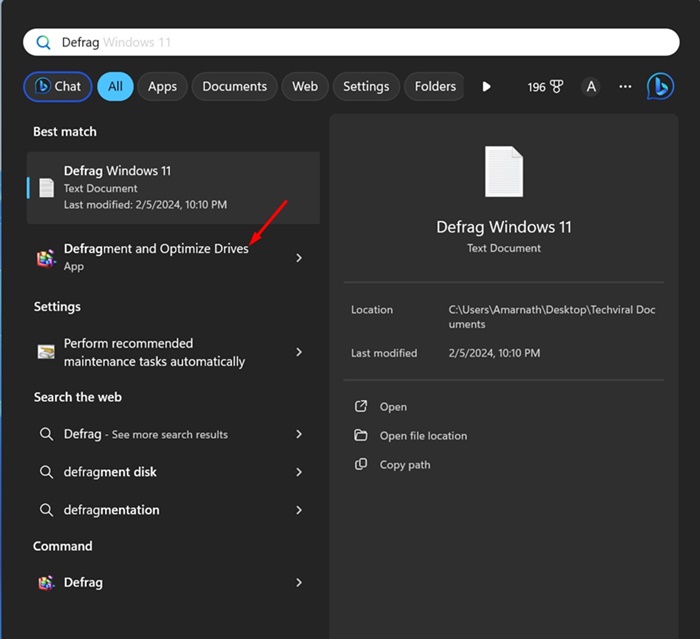
1. Type in Defrag on the Windows 11 Search. Next, open the Defragment and Optimize Drives from the list of best-match results.
2. On the Optimise Drives, select the drive you want to optimize. It’s recommended to select the system installation drive first.
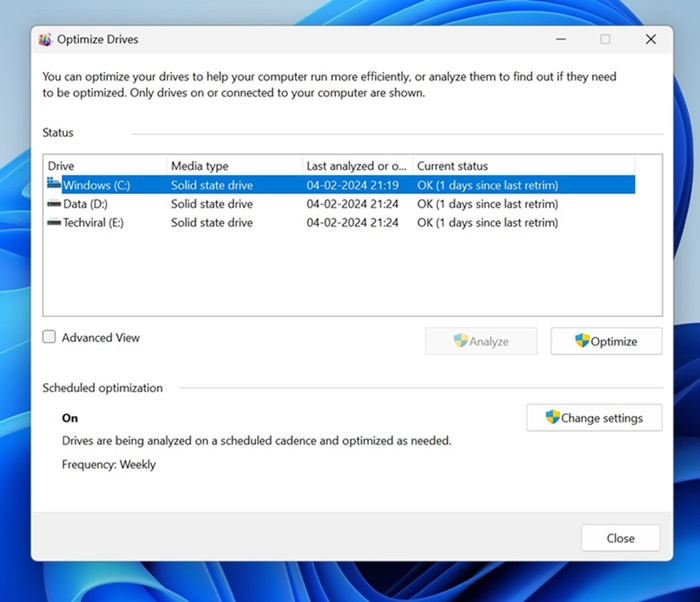
3. Once selected, click on the Analyse button.
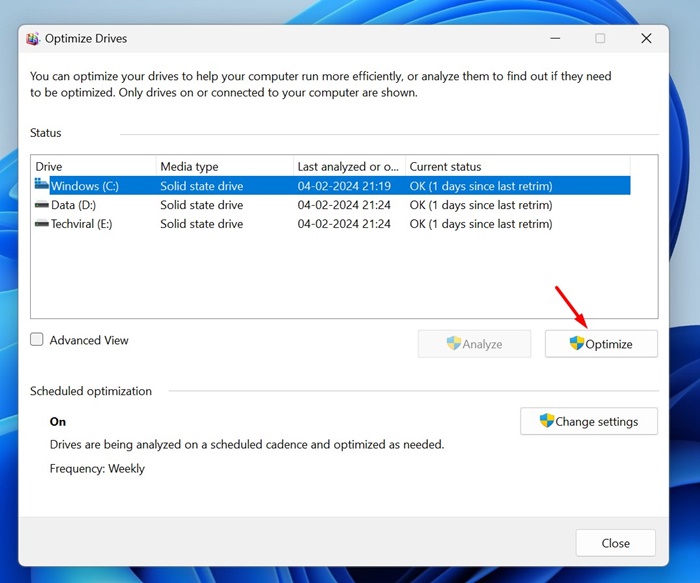
4. Now, the Optimise Drives tool will show you the fragmentation percentage. Click on the Optimize button to defrag the drive.
How to Schedule Drive Optimization?
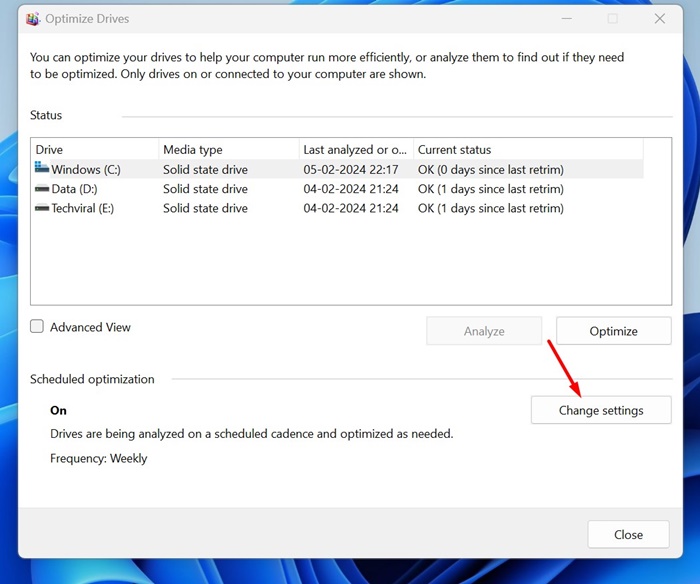
You can also set a schedule to optimize the drive. For that, follow the steps shared below.
1. Click on the Change Settings button on the Optimize Drives tool.
2. Now check the Run on a schedule (recommended).
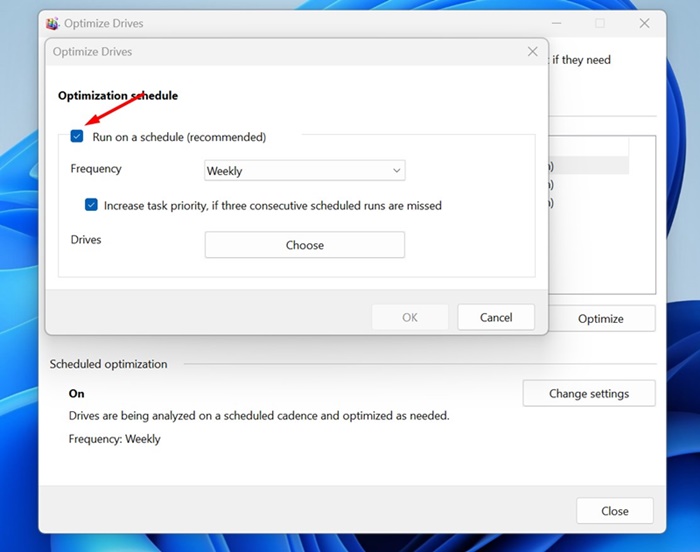
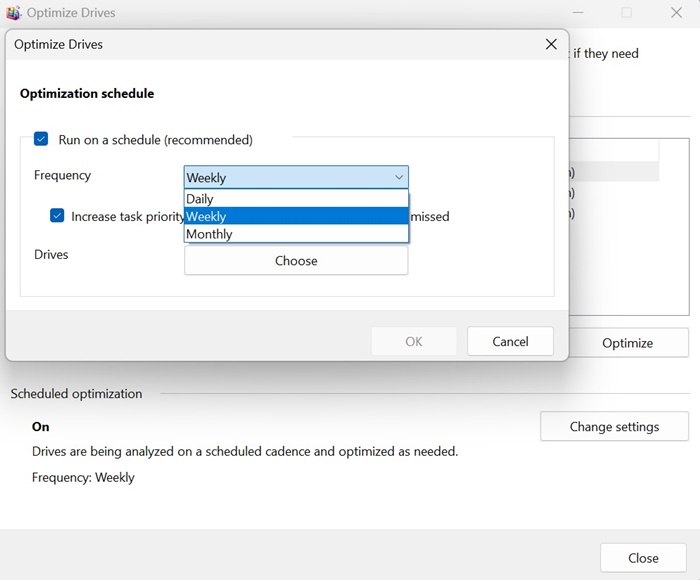
3. On the frequency drop-down, set the schedule to run the Optimize Drives.
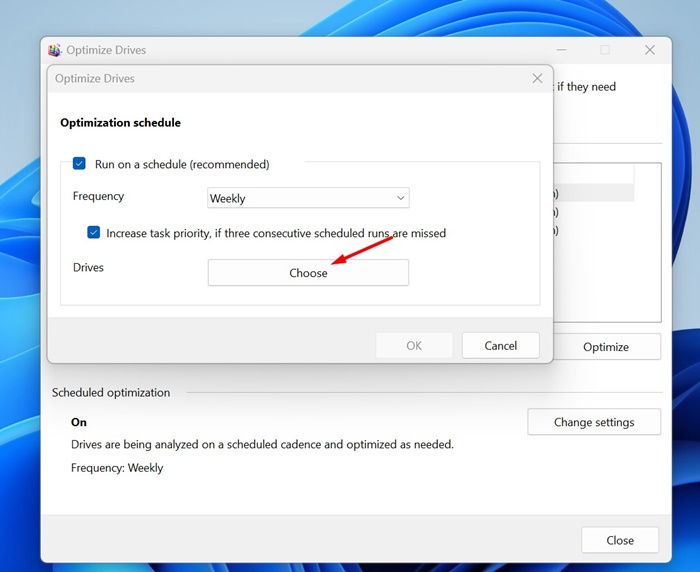
4. Next, click on the Choose button beside Drives.
5. Select the drives that you’d like to optimize. It’s recommended to check the Automatically optimize new drives as well.
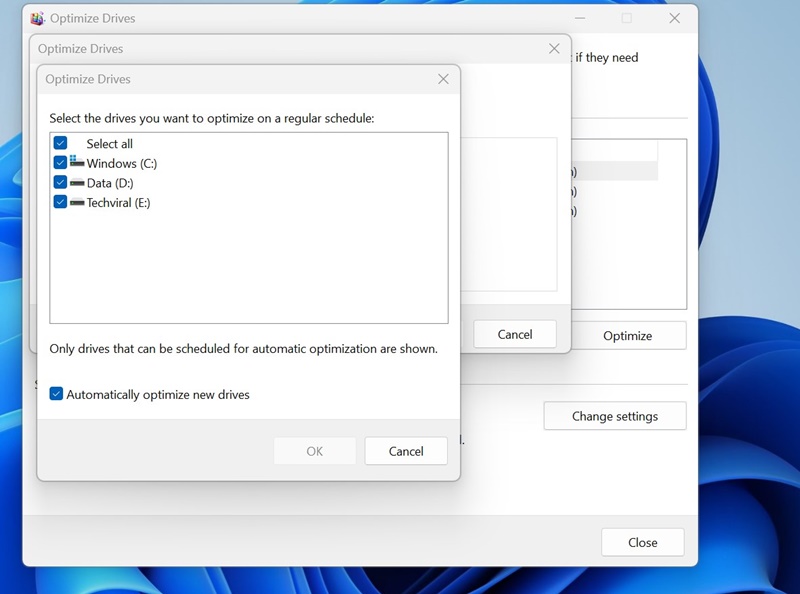
6. Once done, click OK and then OK again to save the schedule.
How to Defrag a Drive Using Command Prompt?
If you’re comfortable handling the command line utility, you can use the Command Prompt to defragment a drive on Windows 11. Here’s how to defragment a drive using Command Prompt on Windows 11.
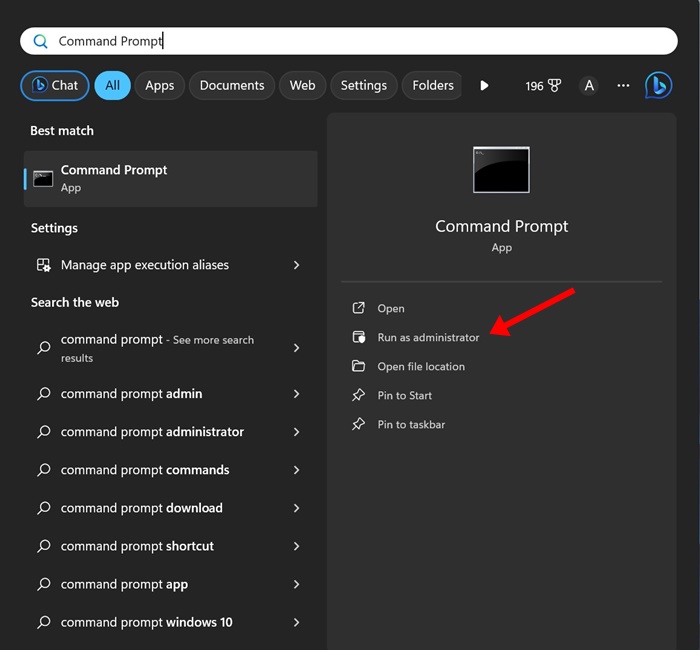
1. Type in Command Prompt on the Windows 11 Search. Next, right-click on the Command Prompt and select Run as administrator.
2. When the Command Prompt opens, execute the given command:
Defrag [Drive letter]
Important: Make sure to replace [Drive Letter] with the letter assigned to the drive you want to defrag.
![Defrag [Drive letter]](https://cyberfreaks.in/wp-content/uploads/2024/02/1707213316_178_How-to-Defrag-Windows-11-PC-2024-Guide.jpg)
3. Now, you need to wait until the process is complete. The process may take a while to complete.
4. If you would like to optimize an SSD, execute this command:
Defrag [Drive letter] /L
Important: Make sure to replace [Drive Letter] with the letter assigned to the drive you want to defrag.
![Defrag [Drive letter] /L](https://cyberfreaks.in/wp-content/uploads/2024/02/1707213317_405_How-to-Defrag-Windows-11-PC-2024-Guide.jpg)
That’s it! After executing the commands, close the command prompt and restart your Windows 11 PC. This will defrag your Windows 11.
As you see, defragging a hard drive on Windows 11 is super easy. You can defrag a drive when there’s more than 10 percent defragment. Let us know in the comments below if you need more help on this topic.


