

If in case you have been utilizing Home windows working system for some time, you would possibly know that the working system means that you can create system restore factors. For those who don’t know, with restore factors, you possibly can shortly restore Home windows to the earlier model.
The function is useful, and you may create limitless units of restore factors in your system. For those who use Home windows 11 beta or dev builds, you would possibly need to create restore factors repeatedly.
Though Microsoft means that you can create System restore factors in Home windows 11 in simple steps, wouldn’t it’s simpler if we had an choice to create Restore Level within the context menu? Sure, if you wish to make it simpler to create a system restore level in Home windows 11, you possibly can select so as to add a ‘Create System Restore’ choice within the context menu.
Therefore, if you’re on the lookout for methods so as to add the ‘Create System Restore Level’ choice in Home windows 11’s context menu, you’re studying the precise information. On this article, we are going to share a step-by-step information on including a create system restore level choice within the right-click menu of Home windows 11.
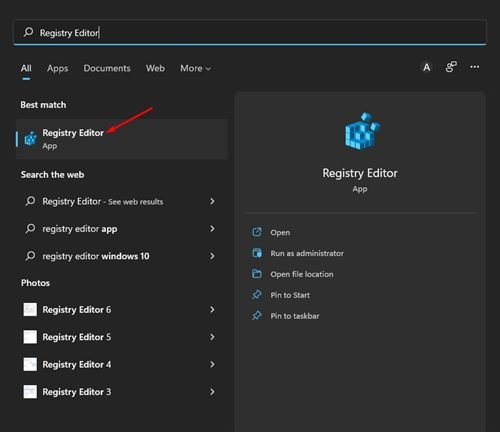
1. Initially, click on on the Home windows 11 search and kind in Registry. Subsequent, click on on the Registry Editor app.
2. On the Registry Editor, navigate to the next path:
HKEY_CLASSES_ROOTDesktopBackgroundShell
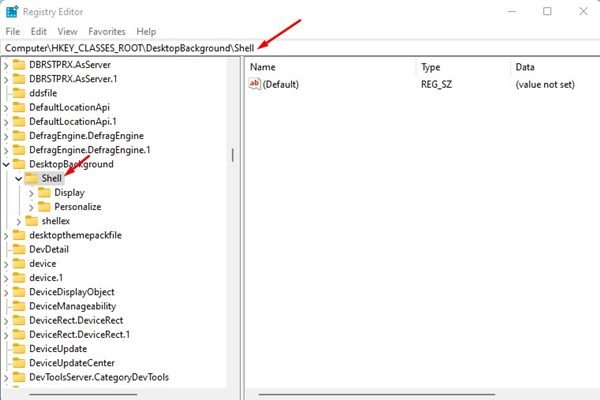
You too can copy and paste the trail on the Deal with bar, as proven beneath.
3. Now proper click on on the Shell folder and choose New > Key.
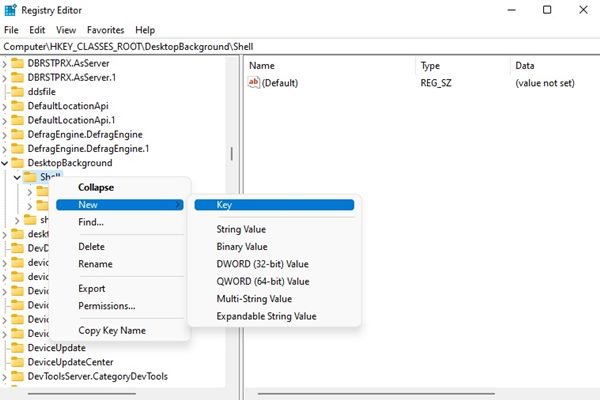
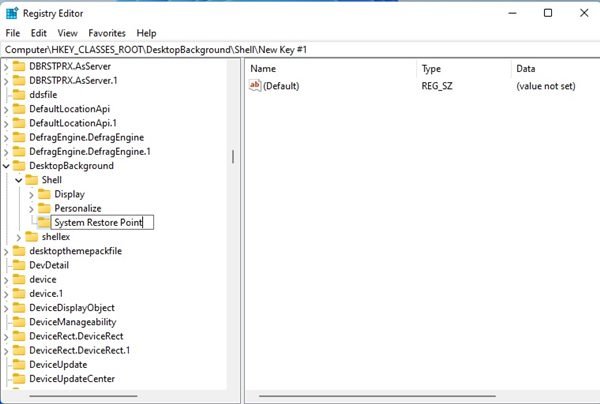
4. Title the brand new key System Restore Level.
5. Now, right-click on the System Restore Level key and choose New > String Worth.
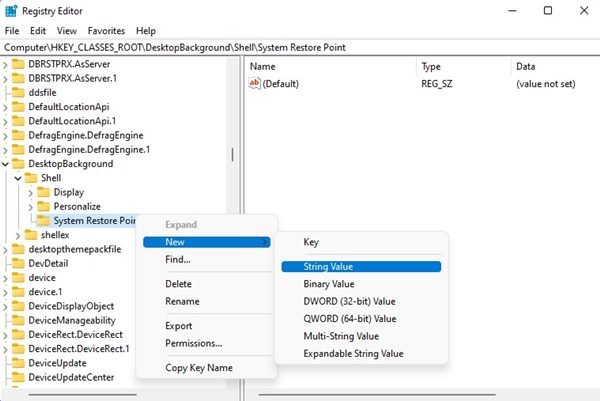
6. Title the brand new String Worth MUIVerb.
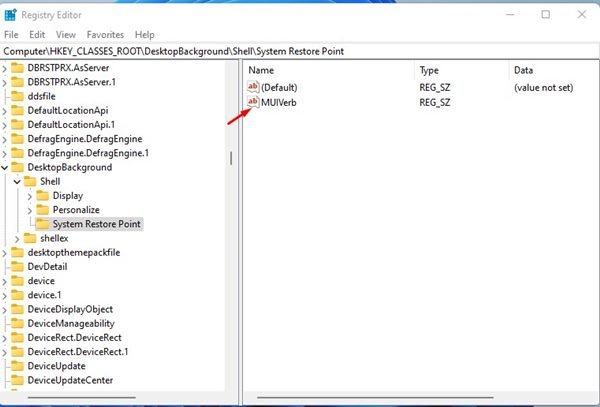
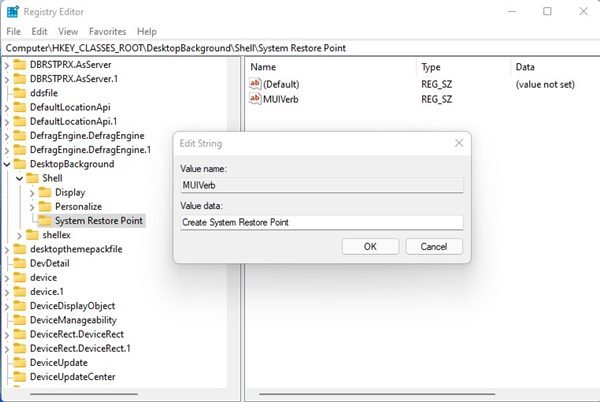
7. On the precise pane, right-click on the MUIVerb String Worth and choose Modify. Subsequent, on the Worth information discipline, enter Create System Restore Level and click on on the Okay button.
8. Subsequent, right-click on the System Restore Level key once more and choose New > String Worth.

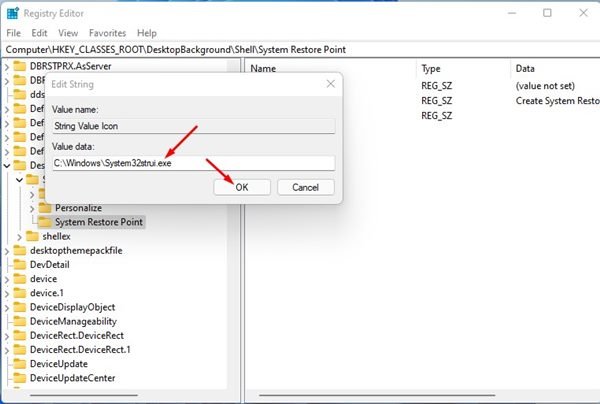
9. Title the brand new String Worth Icon. Now, right-click on the Icon and choose the Modify choice.
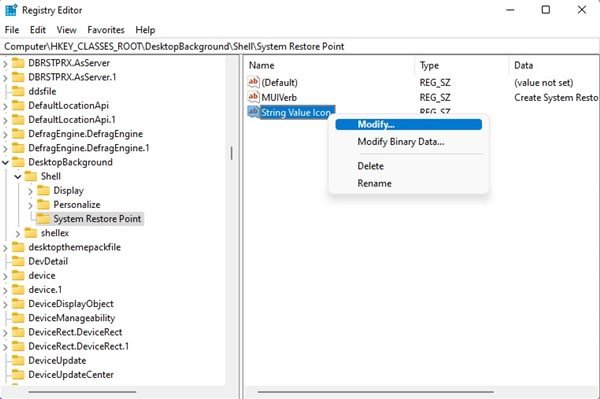
10. On the Worth information discipline, enter the next textual content and click on on the Okay button.
C:WindowsSystem32strui.exe
11. Now proper click on on the System Restore Level key as soon as once more and choose New > Key.
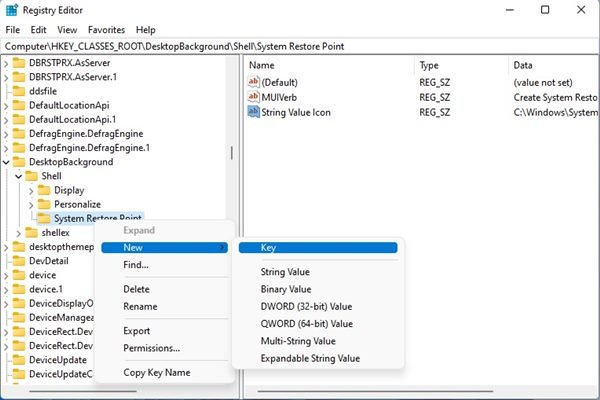
12. Title the brand new key Command. As soon as completed, right-click on the Default string worth on the precise pane and choose Modify.
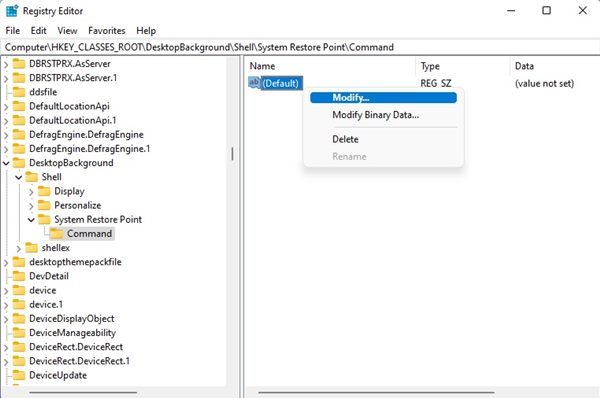
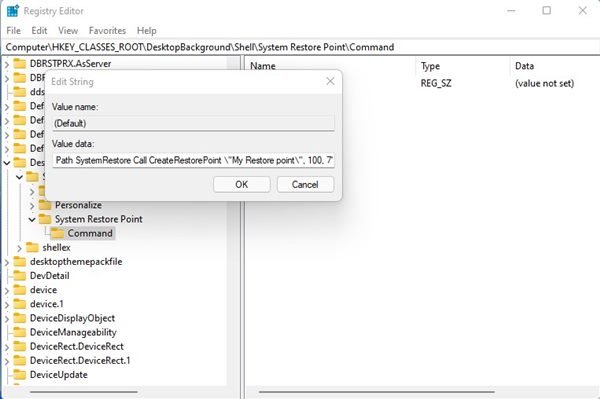
13. Subsequent, on the Worth Knowledge discipline, enter the textual content beneath and click on on the Okay button.
powershell.exe -c begin -verb runas cmd '/okay wmic.exe /Namespace:ootdefault Path SystemRestore Name CreateRestorePoint "My Restore level", 100, 7'
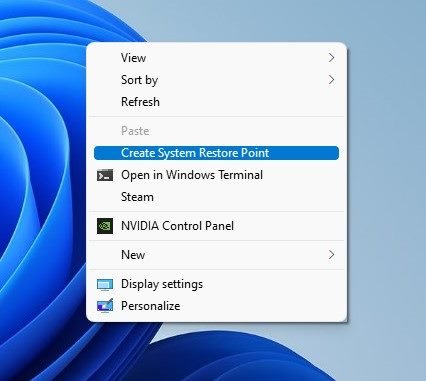
That’s it! You’re completed. Now, right-click wherever on a clean area in your desktop. You can find a brand new Create System Restore Level choice.
This can be a fairly prolonged course of, however it does work. Be sure that to observe the steps rigorously, or else the Create System Restore Level choice within the context menu gained’t work. I hope this text helped you! Please share it with your folks additionally. If in case you have any doubts associated to this, tell us within the remark field beneath.


