

Home windows 11 is a really new desktop working system, and it’s nonetheless beneath testing. And if you’re utilizing Home windows 11, you may already be coping with many issues. You’re going to get extra BSOD errors or driver incompatibility points when you use the Dev or Beta builds of Home windows 11.
Though you’ll be able to repair most Home windows 11 issues, the drive errors can stress you out. Just lately, many Home windows 11 customers have reported getting an uncommon ‘Scan drive for errors’ notification by the Safety and Upkeep part.
The ‘Scan drive for errors’ notification doesn’t pinpoint any particular drive you must examine, nor does it inform something about the issue. Due to this fact, you’ll want to strive completely different troubleshooting strategies to seek out & repair the problematic drive.
Additionally Learn: How to Find Available Memory Slots on Windows 11
3 Finest Methods to Repair the ‘Scan Drive for Errors’ Notification on Home windows 11
So, when you continuously get the ‘Scan drive for errors’ notification in your Home windows 11 pc, you might have landed on the appropriate web page. Beneath, we’ve got shared a couple of greatest methods to repair the Scan drive for error in Home windows 11. Let’s get began.
1) Run the CHKDSK Scan through CMD
To repair all sorts of laborious drive-related issues, you’ll want to run the CHKDSK scan. There are a number of methods to run the chkdsk command; the simplest is utilizing the command immediate. Right here’s run the Chkdsk command through Command Immediate.
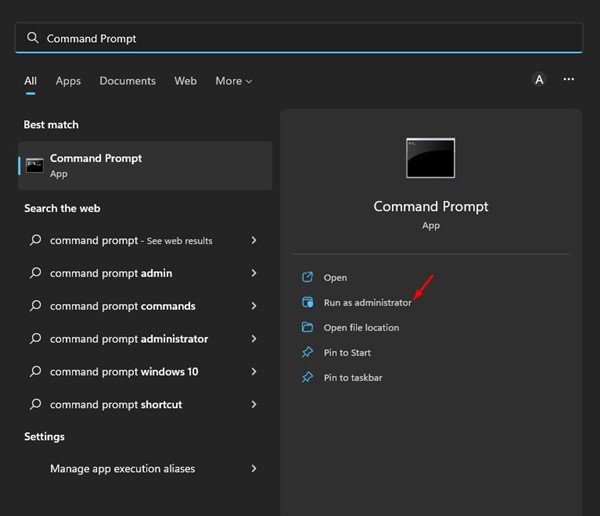
1. Click on on the Home windows 11 search and sort in Command Immediate. Subsequent, right-click on the Command Immediate and choose Run as administrator.
2. On the Command immediate window, execute the command:
chkdsk /x:
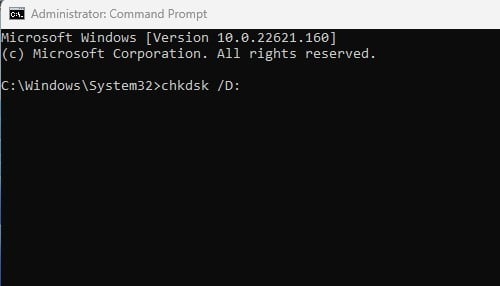
Essential: Exchange x with the identify of the drive you wish to scan.
3. Now, anticipate a couple of seconds till the scan completes. As soon as accomplished, you’ll want to scan the laborious drive for unhealthy sectors. For that, execute the command:
chkdsk /r x:
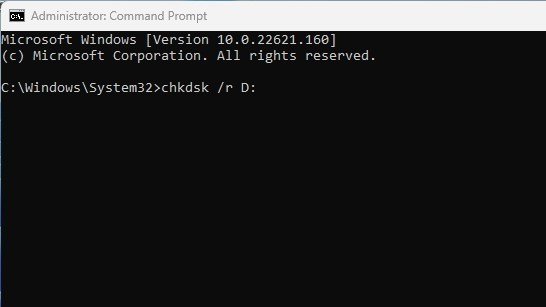
Essential: Exchange x with the identify of the drive you wish to scan.
That’s it. It will pressure examine disk utility to seek out and repair any drive-related issues in your Home windows 11 pc.
2) Run the Verify Disk utility through File Explorer
Should you discovered the command immediate technique sophisticated, you’ll be able to run the CHKDSK utility proper from the File Explorer of Home windows 11. For that, comply with among the easy steps we’ve got shared beneath.
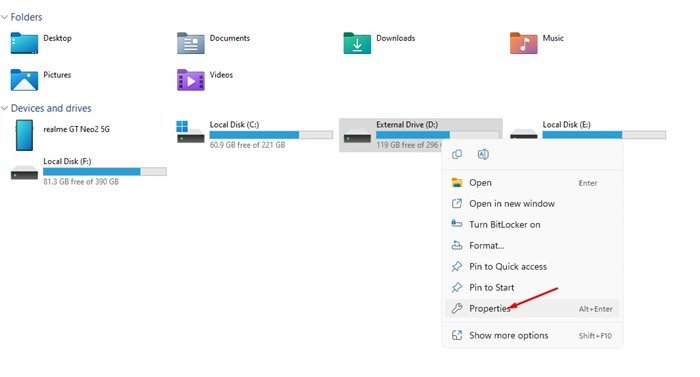
1. First, open File Explorer in your Home windows 11 PC.
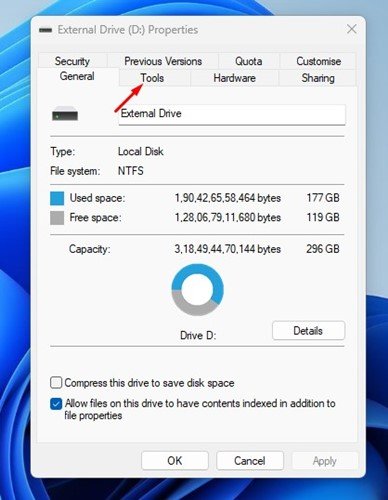
2. Now, right-click on the drive you wish to scan and choose Properties.
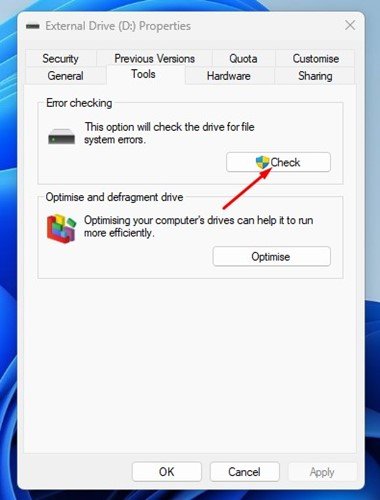
3. On the Drive Properties, swap to the Instruments tab as proven beneath.
4. Beneath Error-checking, click on on the Verify button.
That’s it. It will run the examine disk utility in your Home windows 11 pc. You should anticipate a couple of seconds till the scan completes. As soon as accomplished, restart your pc.
3) Run Antivirus/Malware Scan
Generally, malware or viruses additionally create issues with laborious disk drive workability. Therefore, if the chkdsk command fails to repair your drawback, you have to run a full antivirus scan.

Should you don’t have an antivirus program, you should utilize the Home windows Safety app to run a full virus scan. Or else, you’ll be able to obtain & set up third-party antivirus software program to seek out and take away viruses, malware, PUPs, and keyloggers out of your PC.
4) Run a SMART Take a look at
Effectively, with the S.M.A.R.T check, it is possible for you to to know whether or not your laborious drive is dying. S.M.A.R.T stands for Self Monitoring, Evaluation, and Reporting Expertise, and it tells you concerning the situation of your laborious drive. Right here’s run the SMART check in Home windows 11.
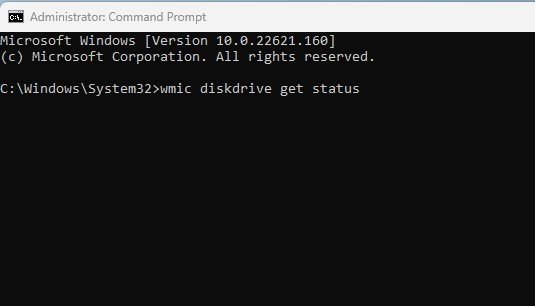
1. Click on on the Home windows 11 search and sort in Command Immediate. Proper-click on the Command Immediate and choose Run as administrator.
2. On the Command Immediate, kind within the command and hit the Enter button.
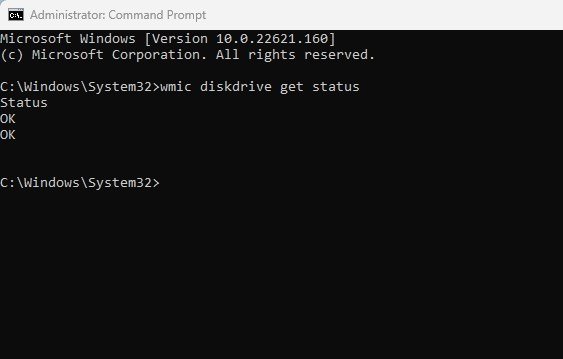
wmic diskdrive get standing
3. The SMART check will return with a Standing outcome. If the standing reveals Okay, your laborious drive has no drawback. Nevertheless, if it returns with BAD or Unknown standing, it signifies a failing laborious drive.
That’s it. That is how one can run the SMART check in Home windows 11. Should you bought the BAD or Unknown within the SMART check, you’ll want to get your laborious drive checked by knowledgeable.
5) Carry out a system restore
If Home windows 11 nonetheless throws a ‘Scan Drive for Errors’ notification after following all of the above strategies, you’ll want to carry out a system restore.
System Restore will in all probability change the corrupted system recordsdata & incorrect settings, which could repair the issue for you. Nevertheless, you’ll be able to carry out a system restore provided that you’ve arrange computerized system restore factors.
In case your Home windows 11 PC already has a system restore level, you have to comply with these steps.
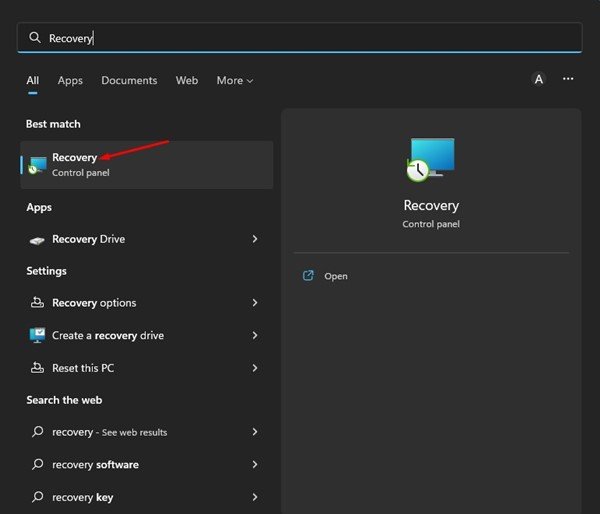
1. Click on on the Home windows 11 search and sort in Restoration.
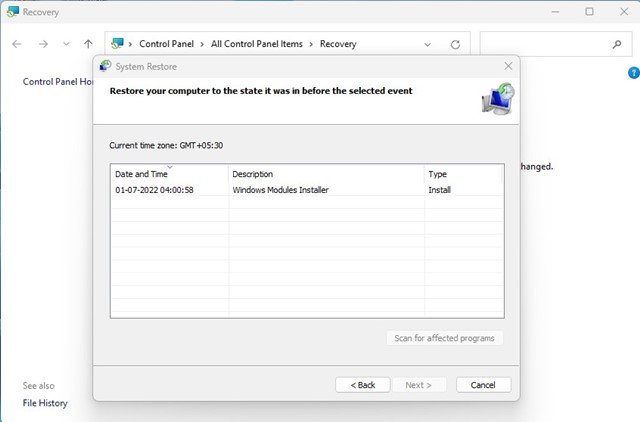
2. On the Restoration app, click on on the Open System Restore hyperlink.

3. On the System Restore Window, choose the Restore level you wish to use.
4. On the following display, click on on the End button.
That’s it. It will roll again your Home windows 11 to the again date.
Additionally Learn: How to Schedule Automatic System Restore Points in Windows 11
So, these are among the greatest methods to repair the ‘Scan Drive for Errors’ notification on Home windows 11. If you already know some other methods to repair the issue, tell us within the remark field beneath.


