

Being the preferred electronic mail service, Gmail affords you a lot helpful options. The free electronic mail service additionally supplies you with many electronic mail administration options, corresponding to the power to create a label and group emails into it.
When you use Gmail for enterprise functions, or if it’s the one technique of communication for you, your Gmail inbox would possibly already be cluttered with a whole bunch of emails. You would possibly discover it troublesome to seek out emails that you simply need to learn or reply to.
Gmail affords customers a function known as ‘Labels’ to take care of such points. The Labels in Gmail are just like folders in Home windows. You possibly can create totally different labels and put related emails on them.
Steps to Create Labels in Gmail to Set up your Emails
On this article, we are going to share a step-by-step information on creating labels to arrange emails in Gmail. Therefore, if you’re concerned with creating labels in Gmail to handle your emails and declutter your inbox, you would possibly discover this text very helpful. Let’s try.
1) Methods to Create Labels in Gmail
If you wish to group emails into folders in Gmail, that you must create a label first. Listed below are among the easy steps to create a label in Gmail.
1. Initially, open your favourite internet browser and log in to your Gmail account.
2. On the left pane, click on on the Extra button under.
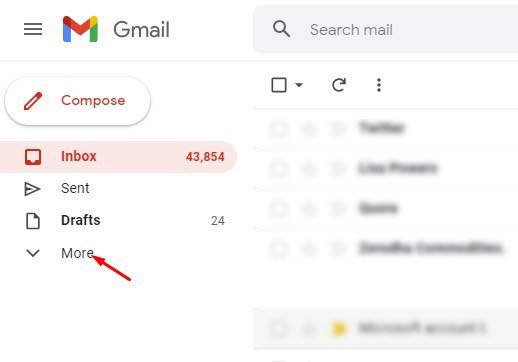
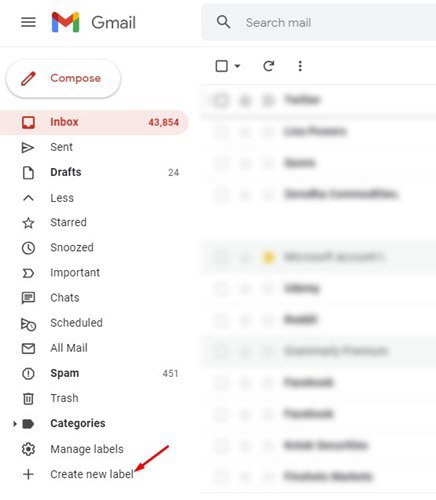
3. On the expanded menu, scroll down and click on on the ‘Create new label’ possibility.
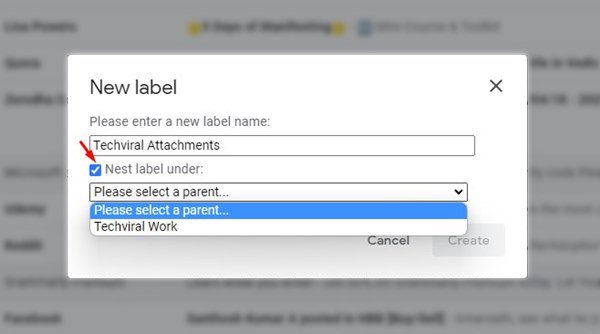
4. On the New label pop-up, enter the label title and click on on the Create button.
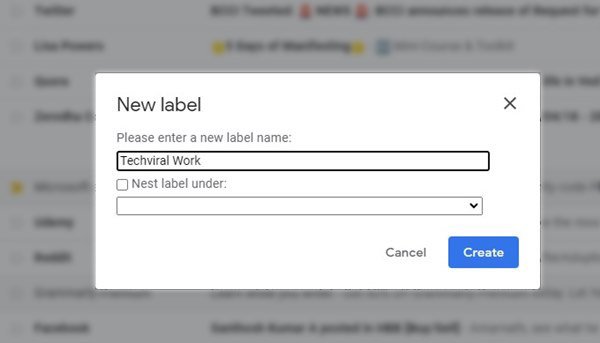
5. If you wish to put this label inside one other label, examine the ‘Nest label underneath’ possibility and choose an current label.
That’s it! You might be completed. That is how one can create a label in Gmail for a desktop.
2) Methods to Transfer emails to the newly created label
After creating a brand new label, you would possibly need to add emails to it. You might want to open Gmail.com in your internet browser and log in to your account.
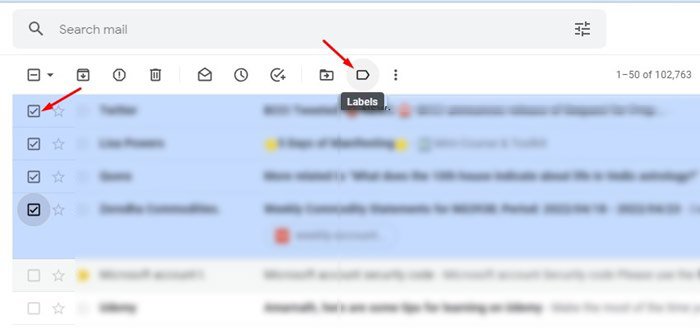
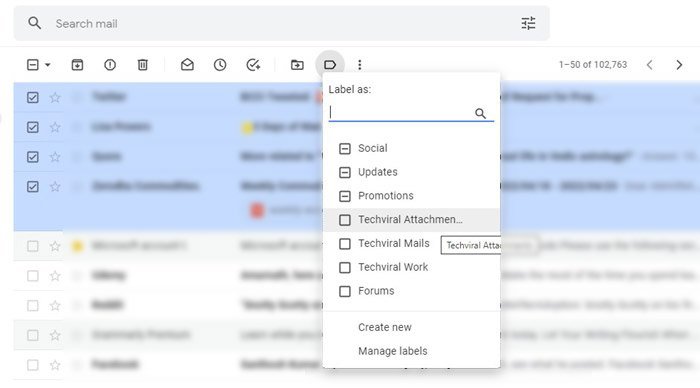
Subsequent, choose the emails you need to transfer, and click on on the label icon under. Now choose the label title and click on on the Apply button.
That’s it! It will transfer emails to the brand new label in Gmail. You might be completed.
3) Methods to Delete a Label in Gmail
If, for any cause, you need to delete a label in Gmail, then that you must observe these steps. Right here’s how you can delete a label in Gmail.
1. Initially, open your favourite internet browser and log in to your Gmail account.
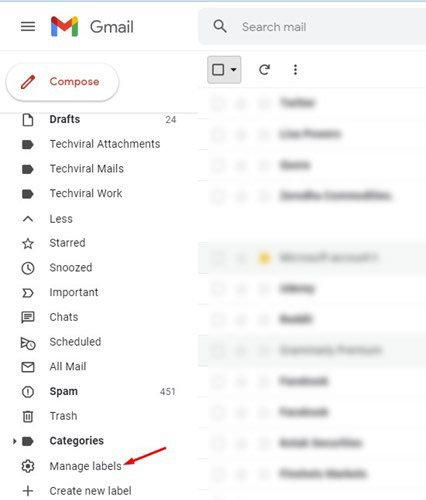
2. On the left pane, click on on the Extra button under.
3. On the expanded menu, scroll down and click on on the Handle labels possibility.
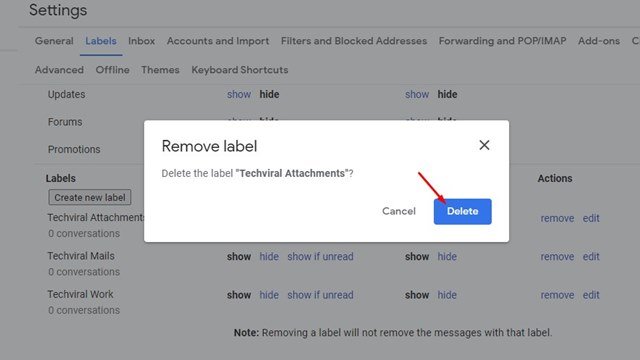
4. It will open the labels settings. Right here that you must click on on the Take away hyperlink behind the label title.
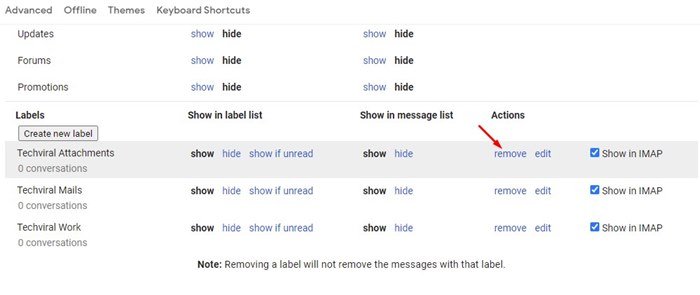
5. On the affirmation immediate, click on on the Delete button.
That’s it! You might be completed. That is how one can delete a label in Gmail in straightforward steps.
So, that’s all about how you can create labels in Gmail to arrange emails. You possibly can create as many labels as you need to arrange your emails in Gmail with none restrictions. For extra Gmail ideas and how-tos, keep related with Cyberfreaks!


")