

Home windows 11 customers could know that the working system routinely locks the account if somebody tries to log in with the incorrect password. That is carried out to forestall unauthorized entry to the gadget and scale back potential brute power assaults.
When Account Lockout insurance policies have been set on Home windows 11, the working system prevents others from coming into the password after a number of incorrect login makes an attempt and blocks the person account for 10 minutes.
After 10 minutes of lockout, the counter was routinely reset, giving customers one other 10 probabilities to enter the password or PIN. You’ll be able to modify that 10 minutes of length in simple steps.
Additionally Learn: How to Password Protect Folders in Windows 11
Finest Strategies to Change Account Lockout Length in Home windows 11
Whereas it’s not really useful to alter the Account Lockout length in Home windows 11, you should still wish to improve or lower the length for particular causes. Therefore, beneath, we now have shared a step-by-step information on altering account lockout length in Home windows 11. Let’s take a look at.
1) Change Account Lockout Length by way of Native Group Coverage
This methodology will present you how one can change account lockout length by way of Native Group Coverage Editor. Observe among the easy steps we now have shared beneath.
1. First, click on on the Home windows 11 search and sort in Native Group Coverage. Subsequent, open the Group Coverage Editor from the record of matching outcomes.
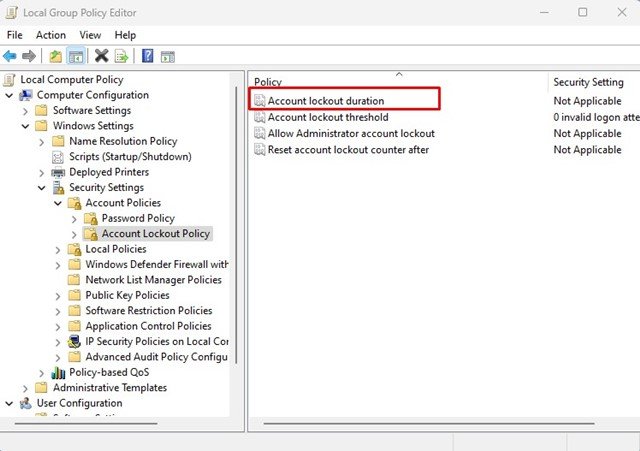
2. On the Native Group Coverage Editor, navigate to the next path:
Pc Configuration > Home windows Settings > Safety Settings > Account Insurance policies > Account Lockout Coverage

3. You can see a couple of insurance policies within the Account Lockout Coverage folder. It is advisable double-click the Account lockout length coverage on the precise.
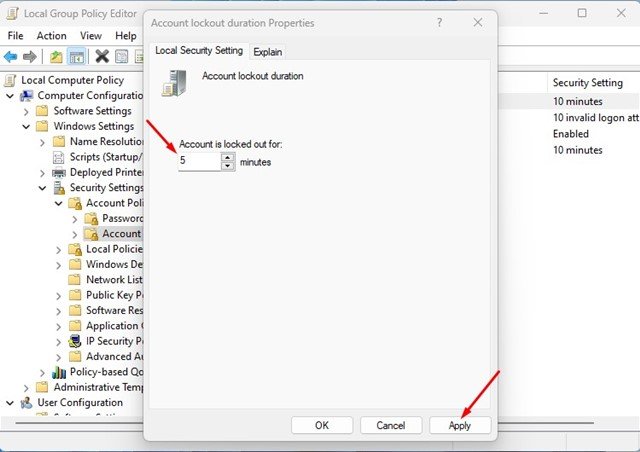
4. On the Account lockout length properties, change to the Native Safety Setting tab.
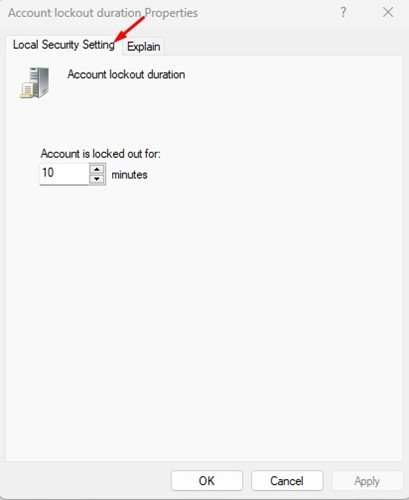
5. Now, set the time (in minutes) for the account lockout. As soon as carried out, click on on the Apply button after which on Okay.
That’s it! That is how one can change the account lockout length in your Home windows 11 pc.
2) Change the Account Lockout Length by way of Command Immediate
You’ll be able to even use the Command Immediate utility to alter the account lockout length. For that, comply with among the easy steps we now have shared beneath.
1. Click on on the Home windows 11 search and sort in Command Immediate. Subsequent, open the Command Immediate utility from the record of matching outcomes.
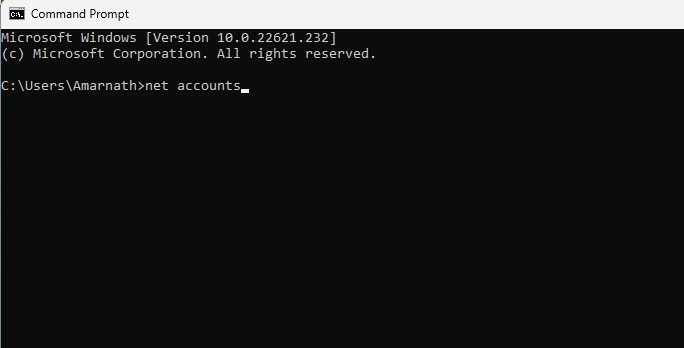
2. On the Command Immediate, sort in internet accounts and hit the Enter button.
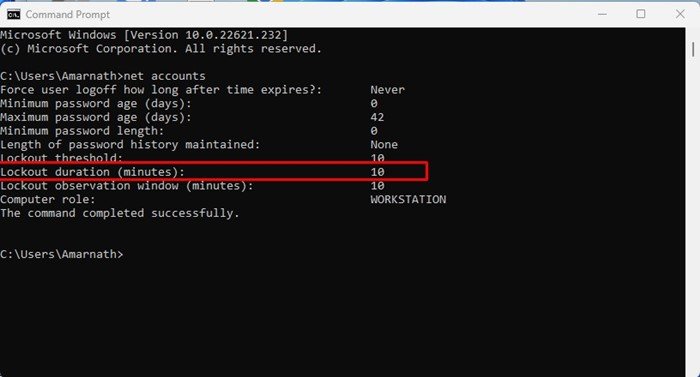
3. This can reveal the Account Lockout coverage. It is advisable verify the Lockout length (minutes): to verify the present account lockout time.
4. Now, if you wish to improve or lower the Account Lockout length, enter the next command:
internet accounts /lockoutduration:<quantity>
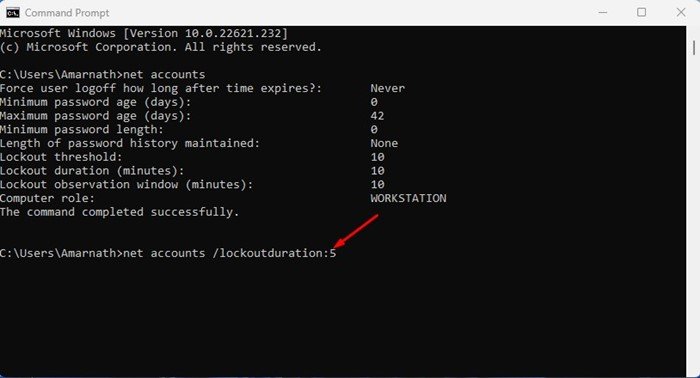
Necessary: Be certain to interchange<quantity> with the time you wish to set. You’ll be able to set the time between 0 and 99999 minutes. Setting it to 0 will disable the account lockout.
That’s it! You’ll be able to change the account lockout length in Home windows 11 by way of the Command Immediate.
Additionally Learn: How to Format a Hard Drive or SSD in Windows 11
So, that’s all about altering the account lockout length in Home windows 11. You’ll be able to comply with these two strategies to switch the time restrict for account lock. Should you want extra assist with the Account lockout length coverage, tell us within the feedback beneath.


")