")
After the massive success of ChatGPT, every tech company plans to launch its own AI chatbot. Google has already introduced Google Bard, which uses Google’s Pre-training and Auxiliary Language Modeling (PaLM).
The one advantage of Google Bard over ChatGPT is accessing internet content. On the other hand, ChatGPT has limited knowledge of the world and events after 2021.
While the viral AI Chatbot, ChatGPT, can’t access the internet, it just got a new feature called ‘Plugins’ that enhances the capabilities of the AI chatbot.
What are Plugins on ChatGPT?
Plugins on ChatGPT enhance the capabilities of the AI chatbot. They can access the external tools and fetch information not included in the training data of ChatGPT.
With the Plugin support, ChatGPT can come up with more accurate information. It can fetch up-to-date news or data from external tools and provide additional information.
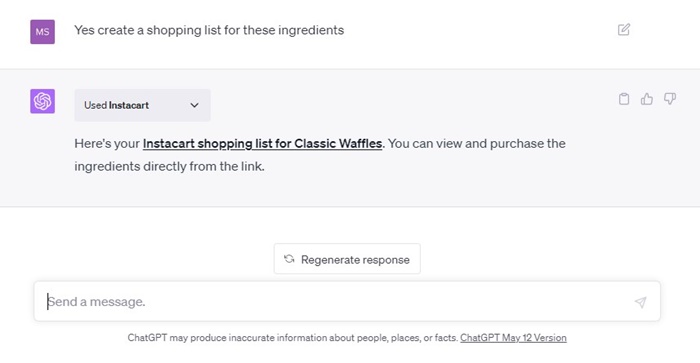
For example, the Instacart plugin lets you order from your favorite local grocery stores right from ChatGPT’s interface. Similarly, there’s a ChatGPT Kayak Plugin to search for flights, rental cars, etc.
How to Enable and Use ChatGPT Plugin?
Before the recent update, the plugins are available only to those users who have joined the waitlist. However, OpenAI recently made plugins available to every ChatGPT Plus user.
So, if you have a ChatGPT Plus account, you can use the plugins without joining any waitlist. However, if you don’t have ChatGPT Plus, you must purchase it by paying a $20 subscription fee.
1. Get the ChatGPT Plus Subscription
The very first step includes getting the ChatGPT Plus subscription. ChatGPT Plus subscription costs around $20 per month and is available to all users worldwide. Here’s what you need to do.
1. Open your favorite web browser and visit chat.openai.com.
2. Next, sign in with your ChatGPT account.
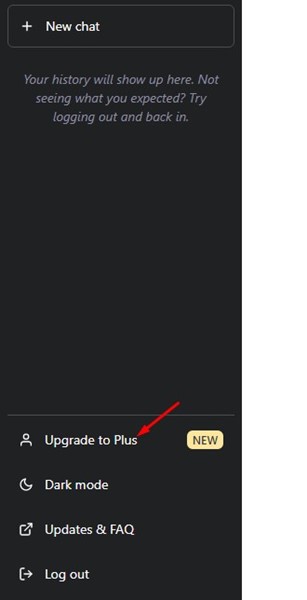
3. Now, on the right side, click on the option that says ‘Upgrade to Plus‘.
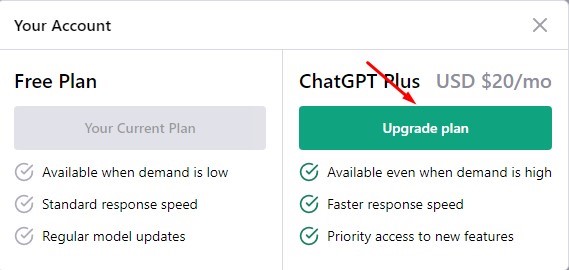
4. On the Your Plan screen, click the ‘Upgrade plan‘ button under ChatGPT Plus.
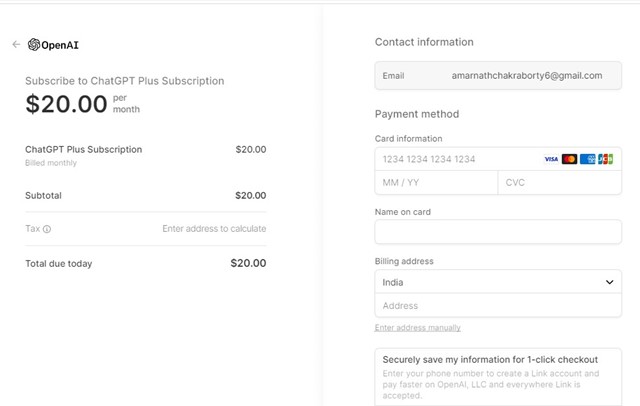
5. Now, on the next screen, enter your billing information and payment details to subscribe to ChatGPT Plus.
That’s it! These are the steps to get ChatGPT Plus in easy steps.
2. Enable Plugins in ChatGPT
Once you’ve purchased the ChatGPT Plus subscription, your account will be ready to enable and use the plugins. Here’s how to enable Plugins in ChatGPT Plus.
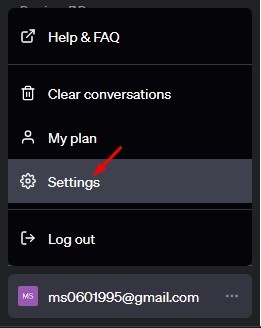
1. Open your ChatGPT account and click on the three dots beside your profile picture.
2. Select ‘Settings‘ from the list of options that appears next.
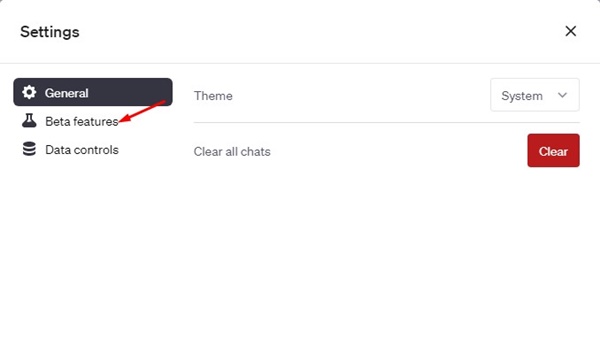
3. On the ChatGPT Plus Settings, switch to the Beta features.
4. On the right side, enable the toggle for ‘Plugins‘.
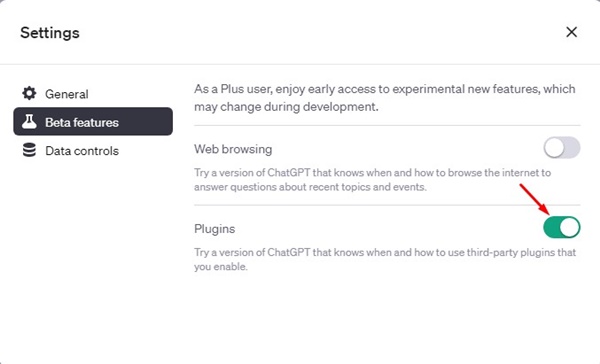
That’s it! That’s how easy enabling the Plugin support in ChatGPT Plus account is.
3. How to Access ChatGPT Plugins with GPT-4
After enabling the plugin support, you can access the ChatGPT Plugins with the GPT-4. For that, follow the simple steps we have shared below.
1. Move to the main screen of ChatGPT Plus.
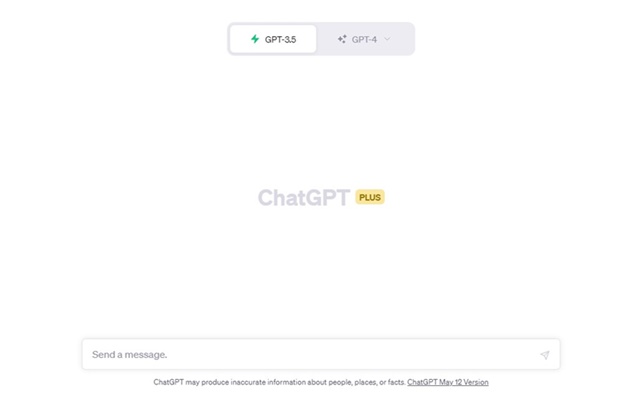
2. On the top, click on the ‘GPT-4‘ model.
3. A new list of options will appear. Click on the Plugins (Beta).

That’s it! This is how you can access plugins in ChatGPT Plus.
4. How to Install and Use ChatGPT Plugins?
After enabling the Plugins, you can visit the Plugin store and install them on your ChatGPT Plus account. For that, follow the steps we have shared below.
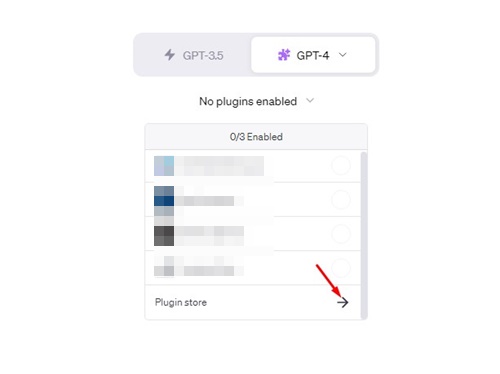
1. Once you access the ChatGPT Plugins, you will find an option ‘No plugins enabled‘.
2. Just underneath it, click the (->) arrow button for the Plugin store.
3. You will now see the About Plugin screen. Click on the ‘Ok‘ button to continue.

4. Now, you will see the entire plugin store of ChatGPT.
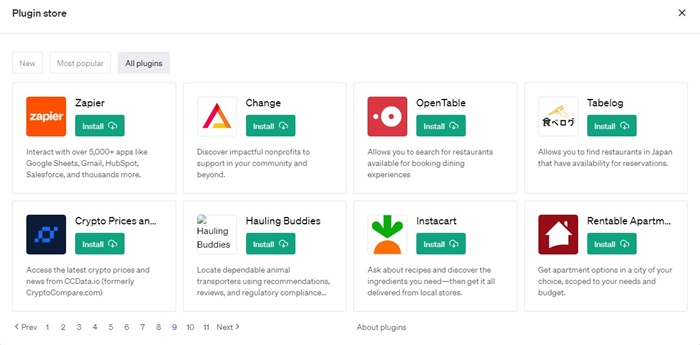
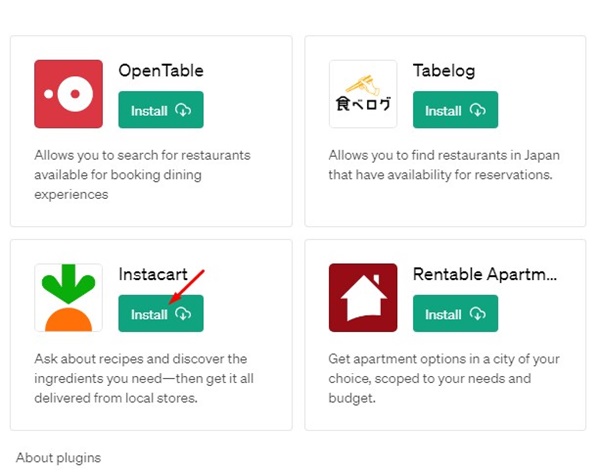
5. Read the plugin’s description to know what it does. Then, if you want to use a particular plugin, click on the ‘Install‘ button underneath the plugin name.
6. The plugin will be added to your account. To use the plugin, move to the main screen of ChatGPT Plus.
7. Under the GPT-4 model option, click on the Plugin drop-down and select the plugin you’ve just added.
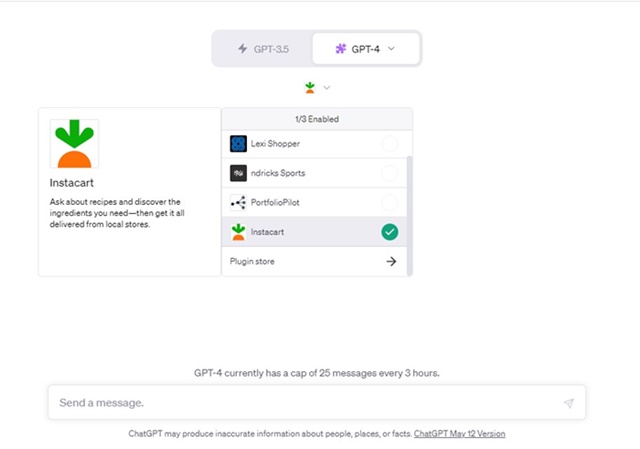
8. Now you can enter prompts that can interact with the Plugin you’ve just added. ChatGPT Plus will use the plugin to fetch up-to-date content and will provide you with a response.
That’s it! That’s how easy it is to install and use Plugins on ChatGPT Plus. You can follow the same steps to add as many plugins as you want on your ChatGPT account.
The Plugin support in ChatGPT is supposed to be a game-changer in the AI race. However, purchasing ChatGPT Plus for using plugins to fetch up-to-date information is still expensive, since we already have free options like Google Search.
Also Read: How to Voice Chat With ChatGPT on Android Device
Also, GPT-4 on ChatGPT Plus currently has a cap of 25 messages every 3 hours. So, it all depends on your need. As a general user, I found the new plugin support pretty useless, since it took time to fetch information and provided less information. What’s your take on this? Let us know in the comments.
")

